Those who are searching for how to create a portfolio website here is your easiest solution to create a portfolio website for free. Nowadays, cr...
To own a portfolio website, either you need to buy a completed website from others, or you need to know the procedures on how to build a portfolio website. In this article, I have tried so high to make a complete guide on how to create a portfolio website so that you can build your own portfolio website rather than buying other websites for showcasing your profile.
So, let's explore the procedures in detail rather than searching for how to create a portfolio website here and there.
Why You Need a Portfolio Website?
An online portfolio brings many opportunities for your career and business. Your online portfolio will not only help get you more business, it also connects you with like-minded people who're looking to expand their businesses in the same direction.
- Building a website about your brand and experience is a polished way to share your expertise with others. Websites can be more creative and innovative than traditional portfolios and are able to share with anyone in the world.
- When someone asks you about your portfolio, you won't need to send it to them by mail or fax. You can simply share the link to your portfolio page.
- An online portfolio page improves your website's search engine rankings.
Requirements
to register your domain name. When you are selecting your domain name, consider the following tips mandatory).
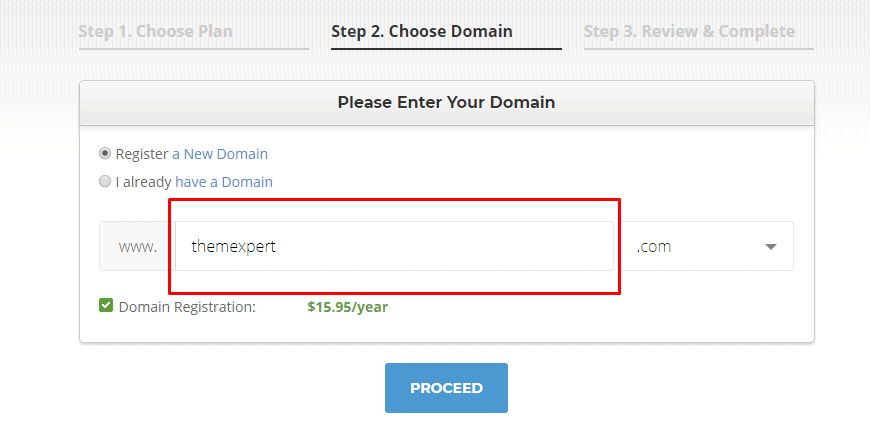
mandatory).
- How fast is the hosting provider? It should load your site within a possible shortest time ms).
- You'll have to sort out issues with support at some point – therefore you should choose a host that has good-quality and responsive customer support.
There are multiple process for Joomla installation; however, to make the installation butter smooth, we have a dedicated blog post about "How to Install Joomla - A Step by Step Guide". Follow this link to install Joomla.
Besides, we provide documentation and video tutorial for you, in case you need any further help.
Step 04: Choose Template
Before uploading a template, you need to know which template gonna best for you. There is a lot of modern designed Joomla templates, but you must decide which one will be the best fit for you.
Your selected Joomla template must be responsible as well as contemporary designed.
- It's great to have technical support included, as these people can fix any issue for you.
- Joomla constantly updates their system. Make sure your template provider also updates their templates frequently to make sure it will work with the latest releases.
- From time to time, you'll need to check some features to learn how they work. Be sure there is a place where you can do so.
- This means your template should look great in every browser as well as on any mobile device.
- Check out which template features can be customized by yourself. For example, look for templates that have many module positions.
Step 05: Upload a Template
file) > Upload & Install.
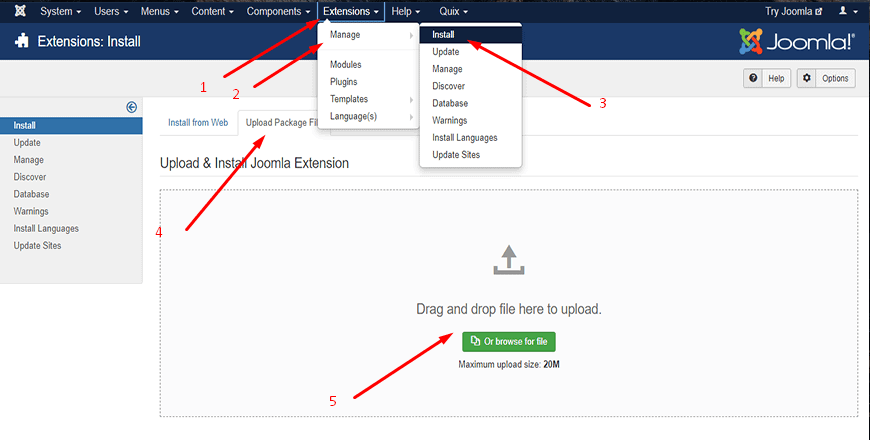
Joomla gives three more options to install extensions. Find from the following link "How to Install Joomla Template".
After that, you still need to activate template and you do that under Extensions > Template > Styles. Here, click the star icon to the right of the template name to make it the default site.
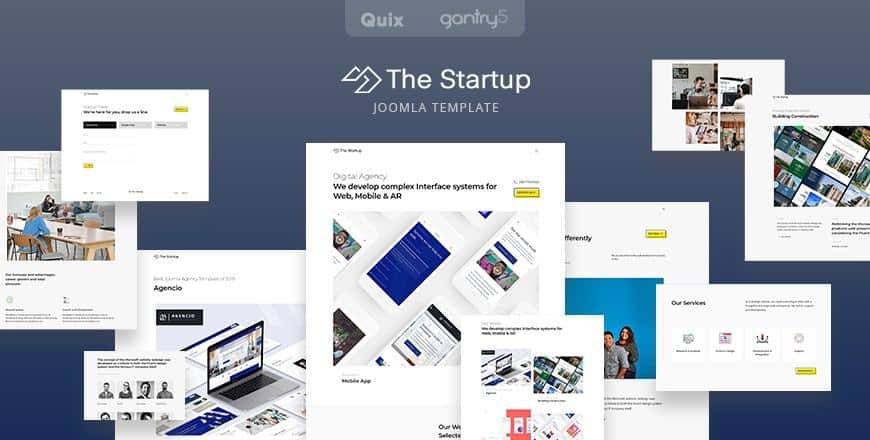
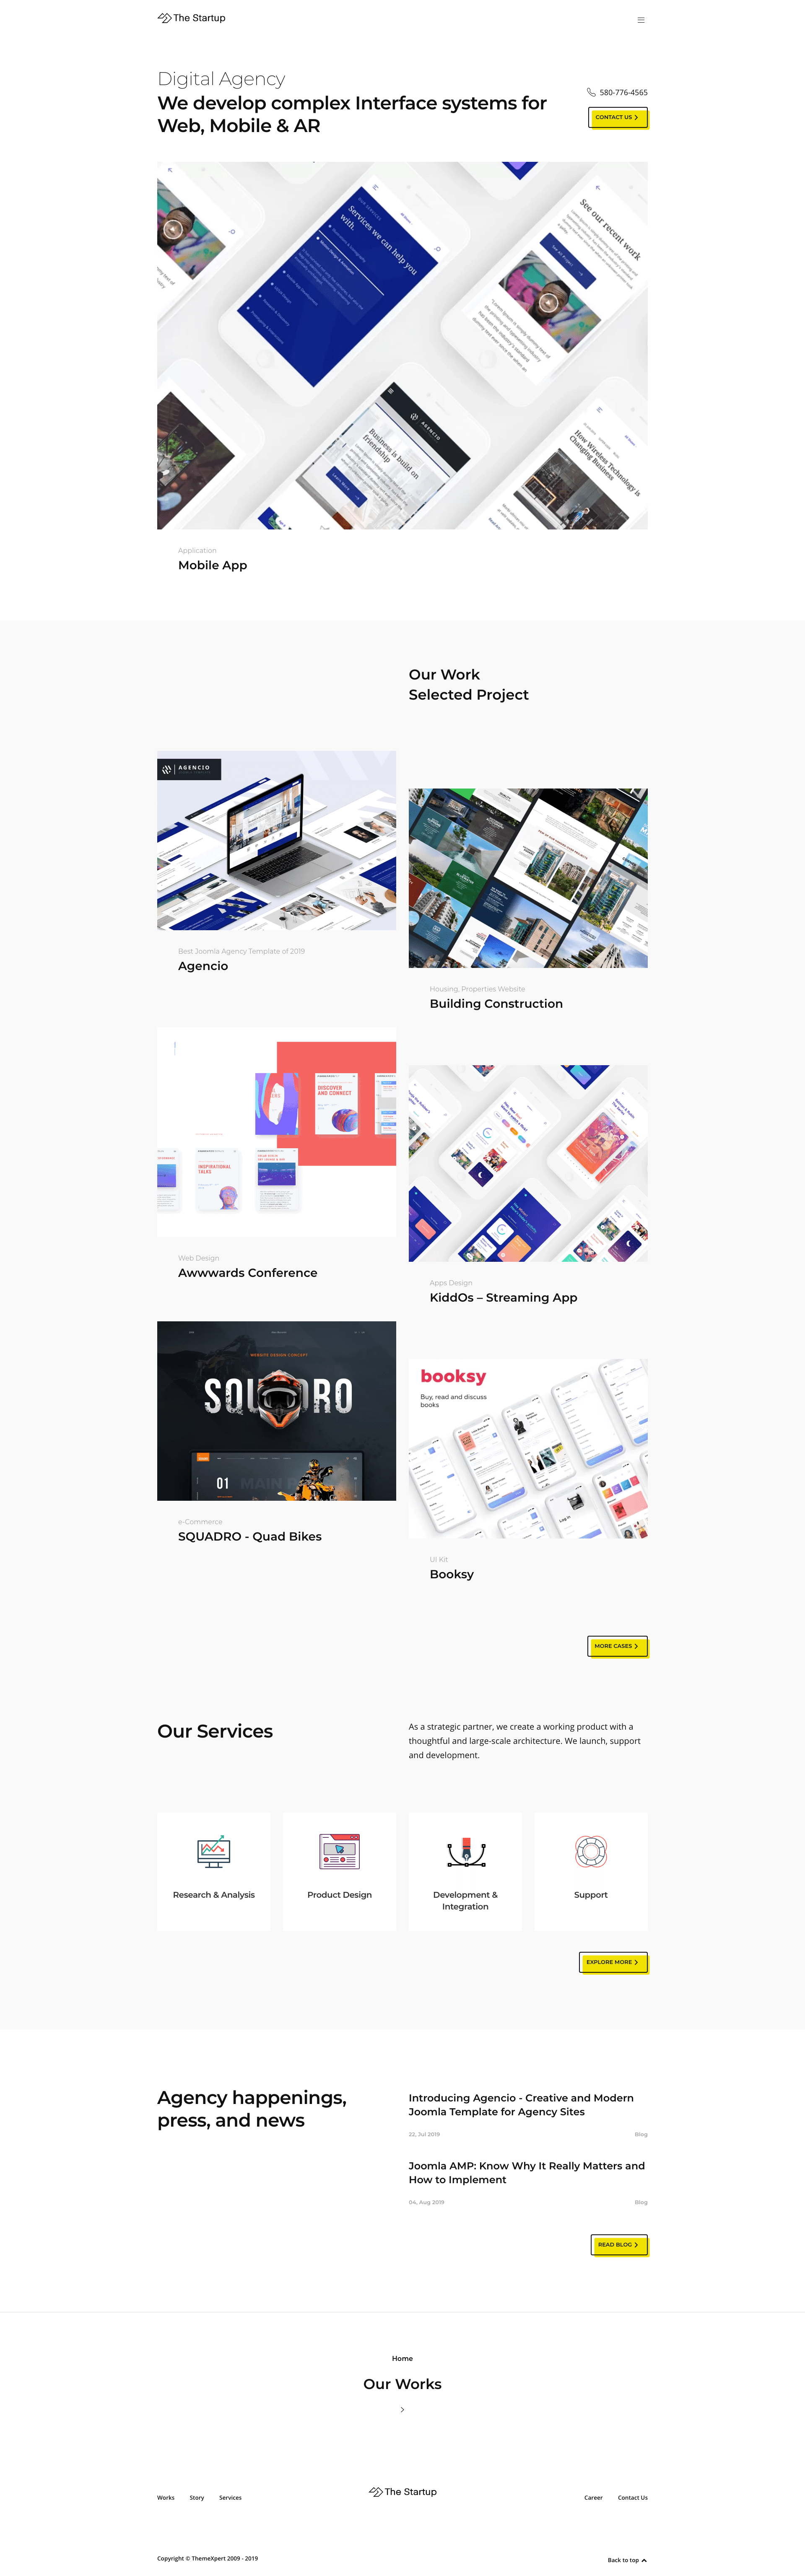
Here we are using Quickstart package to customize the Startup - best business portfolio template for startup company. Quickstart package is elementary and user-friendly, that's why this will be our humble recommendation for you. However, you can customize the template in your own preferred way, as well.
Note: Quickstart package is available with each and every template of our Joomla Template Directory.
To start the Quickstart package first, you have to download the .zip file from our template directory then install it manually. It is the same kind of process as installing Joomla. First, extract the template quickstart .zip file and find out the template folder from the localhost. Your domain look like this, https://localhost/template-name.
After clicking the folder file an installation interface will appear. Fill the necessary information and proceed to the next option by clicking the next button.
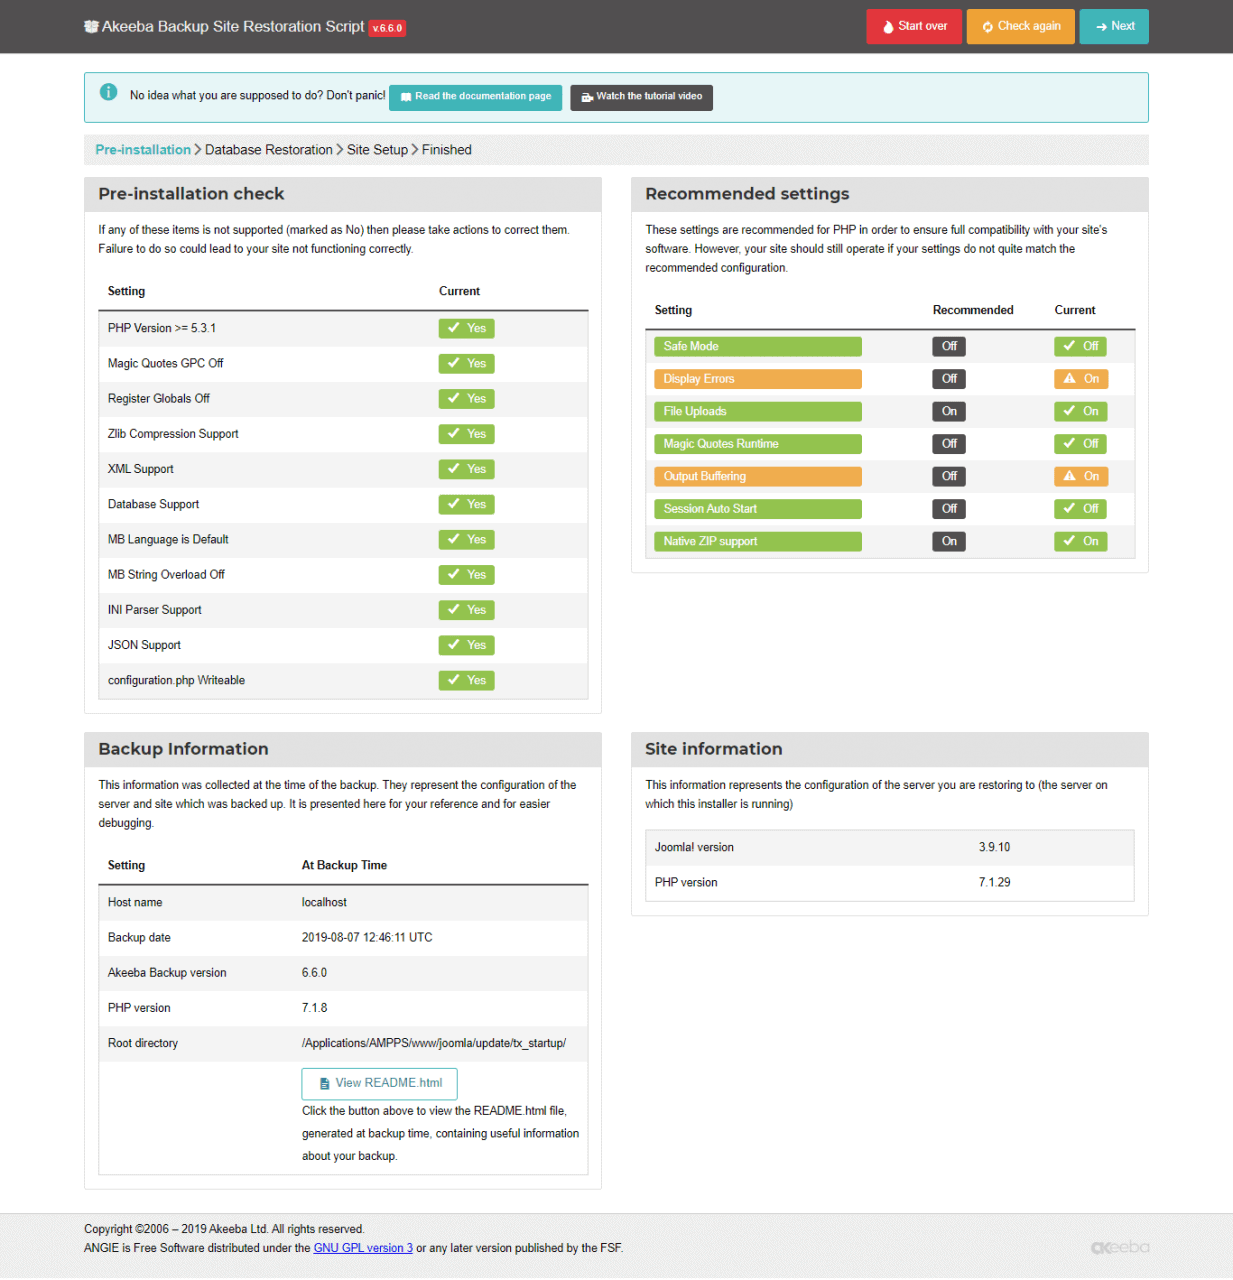
You will get an interface like this, now configure this one and put the connection information for, database type, server host name, user name, password, database name, and table name. It is suggested to keep the password field blank if you face any error.
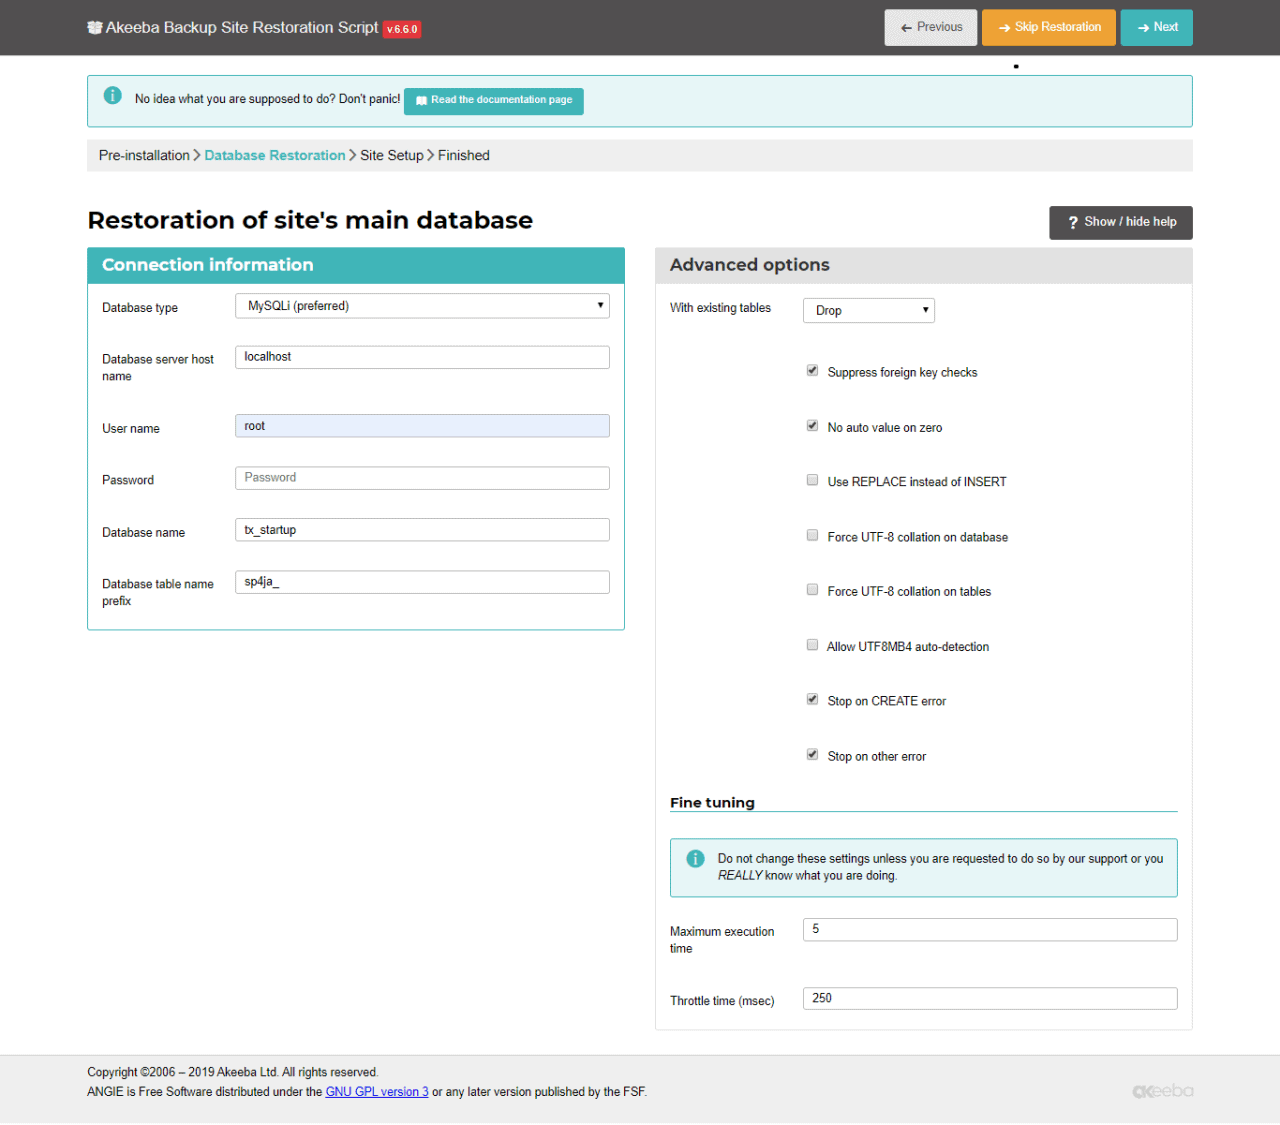
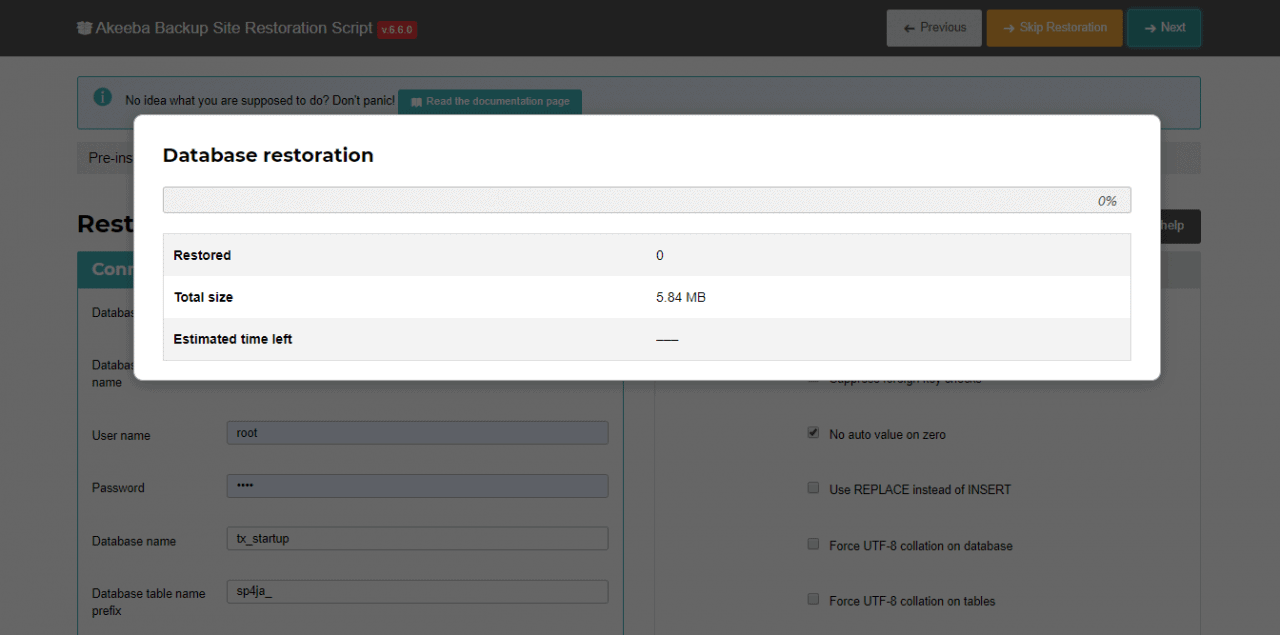
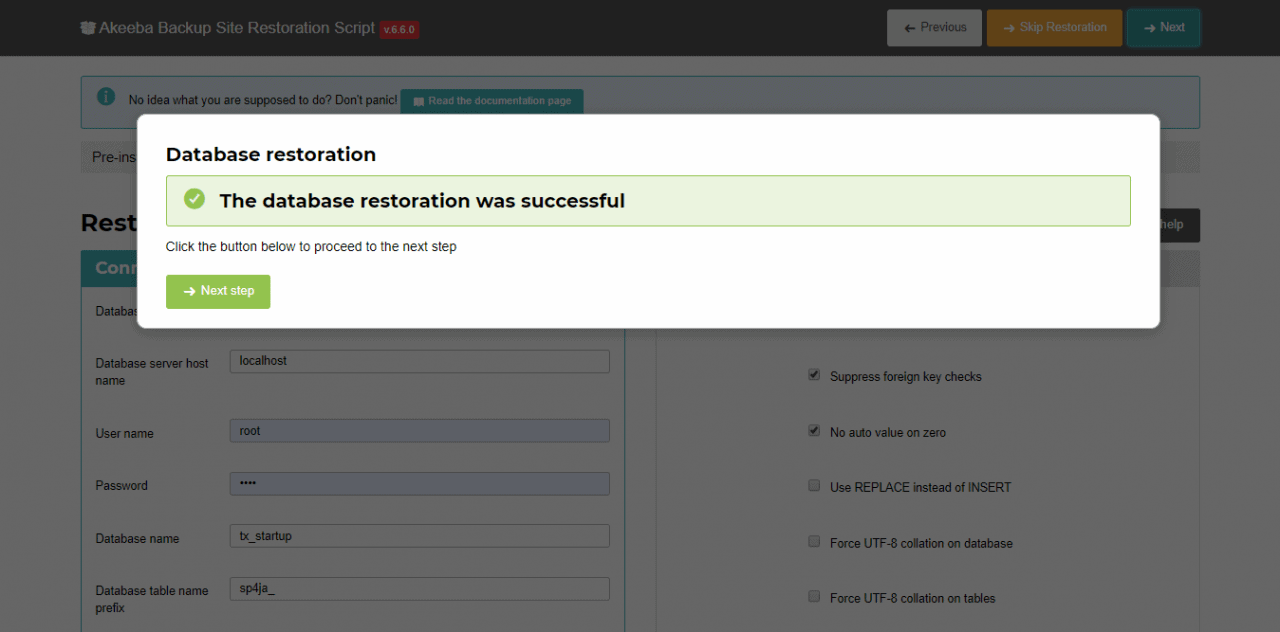
Click on the next button to proceed. Database restoration will start now and after completing an interface will appear like below,
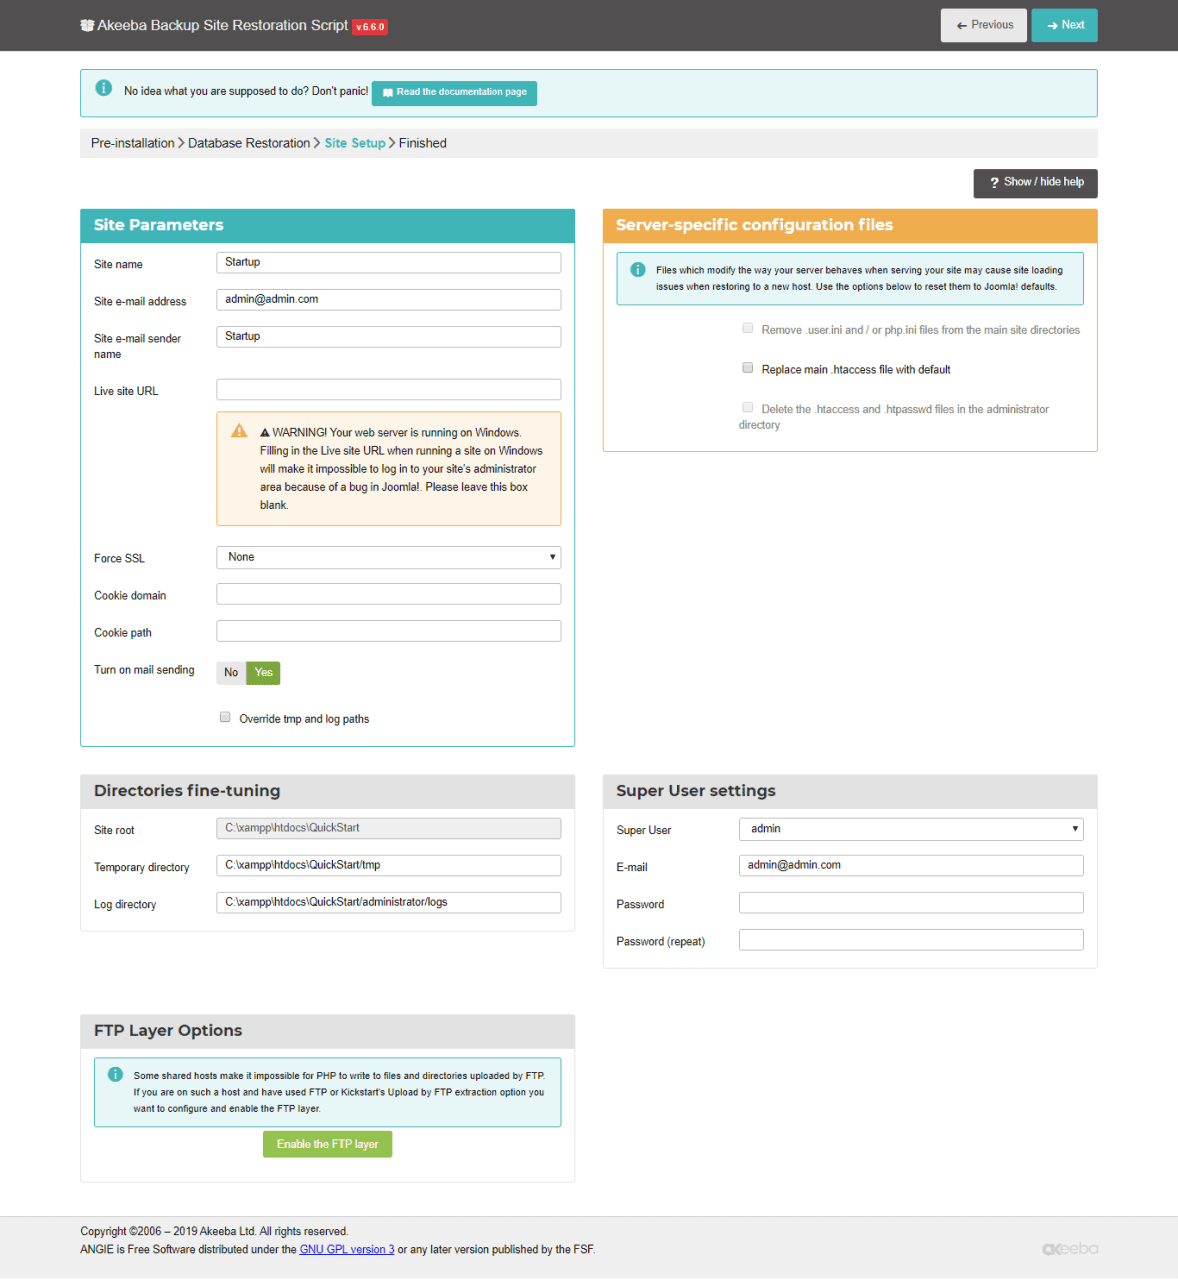
Now it's time to site setup. Click the next button to finish,
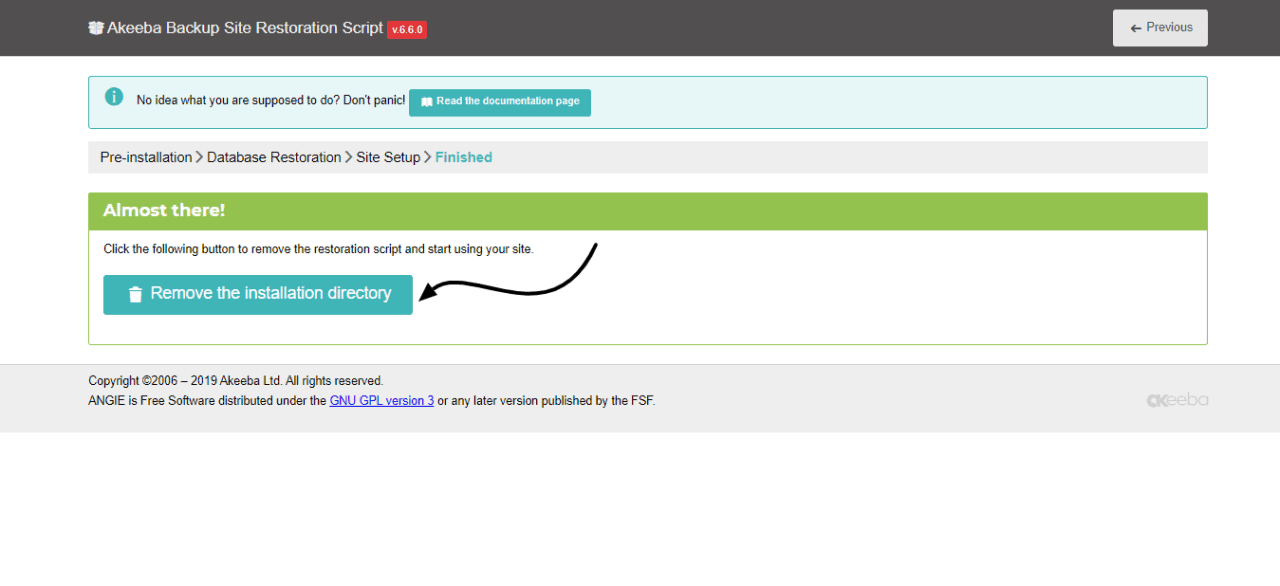
Remove the installation button.
Ready to start using your site! Click the visit your site front end button,
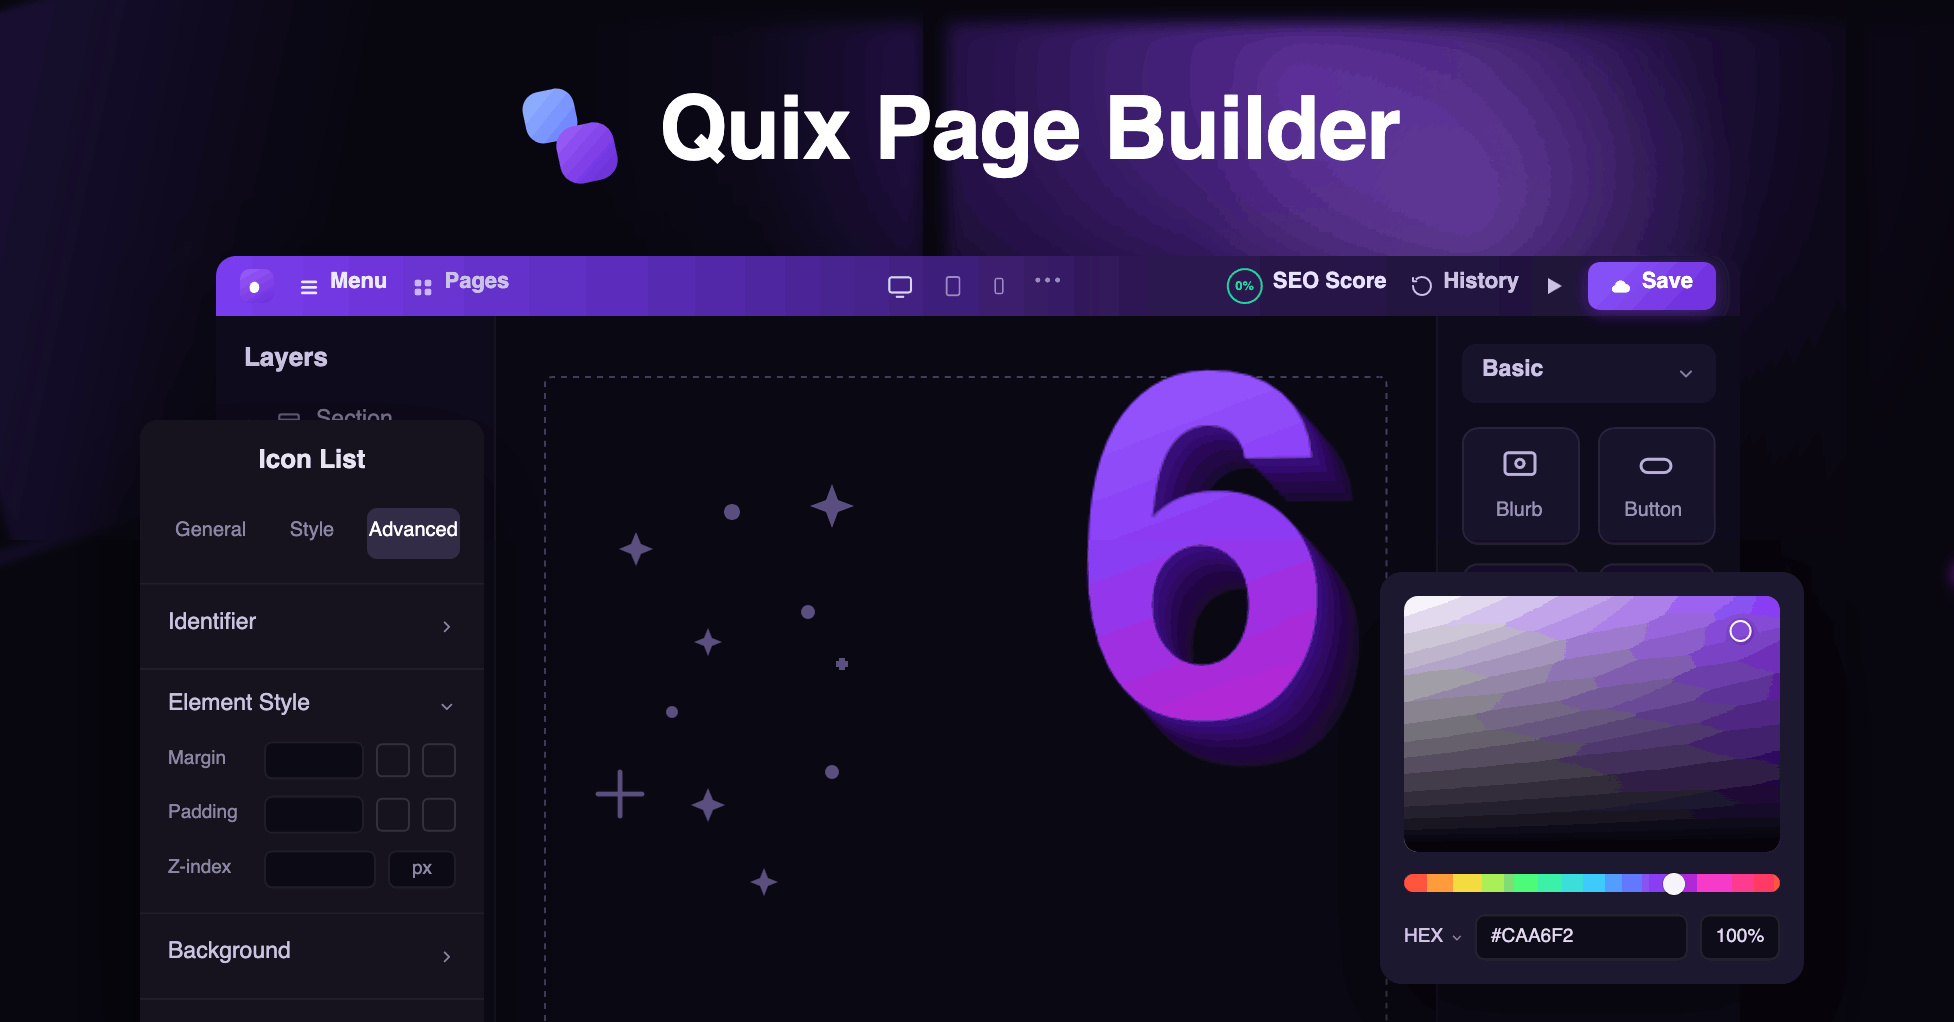
Now login with Joomla administrative and go to Quix dashboard.
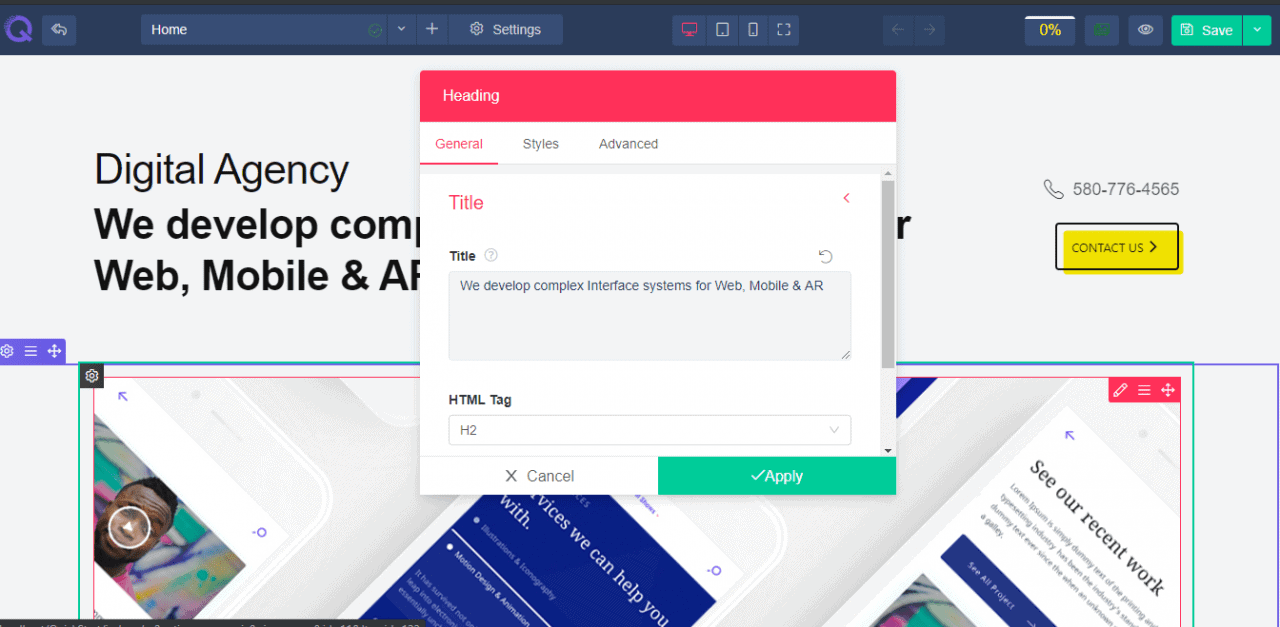
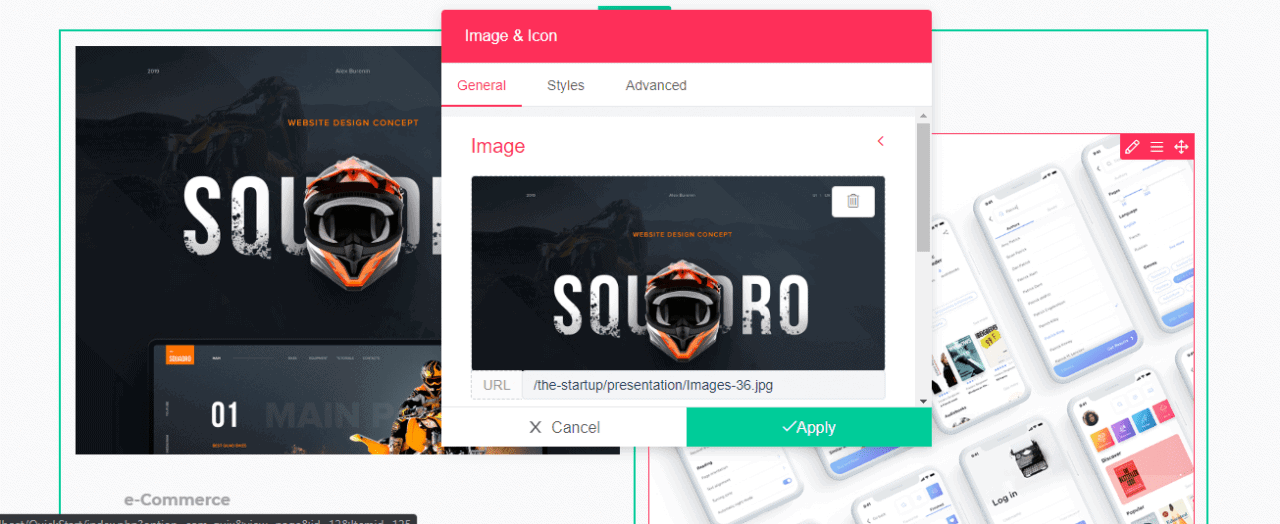
Go to Quix > Pages, then select the page which one you want to customize.
Here, I have used Quix - Joomla page builder to customize this template. Customization with Quix is much more simple and straightforward work than you ever thought. You can create and customize your entire website using Quix visual page builder. It doesn't matter whether you have any prior coding knowledge or not.
Final Words
Once your Joomla website is ready, try to share this resource with others so that it could assist them in building their website without facing any difficulties. In the meantime, let us know your thoughts on our guide in the comment box below. Your comments can improve our guide.