
How to install Joomla is a frequently asked question from new users of Joomla. Though it is very easy to install, sometimes, it becomes a nightmare fo...
Joomla Installation
How to Manually Install Joomla Using cPanel?
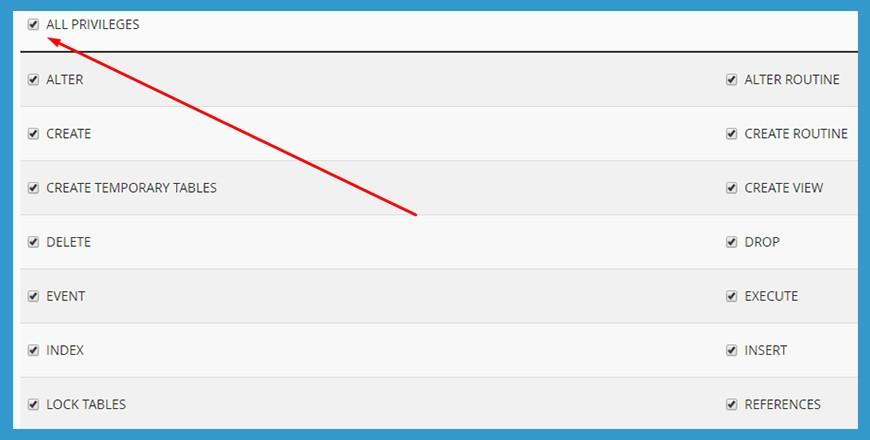
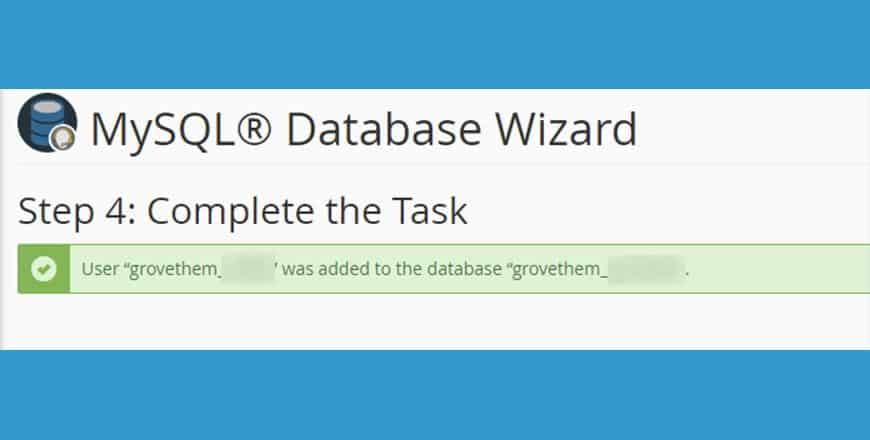
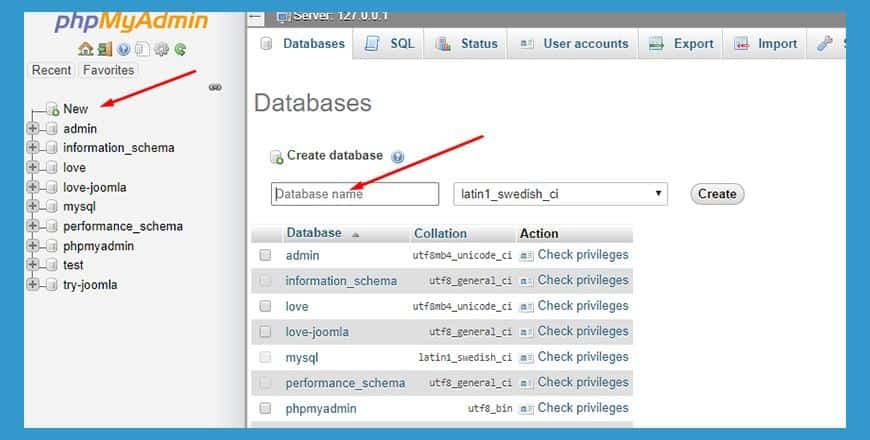
- Databases Wizard" icon.
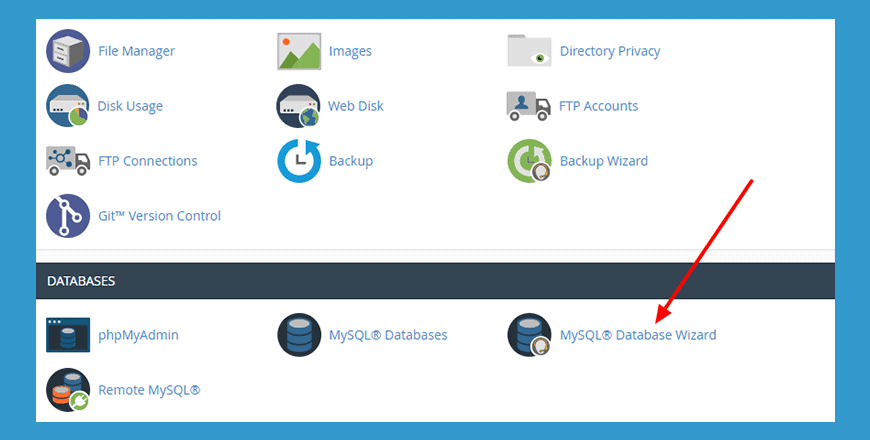
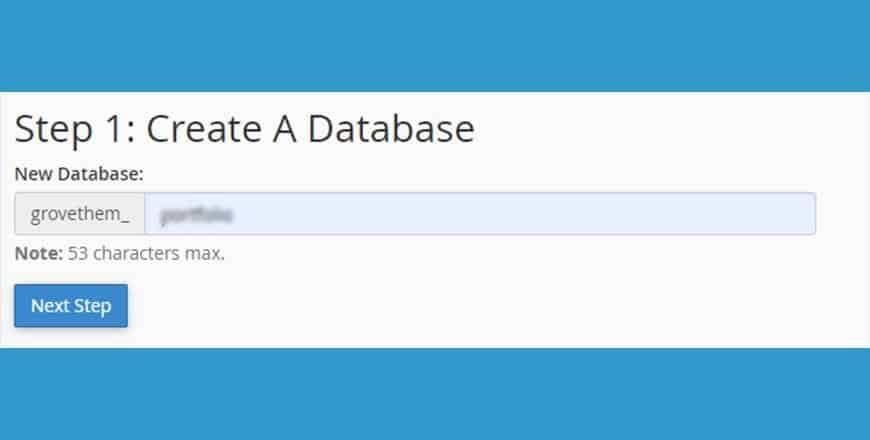
- Create a new database

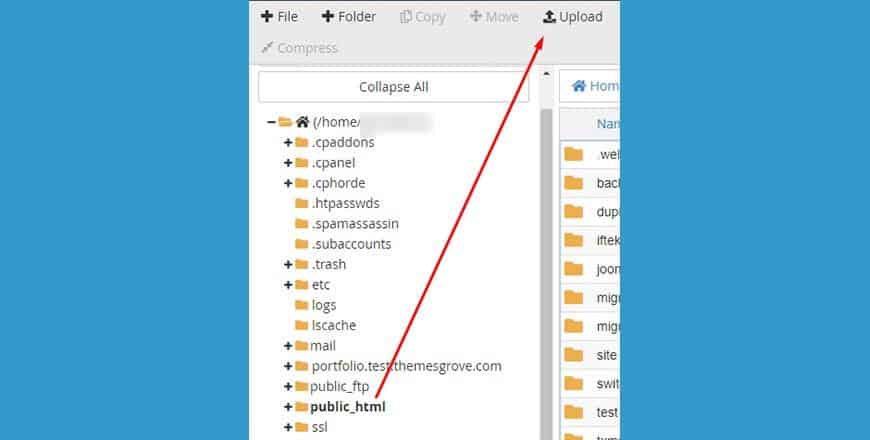
- In your cPanel, access the File Manager
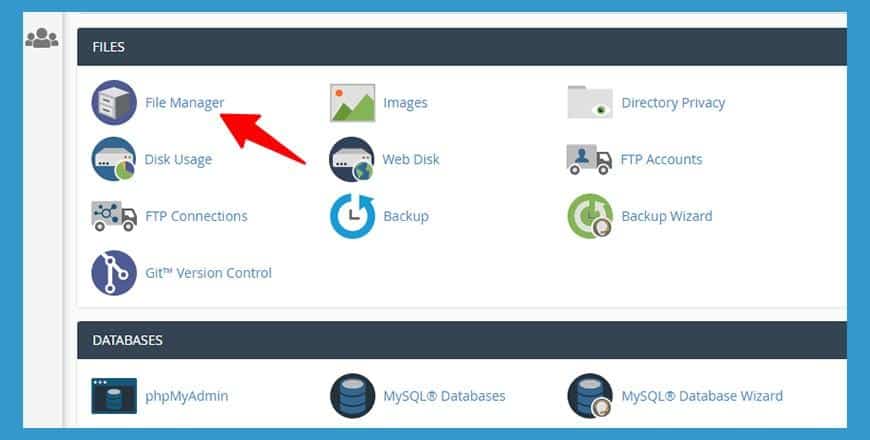
- Access the /public_html folder and click the Upload button
- Or if needed, access a subfolder of the /public_html folder if you're setting up a test site and/or if another site is in the /public_html folder.
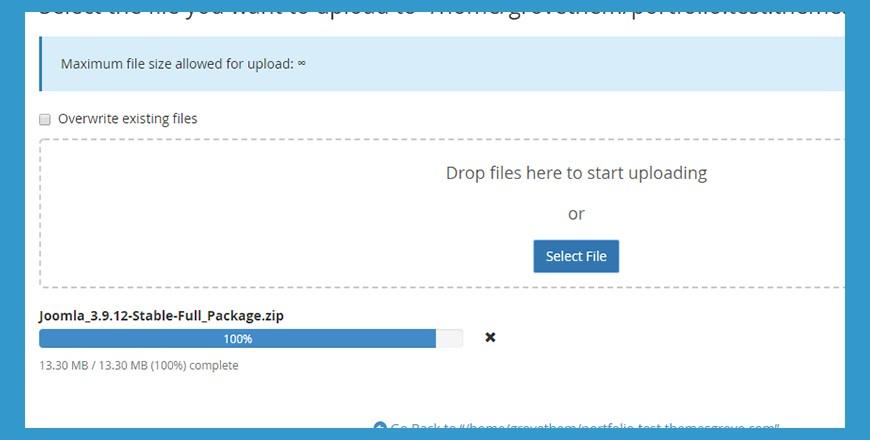
- Upload the Joomla installation package that you downloaded previously
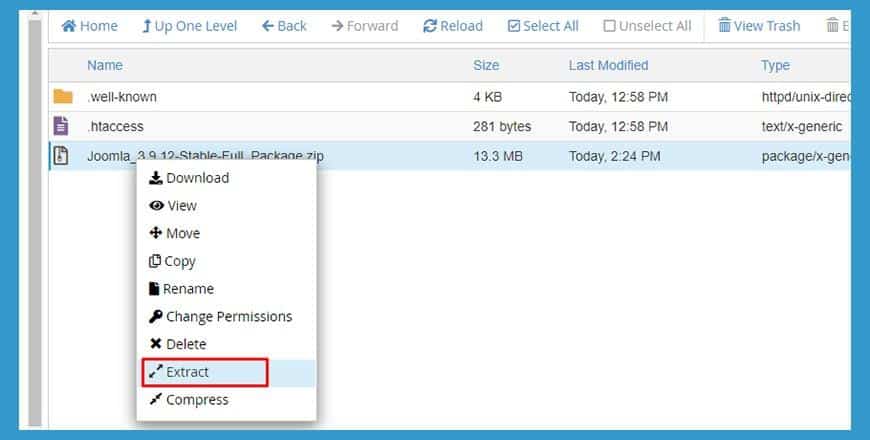
- Visit the domain of the website. If you upload the files to a subfolder, add the subfolder name to the end of the domain e.g. https://yourdomainname/subfolder/installation/index.php
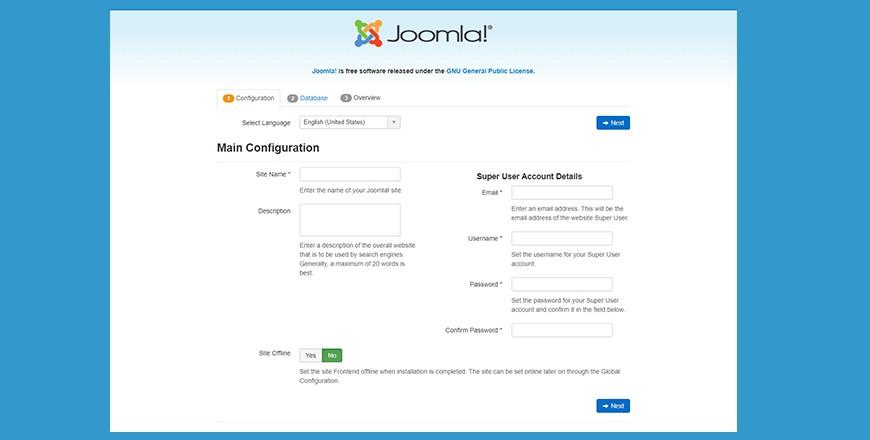
- Now, follow the below mentioned procedures

- Site Name: The name of your website — this can be changed at any point later in the Site Global Configuration page.
- Description: Enter a description of the website (optional).
- Admin Username & Password: Joomla uses a default "admin" as the username for the Super User. You can leave it as is, or you can change it. Set a password.
- Site Offline: Click the Yes or No box. Yes - this means when installation is complete, your Joomla website will display the 'Site is offline' message when you browse to yoursitename.com to view the home page. No - this means the site is live when you browse to yoursitename.com to view the home page. You can use the Site Global Configuration in the Administration interface to change the Offline status at any time.
- Click the Next button.
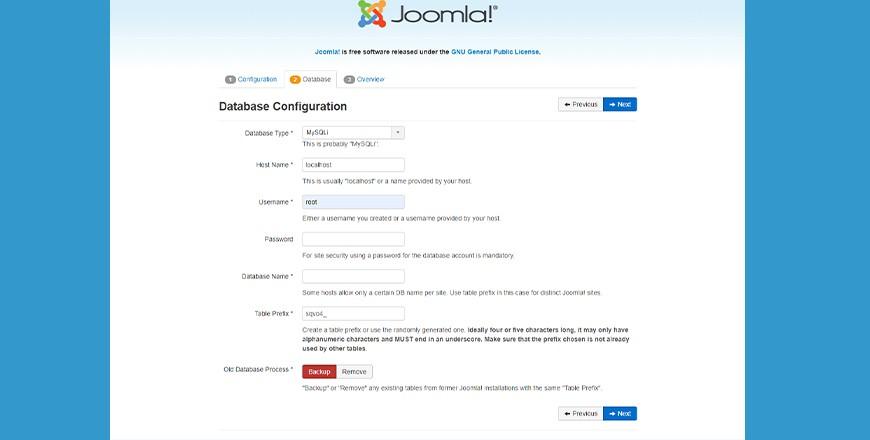
- Database Type: MySQLi is the common database used.
- Hostname: Where is your database located? Common is localhost, but some hosts use a specific database server such as dbserver1.yourhost.com
- Username: The username used to connect to the database
- Password: The password for the database's username (keep it empty if you don't save password when you were creating your database).
- Database Name: The name of the database.
- Click the next button to proceed.

screen.
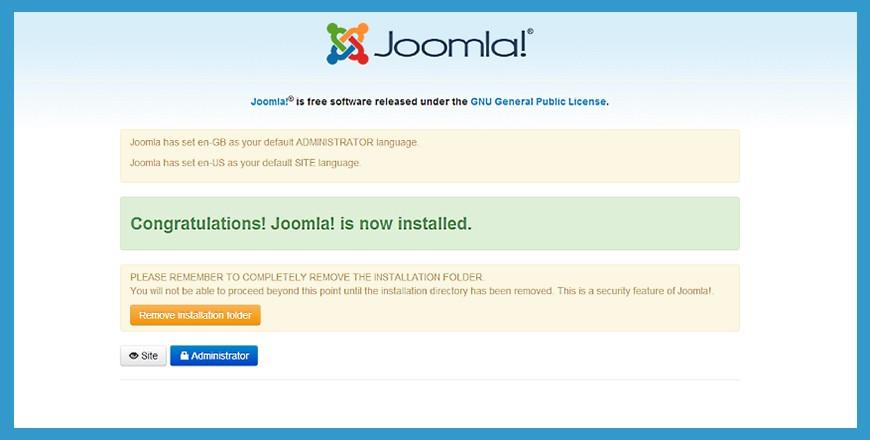
folder and a success message will appear. Now you can navigate to the Administrator log in by clicking or go right to your site by clicking
How to Install Joomla on Localhost?
Here, I'm going to cover the following topics.
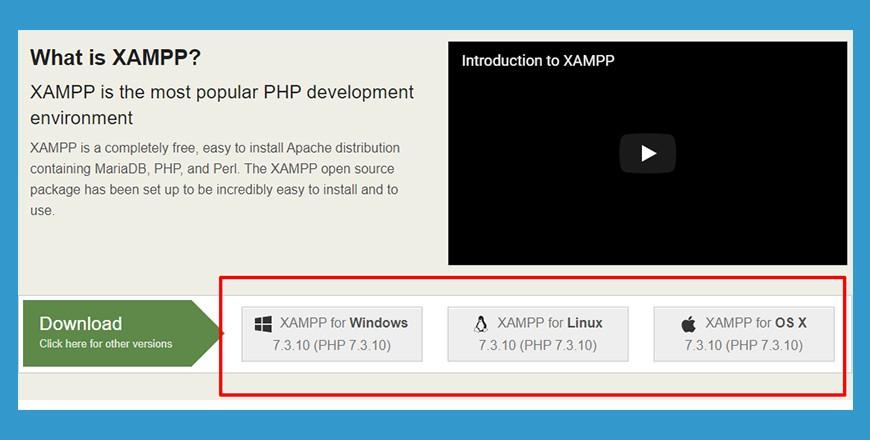
How to Install Joomla Using XAMPP?

- in your browser.

- is where you have moved your downloaded Joomla file and unzipped that file e.g. localhost/try-joomla
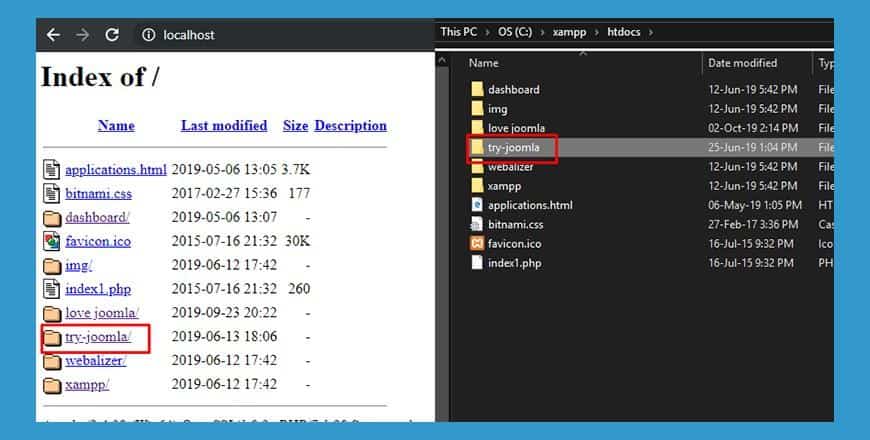
- You will be presented with the following screen.

Note: Now, follow the above stated STEP 05 of "How to install Joomla using XAMPP" to complete the rest of the steps.
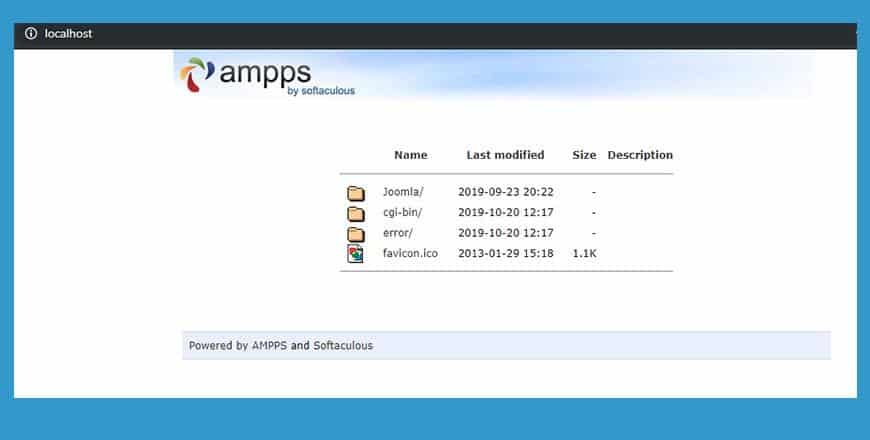
How to Install Joomla Using AMPPS?
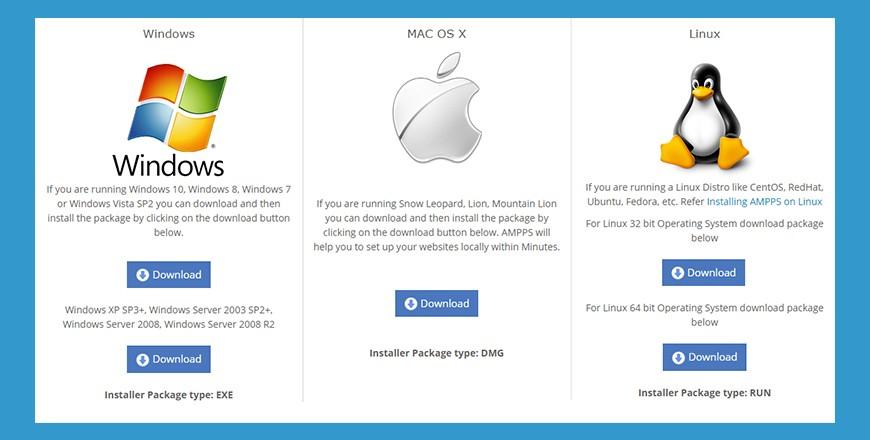

- in your browser.
Step 03: Download Joomla
Step 04: Configuration
- is where you have moved your downloaded Joomla file and unzipped that file e.g. localhost/Joomla
- You will be presented with the following screen.
Note: Now, follow the above stated STEP 05 of "How to install Joomla using XAMPP" to complete the rest of the steps.
How to Install Joomla Using Laragon?
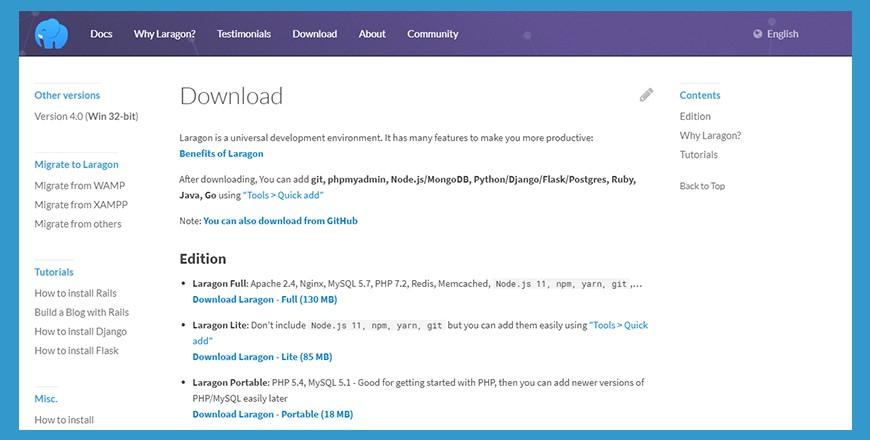
Step 01: Download Laragon
- Install Laragon
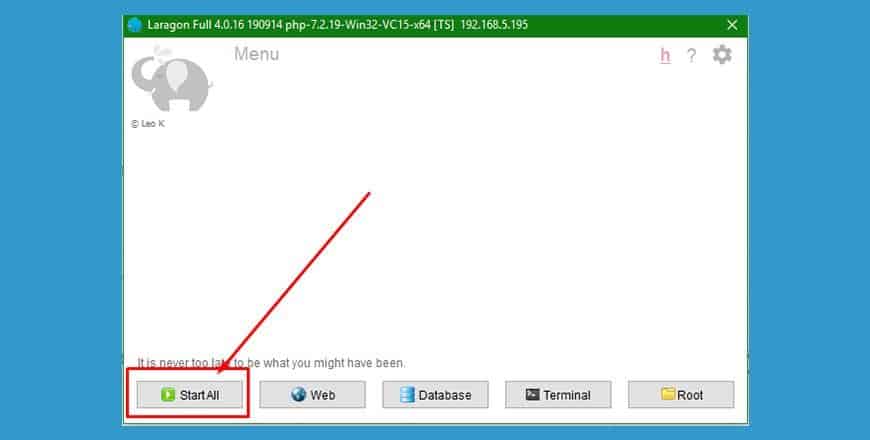
- Start laragon and press Start All button.
Step 02: Configure Laragon
- Go to Menu > Quick app. There is no Joomla.
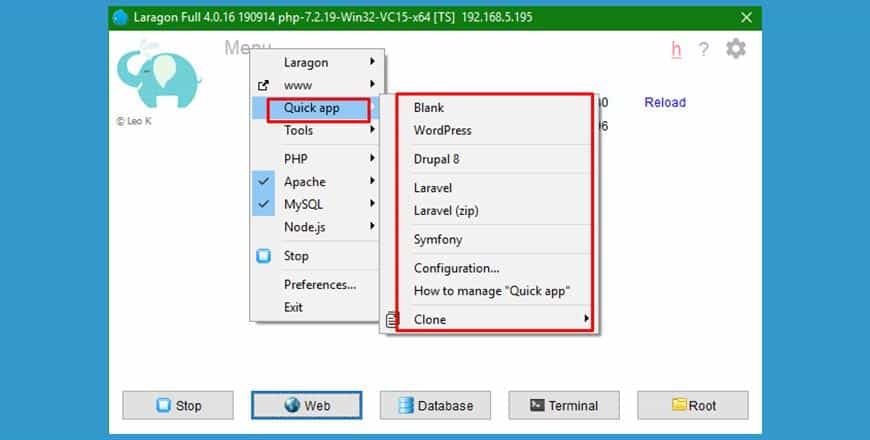
- To enable Joomla, go to Menu > Quick app > Configuration.
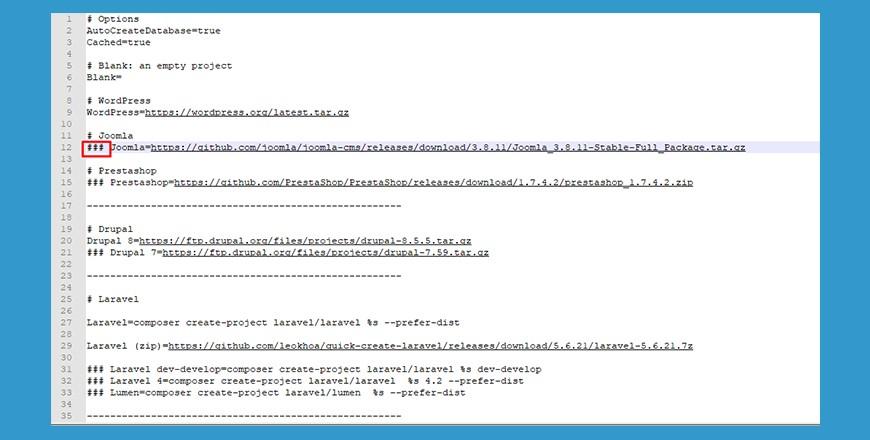
- Remove ### before Joomla and save (ctrl+s) it.
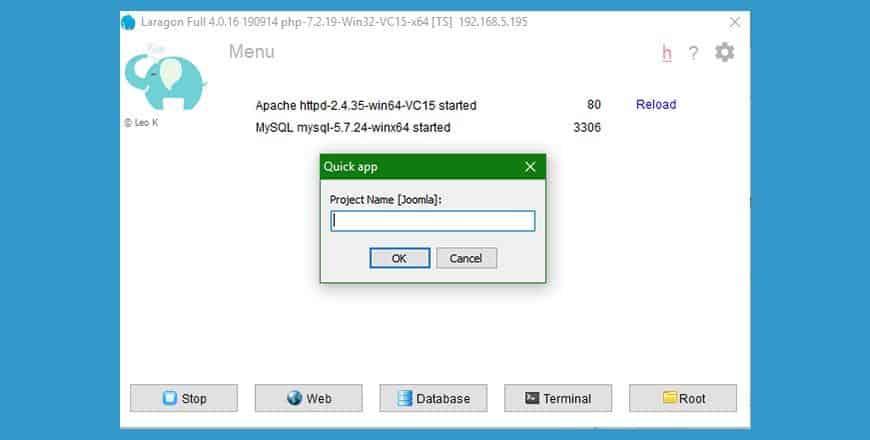
Step 03: Create Project
- Now, go to Menu > Quick app > Joomla and create a project.
Step 04: Configure Joomla
- Go to Menu > www > yourprojectname
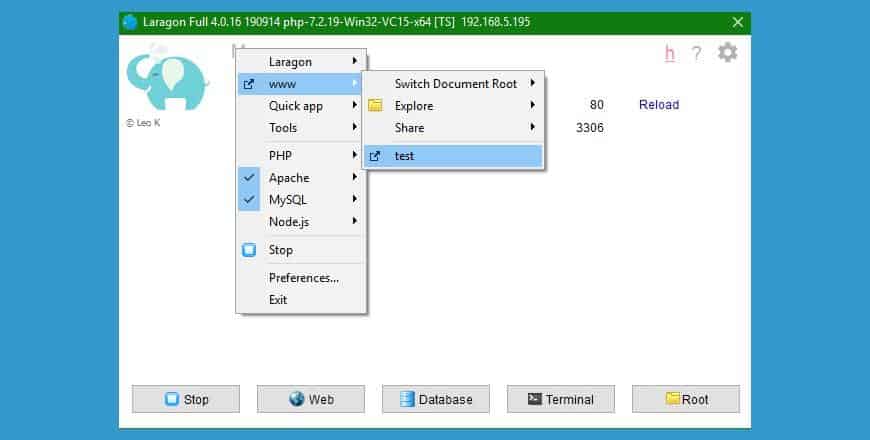
- You will be presented with the following screen.

Note: Now, follow the above stated STEP 05 of "How to install Joomla using XAMPP" to complete the rest of the steps.
How to Install Joomla 4?
Here, I'm going to show you the procedures to install Joomla 4 on your localhost. I'm using XAMPP here as a localhost. Let's start.
Note: Follow Step 01 & Step 02 from above stated How to Install Joomla Using XAMPP to download XAMPP & create database.
- To download Joomla 4 go to Joomla-CMS-release and download the latest file.
Joomla 4 Configuration
- Downloaded Joomla file needs to be unpacked in the root of your site e.g. C drive > Xampp > htdocs > Create a folder and unzip there. My one is C drive > Xampp > htdocs > joomla4
- Open your browser and go to localhost/yourfoldername. Here, "yourfoldername" is where you have moved your downloaded Joomla file and unzipped that file e.g. localhost/joomla4
- You will be presented a UI like following one. Now, configure it as below;
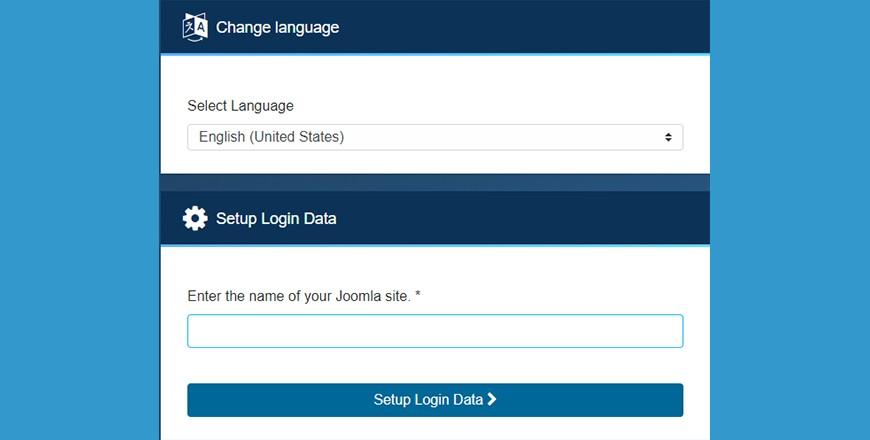
- choose the language you want. You can set more language options after finishing setting up in Installation".
- you have to add your site name, for example Joomla 4 Alpha 8
- Login Data" to continue.
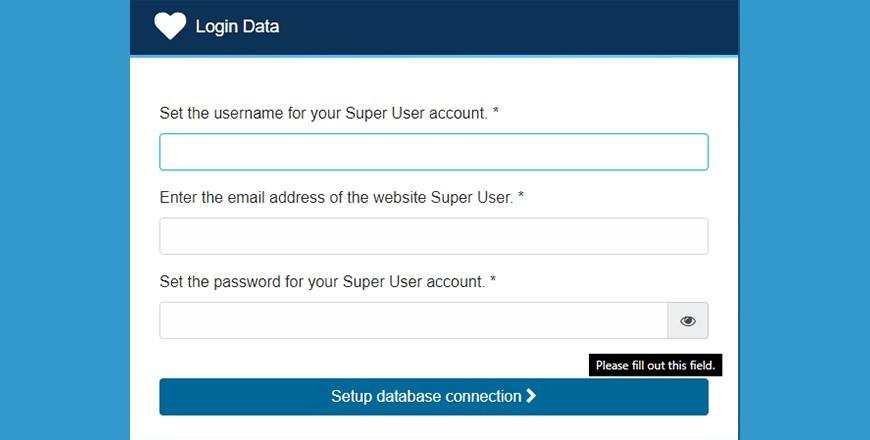
- enter your username, example: admin
- enter your password, example: 123456
- enter your email, example: This email address is being protected from spambots. You need JavaScript enabled to view it.
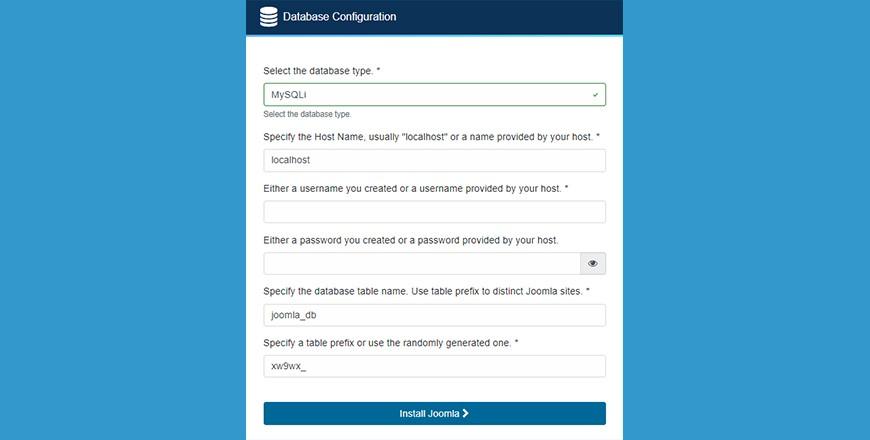
- should select MySQLi since that's the database type used mostly on web servers)
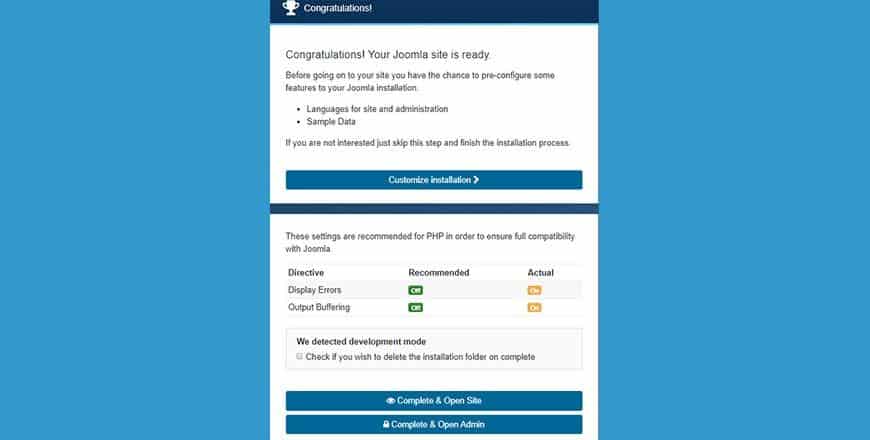
- After successfully installing Joomla 4, you can continue to customize your Joomla site in terms of language (for a multi-language site) and sample data by clicking "Customize Installation" button.
- Or, you can click on "Open Site" to open the front-end site

- Or, you can click on "Open Admin" to open the back-end site.
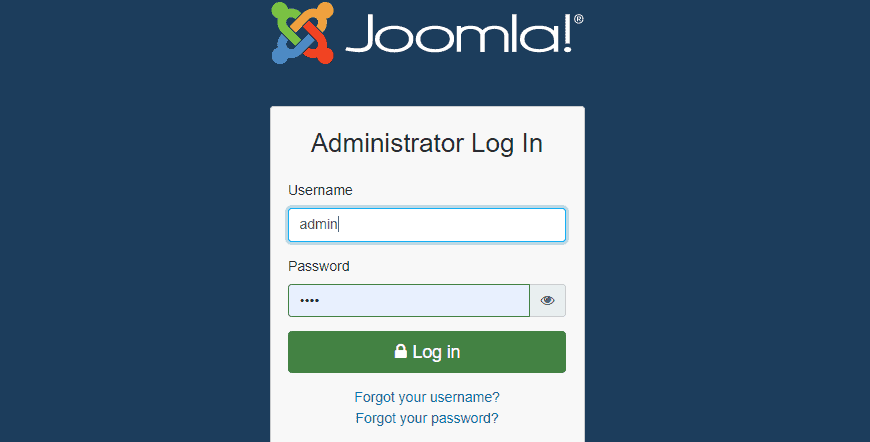
Login to your admin by using your Superuser account you have set up before.
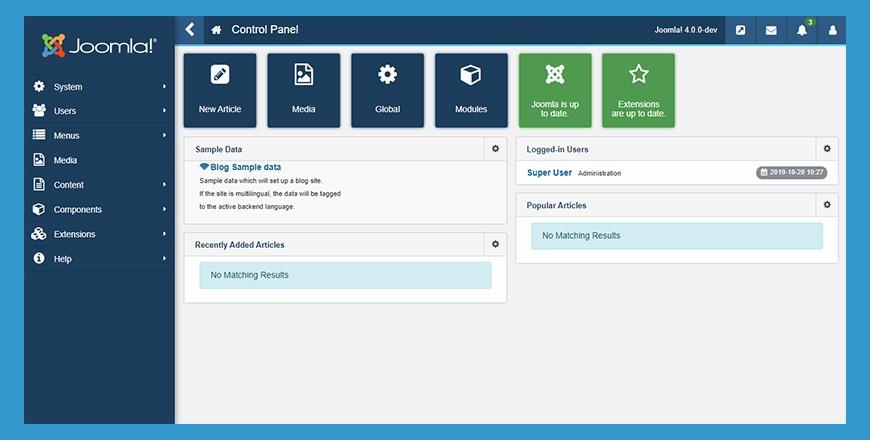
Congratulation! You have installed Joomla 4 successfully.
Final Words
I have tried here to demonstrate every possible way to install Joomla. Which one is the most preferable and easiest way, let me know. You can give us your suggestions and feedback through the comment box below. We always appreciate your valuable thoughts.