"If your business is not on the Internet, then your business will be out of business."- A famous quote by Bill Gates. It does make scenes that interne...
"If your business is not on the Internet, then your business will be out of business."- A famous quote by Bill Gates.
It does make scenes that internet plays a vital role for every business while growing up and increasing its prosperity. Where if you create websites for small business it can be a useful solution also brings an outstanding outcome for your business as well.
Do you know 81% of people research a business or service online prior to making a purchase decision. You are a small business owner and in the ocean of competitive marketplace you desperately expect customer and gives your level best to get them. It's so obvious?
However, let me help you a little bit more and make your work more accessible and handful.
For a startup or a small business having a website is a must needed things. In this article I am going to tell you "Why You Need Small Business Website" and "How to Create Small Business Website."
Let's begin then.
Why You Need a Small Business Website?

Let's start with Why?
The heart of any business is its customers and clients, and to be honest, they are the architect of your business growing. For starters, your customers are mostly online, and that's why it is quite essential to have a website because your online store is not restricted to business hours or any other relevant reasons.
Small businesses mostly focus on necessities and urgent matters, only spending money when they need to. So, even if your business is rigidly local, it always good to invest on to create small business website that is well worth it. You can later use GMB management software, SEO tools, and other digital solutions to run and manage your local business successfully.
Here are some of the core reasons "Why You Need a Small Business Website."
- To establish your business's credibility
- Showcase your products and services.
- Get ranked in Google search results.
- Your competitors all have company websites.
- It provides social proof.
- It will save time as well as money.
- Get new clients and customers for your business.
- To sell products and getting feedback.
Requirements
Create a website for a small business always need some key work and requirements to successfully launch the site. Selecting a domain name, a template to customize the template is a long process to do. Here we use the Joomla CMS platform to publish the website however, you can use your preferred platform also. For building and customizing the template we have used Quix-the best ever Joomla page builder.
Here are the key requirements below,
- Domain Name: Choose an easy to remember and attractive domain name.
- Web Hosting: Select a trusted source to buy web hosting.
- Joomla: Download the latest version of Joomla.
- Template: Pick a contemporary and responsive template.
- Page Builder: Use a page builder like Quix- Joomla Page Builder.
Step 01: Select a Domain Name
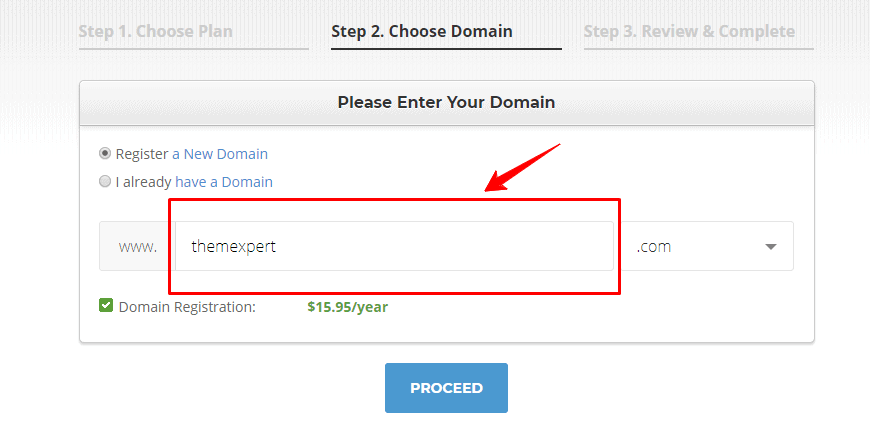
At first, you need a simple, understandable, and easy to remember domain name. The right domain name is always an essential thing while you are trying to create a small business website. Because it captures, the first impression of website visitors also affects your SEO and defines your brand.
If you don't know any trusted source about registering your domain name, you can visit SiteGround to register one. Consider the following tips, although it is not mandatory at all.
- Make it simple and easy to remember.
- Consider to end with .com, .net or .org.
Step 02: Choose a Web Hosting
In the second step, you have to choose web hosting. From the huge options of web hosting around, you can select any of them. If you confused enough with their offerings, you can visit SiteGround to get your preferred offer with minimal cost. We have a dedicated blog post about "How to Select Best Web Hosting with A Comprehensive Guideline", in case you want to learn more about web hosting.
When you are dealing with web hosting, consider the following tips,
- Page Load Speed: How fast is the hosting provider? It should load your site within the possibly shortest time (500-700 ms).
- Customer Support: You'll have to sort out issues with support at some point – therefore you should choose a host that has good-quality and responsive customer support.
Step 03: Install Joomla
Before installing Joomla it is reacquired to know why we use Joomla here. To me,
Now it's time to install Joomla. To create a website for small businesses you need a platform and that's why we use Joomla here. You need to complete all-around three different tasks for installing Joomla. First, you will need to download the Joomla package files.
Next, you will need to have a database for Joomla uses. The third and final task is the main configuration of your Joomla UI.
Besides these, we provide documentation and video tutorial for you, in case you need any further help.
Download Joomla Package File
- Download the current release of Joomla
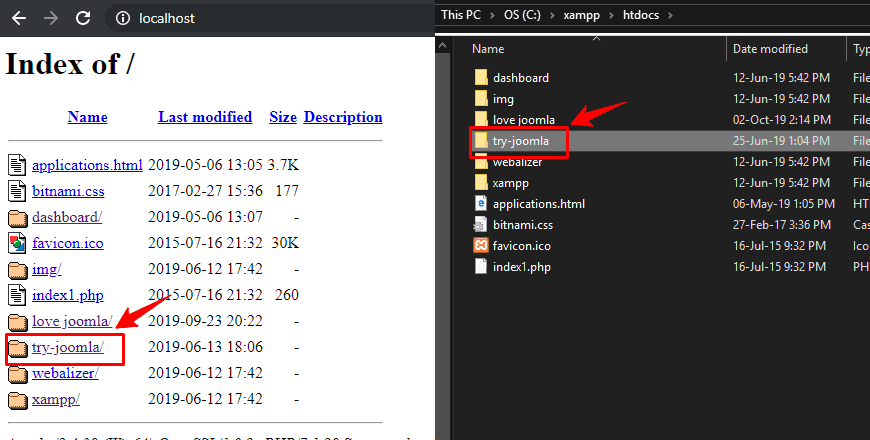
- Downloaded Joomla file needs to be unpacked in the root of your site. Move your downloaded file to C drive > Xampp > htdocs > Create a folder and unzip there (in case you are using xampp localhost).
Database for Joomla Installation
You will need to note basic database information, when your Joomla installation is started.
- Location of database, localhost? Or a specific host's server such as dbserver.myhost.com.
- The database name.
- The database user's name.
- The database user's password.
Now, if you are using localhost, then, navigate to localhost/phpmyadmin in your browser and click the database tab at the top and then create a database from there.

Make sure you remember the name of the database you created, as it will be required during Joomla installation.
Main Configuration
It's time to navigate to localhost/yourfoldername. Here 'yourfoldername' you have to move your downloaded Joomla file and unzip it.
You will be presented with the following screen. Now, configure it by following the steps below,
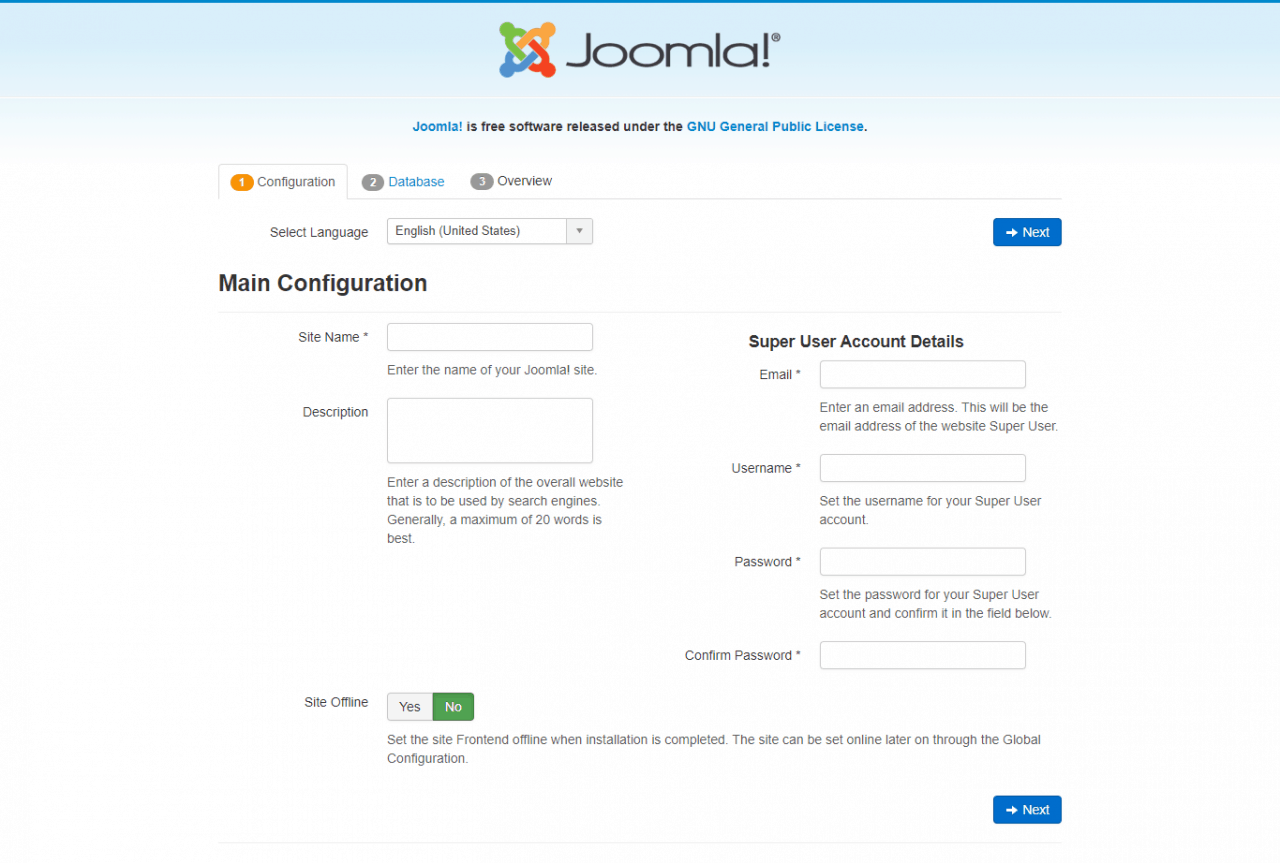
- Site Name: The name of your website — this can be changed at any point later in the Site Global Configuration page.
- Description: Enter a description of the website (optional).
- Admin Username & Password: Joomla uses a default "admin" as the username for the Super User. You can leave it as is, or you can change it. After then set a password.
- Site Offline: Click the Yes or No box.
Yes - this means when installation is complete, your Joomla website will display the 'Site is offline' message when you browse to yoursitename.com to view the home page.
No - this means the site is live when you browse to yoursitename.com to view the home page. You can use the Site Global Configuration in the Administration interface to change the Offline status at any time.
After completing the first page work, click on the next button to proceed further.
You will get an interface like this, now configure this one,
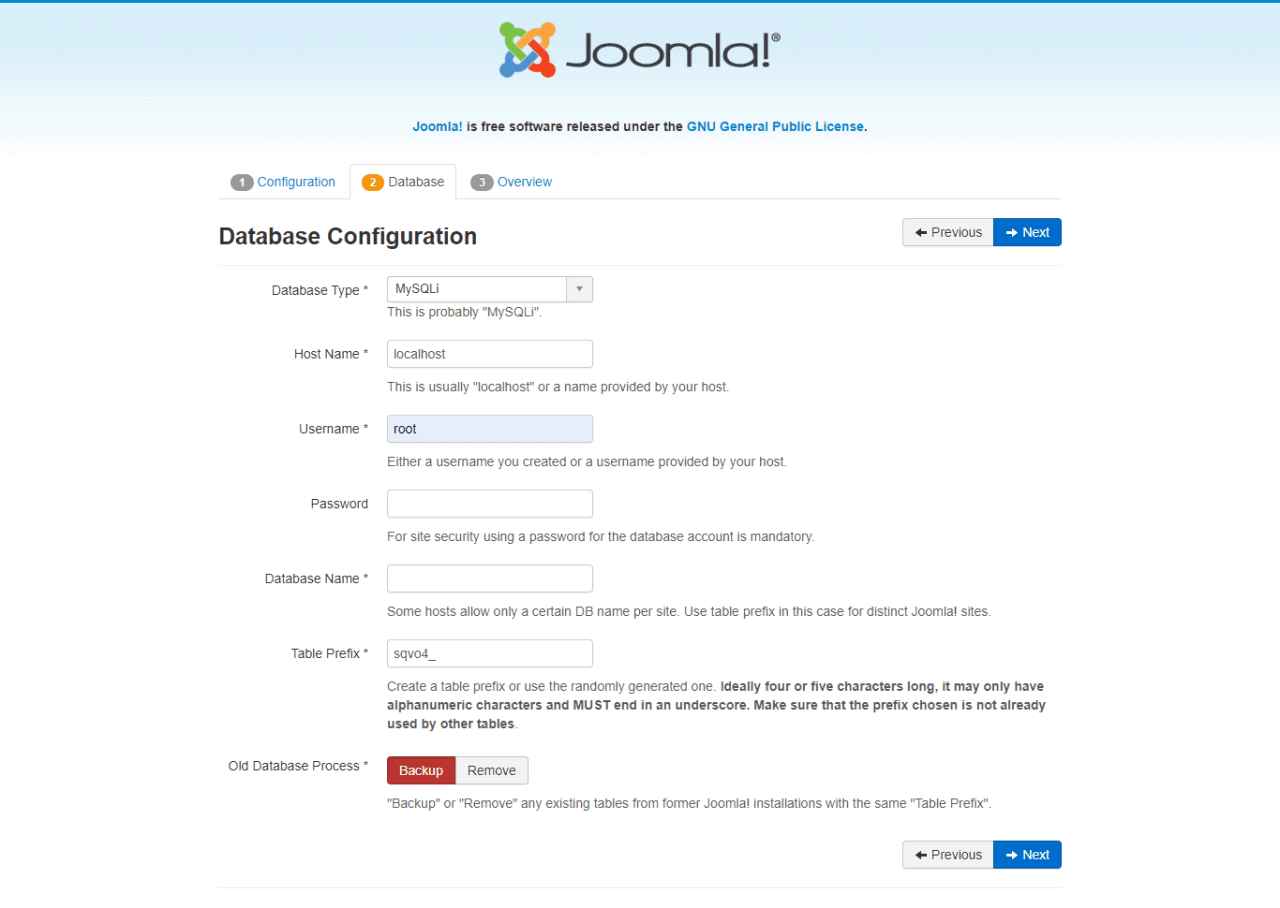
- Database Type: MySQL is the most common database.
- Hostname: Where is your database located? Common is localhost, but some hosts use a specific database server such as dbserver1.yourhost.com
- Username: The username used to connect to the database
- Password: The password for the database's username (keep it empty if you don't save password when you were creating your database).
- Database Name: The name of the database.
Click on the next button to proceed. An interface will appear like below,
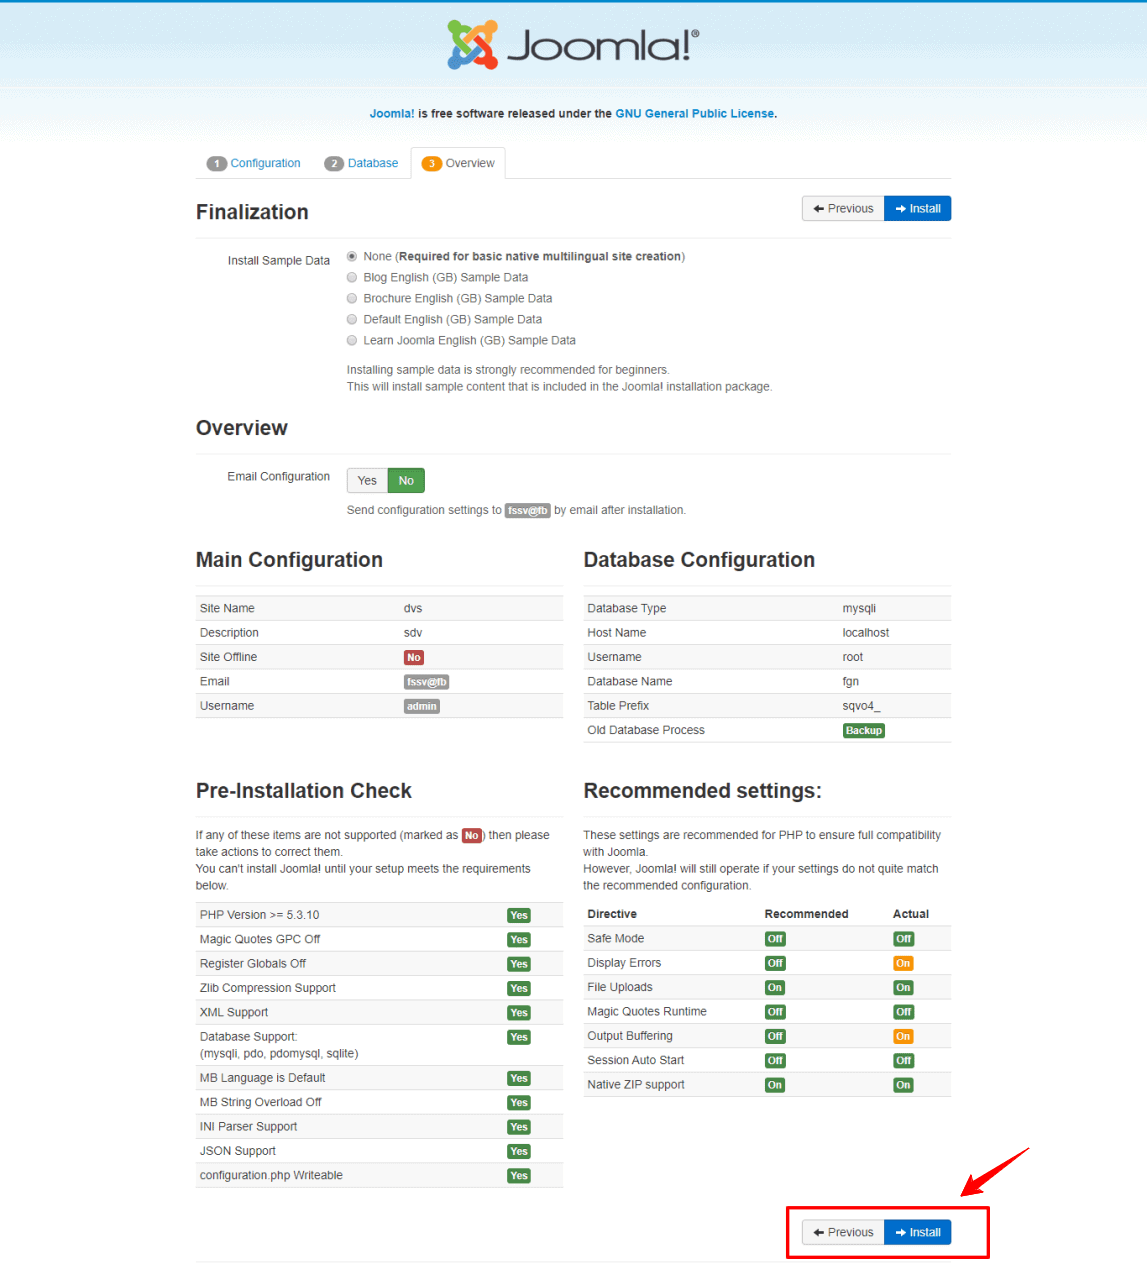
Here clink on the install button and it will take some time to finish the installation process. You will now be presented with a very similar Congratulations! Joomla! is now installed screen.

Now you can delete the Installation Folder. Click on Remove Installation folder and a success message will appear. Now you can navigate to the Administrator login by clicking Administrator or go right to your site by clicking Site.
Step 04: Choose Template
Before uploading a template, you need to choose a suitable template to create small business website. You can choose any of your preferred template from our extensive collection of Joomla Template Directory with visual page builder Quix. Your selected Joomla template must be responsible and contemporary designed.
Check the following factors while you choose a template.
- Support: It's great to have technical support included, as these people can fix any issue for you.
- Pricing Plan: It should be affordable like you must not buy or download a template with minimal features and maximum price.
- Updates: Joomla constantly updates their system. Make sure your template provider also updates their templates frequently to make sure it will work with the latest releases.
- Documentation: From time to time, you'll need to check some features to learn how they work. Be sure there is a place where you can do so.
- Responsiveness and Cross-Browser Compatibility: This means your template should look great in every browser as well as on any mobile device.
- Customizability: Check out which template features can be customized by yourself. For example, look for templates that have many module positions.
Here, I have chosen Agencio - The Best Modern Agency Template For Joomla Website. Reasons behind choosing the template are its features and functionalities.
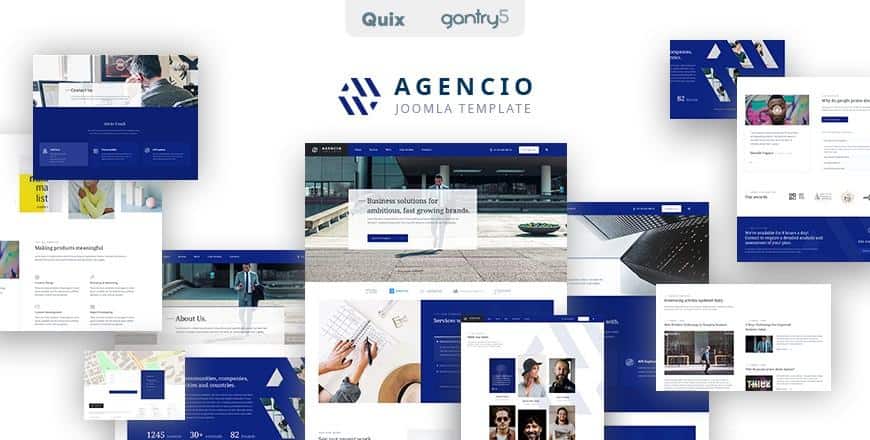
Features of Agencio
- 1 Homepage with 5 Inner Pages
- Typography Control
- Mobile Responsive
- Easy Customizable
- Drag and Drop Development
- Smooth Animation
- Constant Update
- Dedicated Support
- Gantry 5 Framework
- Speed Optimized
- Quick-start Package included
- Full Featured Blog
- Smooth Accordion
- Quix Joomla Page Builder
- Quix Particles
- Built in Pages
- Cross Browser Compatibility
- Dynamic Navigation Menu
- SEO Optimized
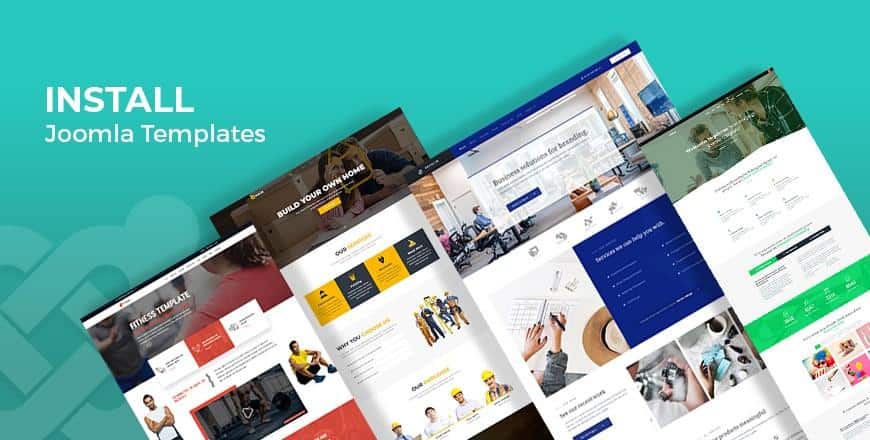
Step 05: Upload a Template
We have a step by step installation guide about "How to Install Joomla Template"; however, you can follow the link through or peruse the instruction below.
To upload a template, go to Extensions > select Extension Manager > Browse the extension package file (template file) > Upload & Install.
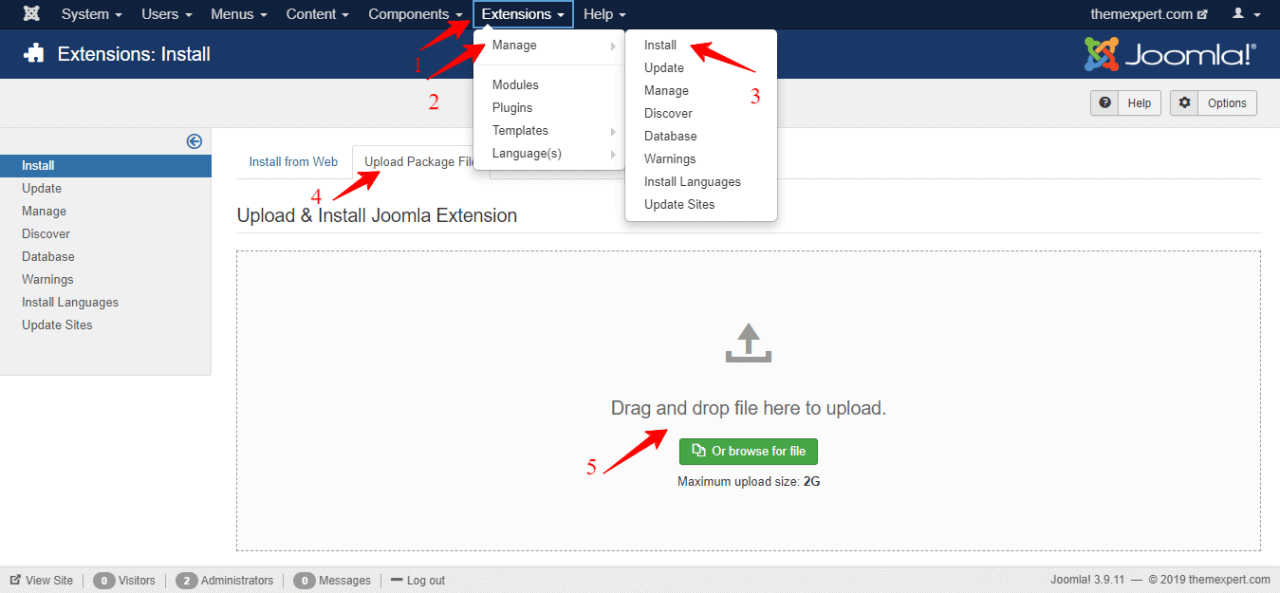
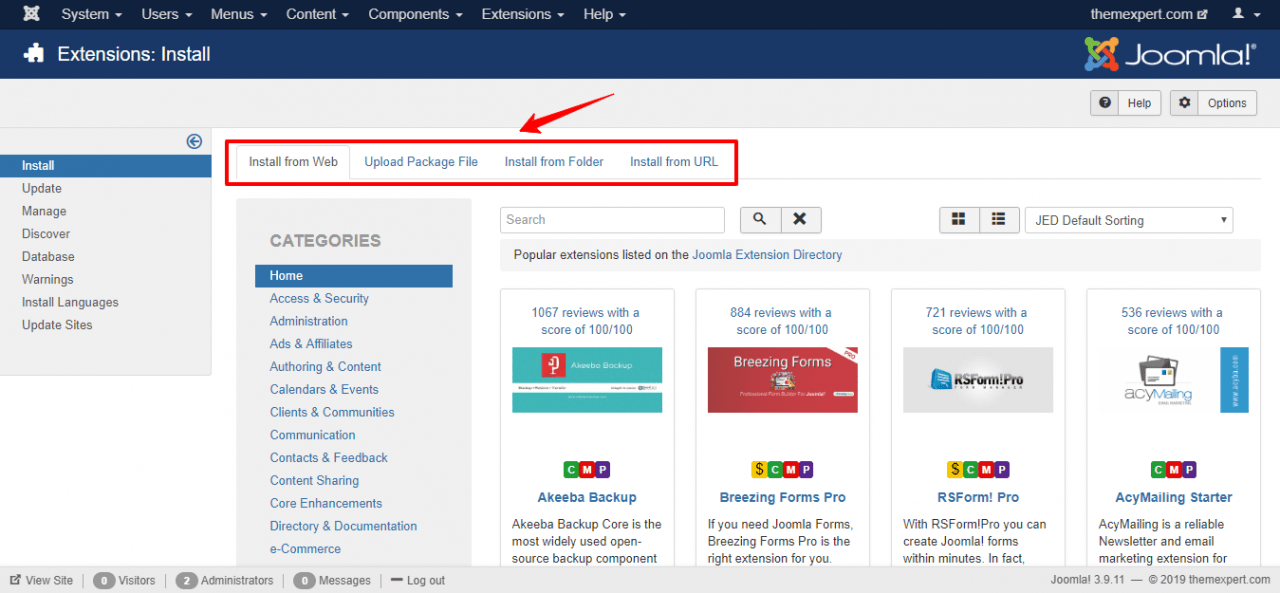
Joomla gives three more options to install extensions.
- Install from web- User can directly install the extension from JED (Joomla Extension Directory)
- Install from directory- user can install the extension by giving the path of directory.
- Install from URL- user can enter the URL to the extension.
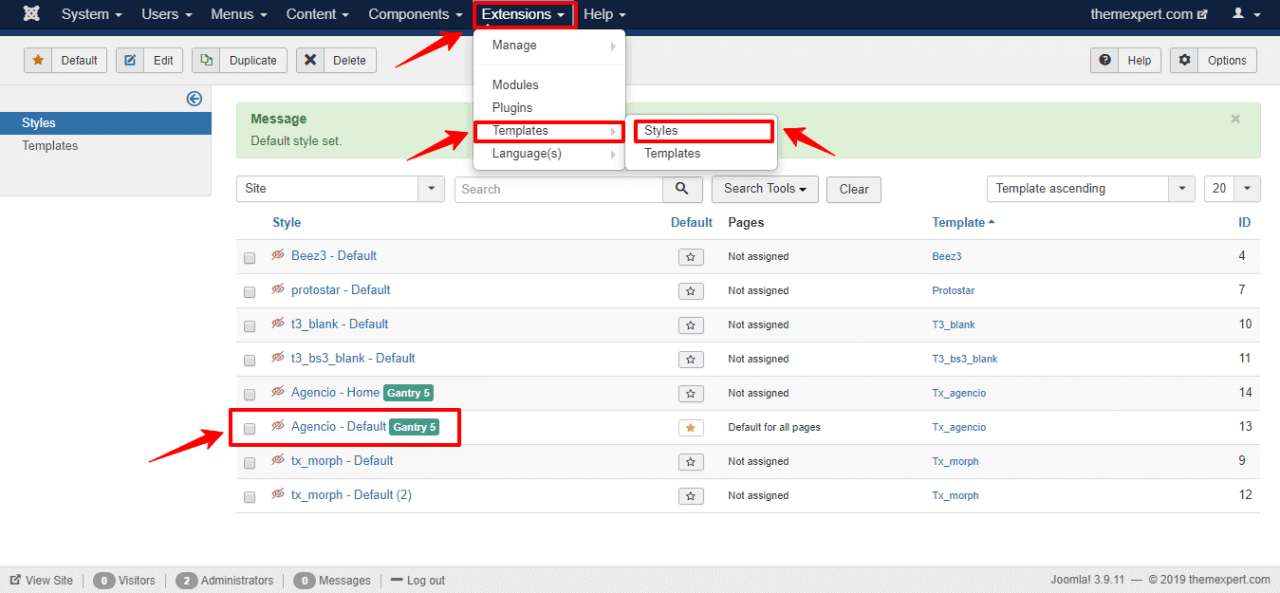
After that, you still need to activate template and you do that under Extensions > Template > Styles. Here, click the star icon to the right of the template name to make it the default site.
Step 06: Customize the Template
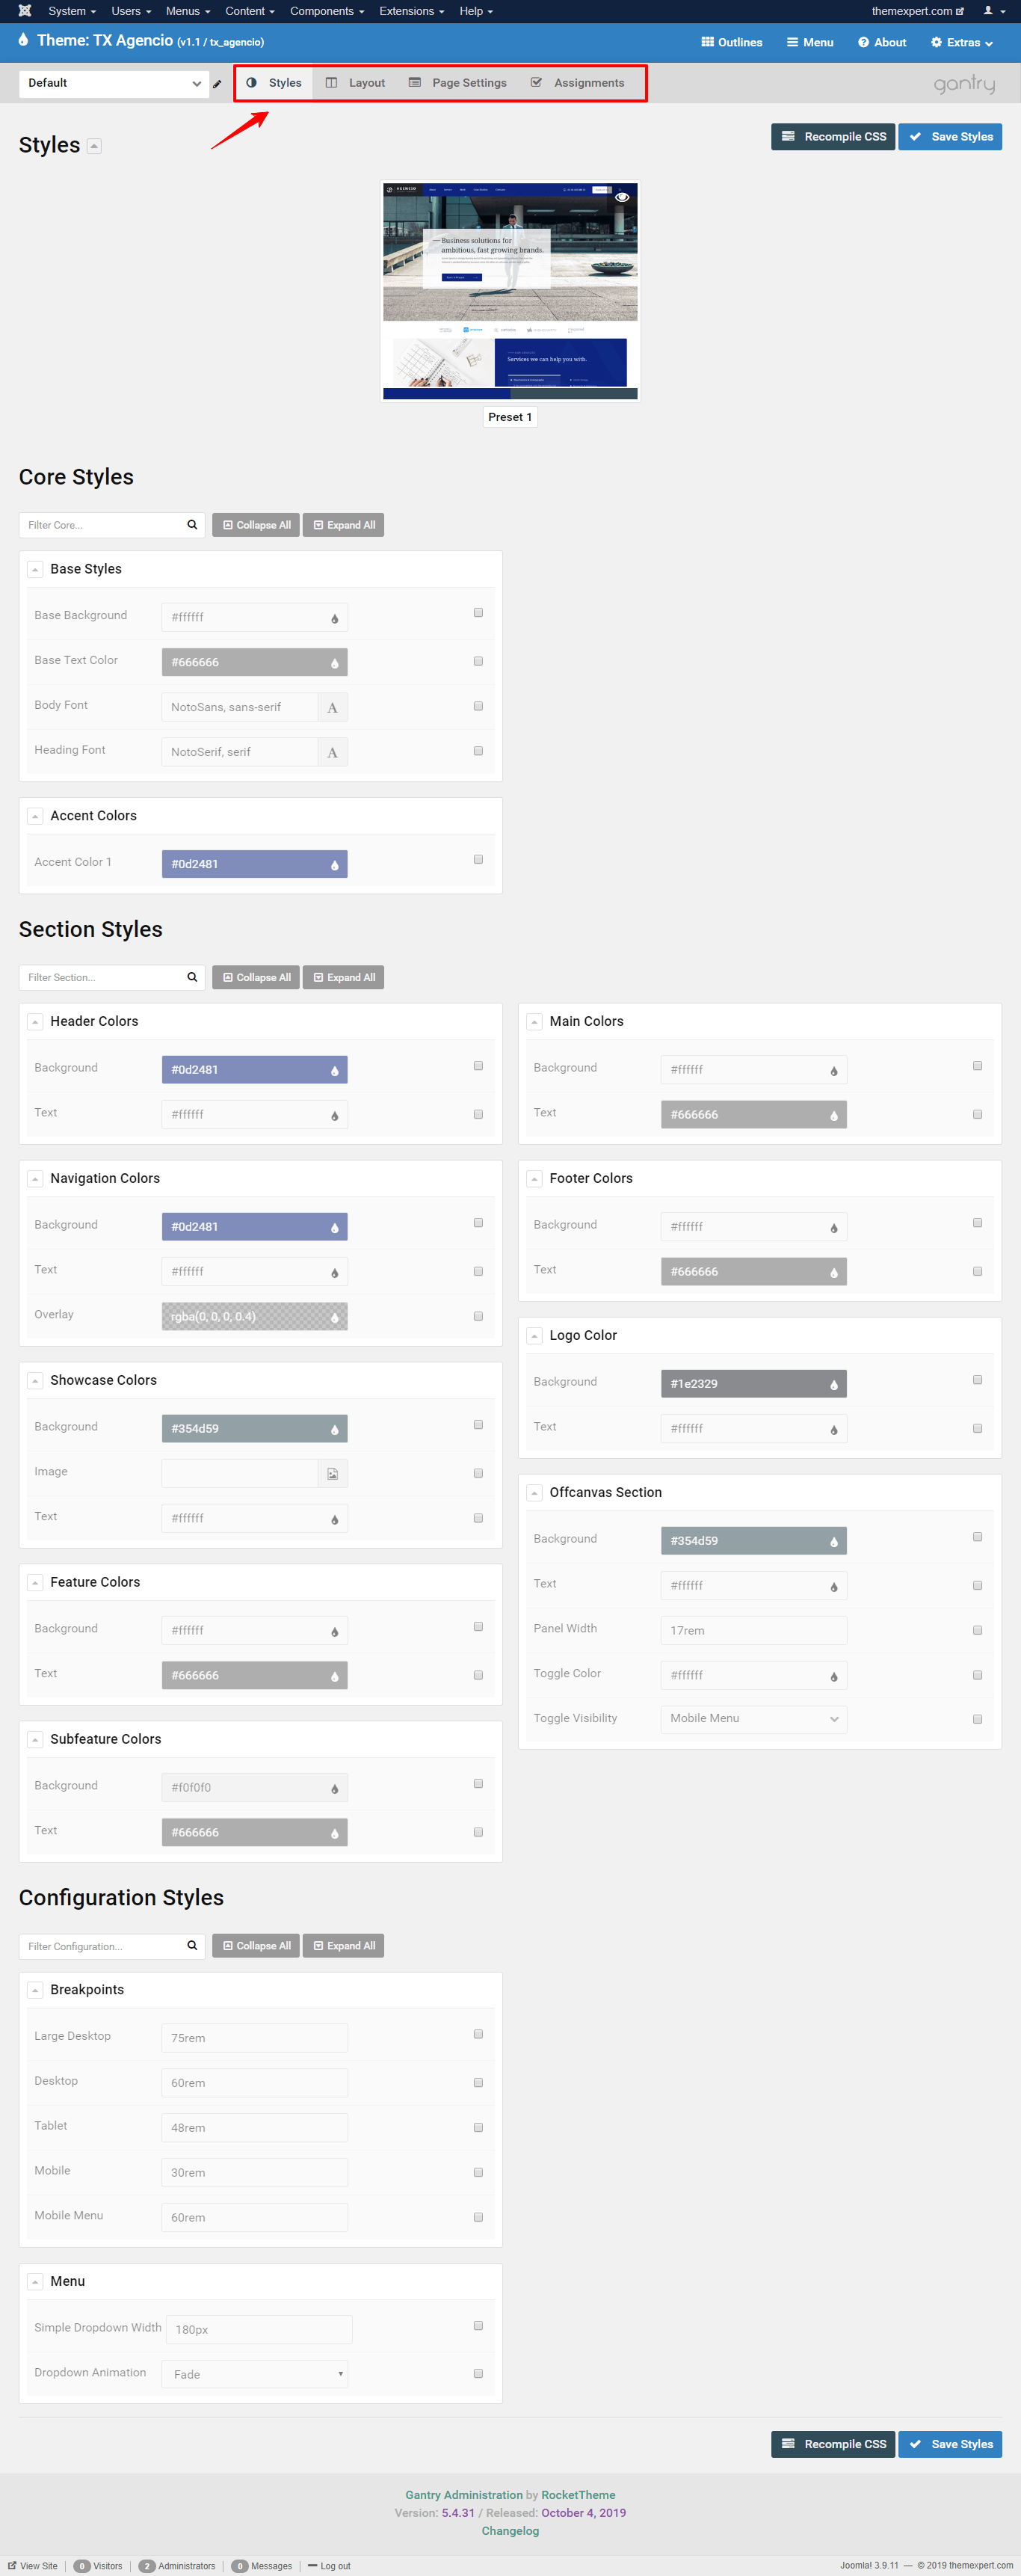
To customize your template go to Extension > Templates > Style then click on your default template.
You can now customize each section as you want. Remember a well designed and eye-catching website always helps to grab your user attention and attraction.
Add Modules
To build a page from scratch, it's best to start by enabling the preview mode for module positions. This way, you can see on where exactly on your page you can add modules and the names of the positions.
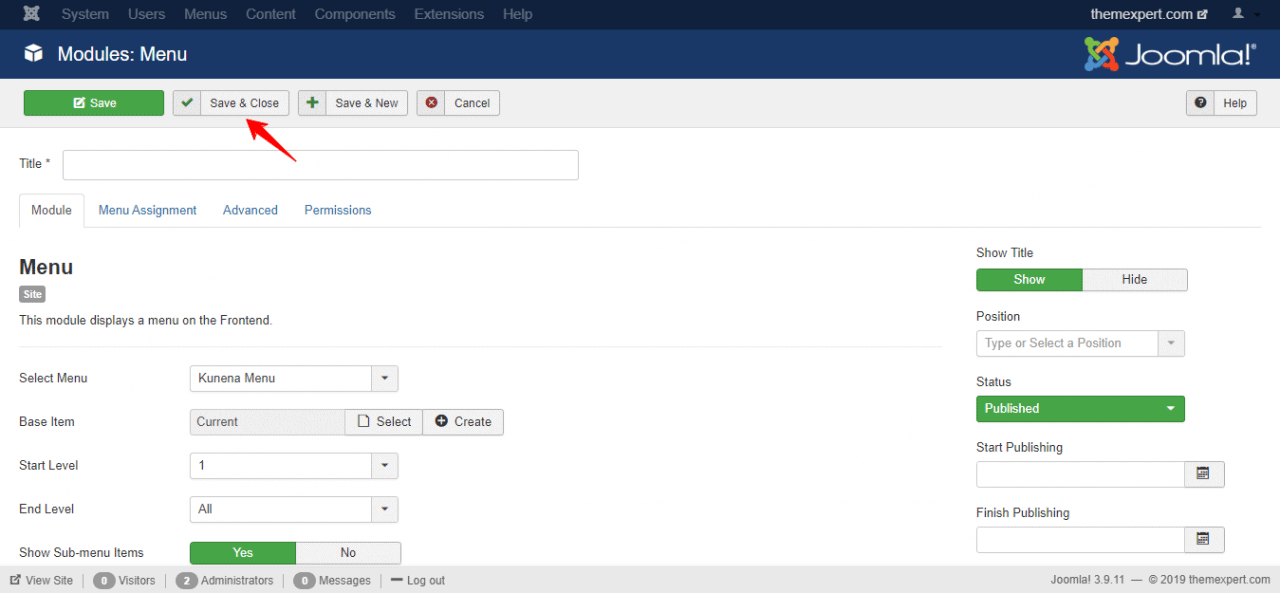
Add ?tp=1 after your preview URL, then you will know all the positions where you can add Modules. Now go to Extensions > Module, click New. An interface like the following image will pop up.
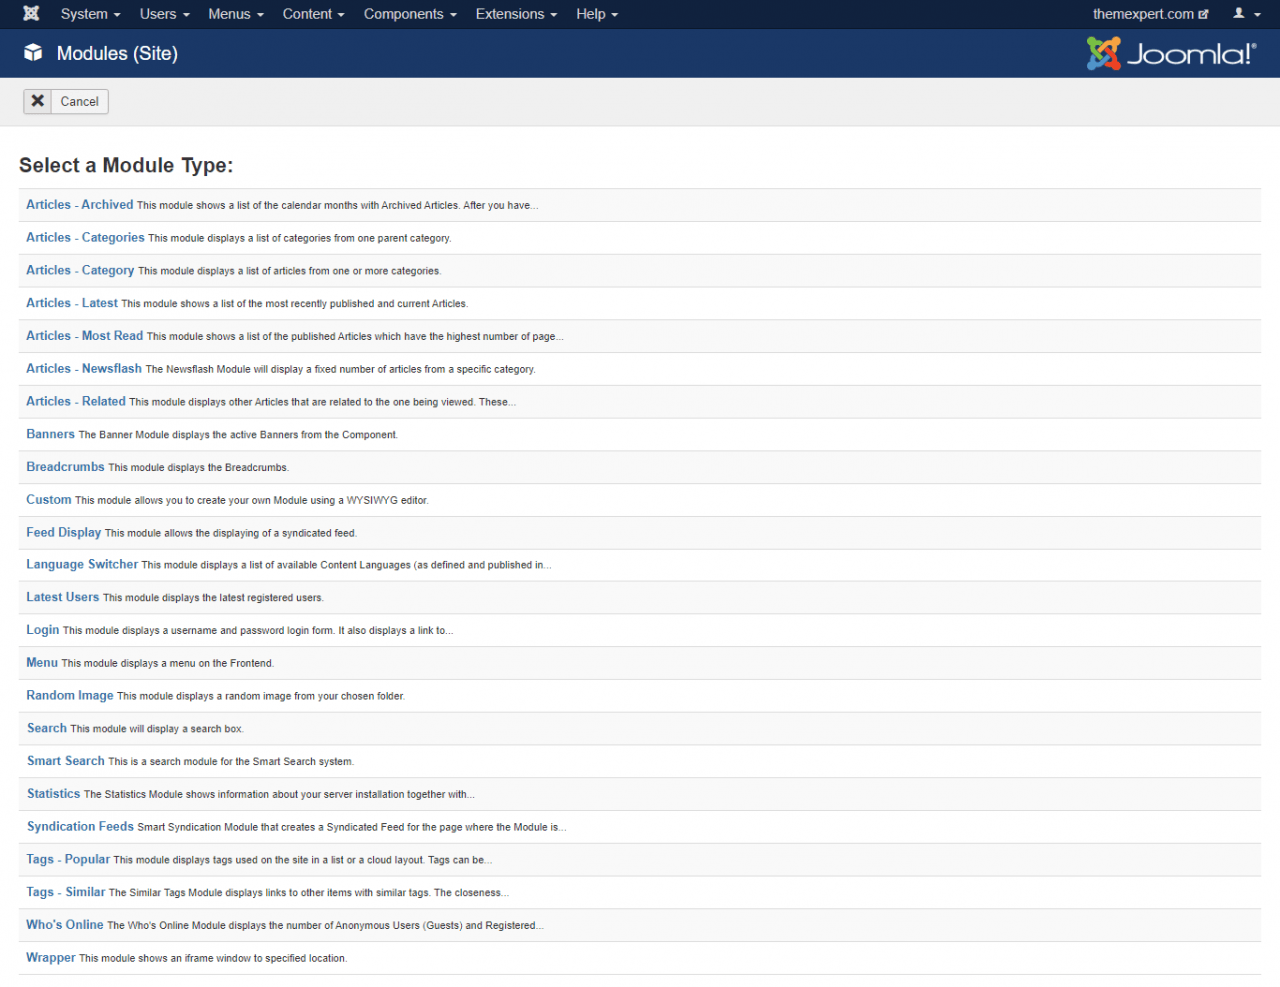
Select any of the options to display on your website. Add title, select position and finally click on "save & close".
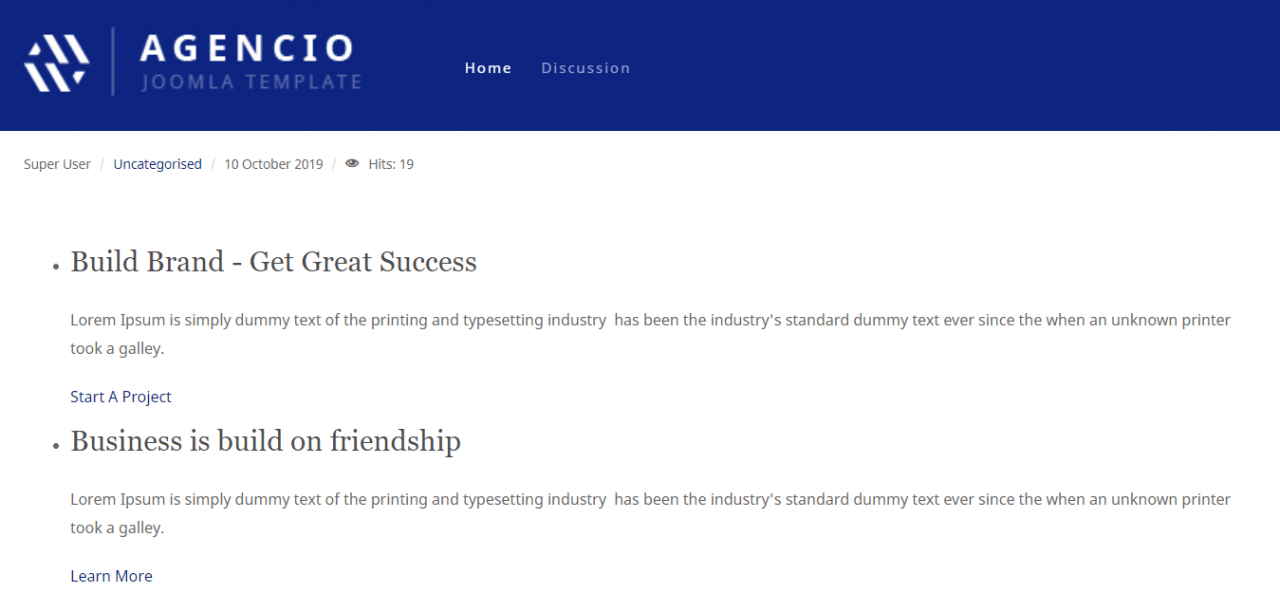
Check your preview to see the result.
This is how you can add new page, content, module, banner, image, text, and other things that you need to appear on your website.
Step 07: Add Extensions
Extensions are like coded shortcuts that add extra functionality to your website. It can help you track the health of your website also add more value while creating a website for small business. Joomla has a central extensions database at extensions.joomla.org. There are thousands of extensions to choose from.
You will be able to install the Extensions directly from the directory. Then go to Extensions tab on the Control Panel to access what you downloaded.
You can also install your desired Extension by following the same way like uploading template we have already described before in Step 5.
Step 08: Preview
As you develop the website, you can preview your development process. This will show how your design appears to other web users.
To access a preview, do the following:
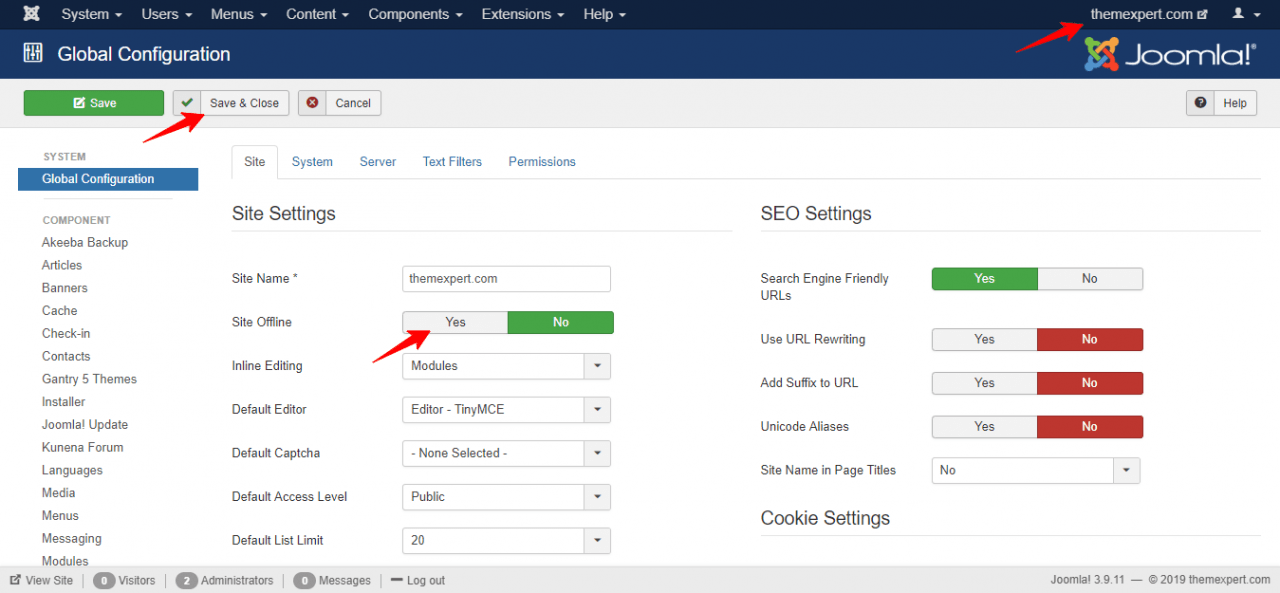
- Go to Site>Global Configuration to access the "backend" of your website.
- Say "yes" to set the site offline option. Click Save.
- Click on the site name on the top right corner to access the "frontend" of your website.
Now you are ready to deploy your website.
Final Words
"How to make a small business website?"- I think you got the answer from the above information. Once your Joomla website is ready, try to share this resource with others so that it could assist them in building their website without facing any difficulties.