Skilio

Welcome to Skilio, where every moment is a masterpiece waiting to be captured. Our template is designed to showcase the artistry and expertise of photographers who excel in immortalizing personality and emotion through captivating portraits. Whether it's the joy of a wedding, the warmth of a family gathering, or the professionalism of corporate events, Skilio offers detailed descriptions of packages tailored to every occasion. Dive into a world where talent meets professionalism, where every click of the camera tells a story, and where satisfaction is guaranteed, as echoed by our glowing reviews and testimonials from delighted clients. Explore Skilio and unlock the potential to transform moments into timeless memories.
Download packages
Login to your account on ThemeXpert.com. Go to the Downloads > Joomla Templates > Skilio from Dashboard.
The Skilio template download section includes the following files:
- Skilio Quickstart Package
- Skilio Template
- Quix Presets
The Quix panel includes the following files:
- Quix 4 (J4 & J5)
- Quix Installer (Recommended)
Quickstart (Demo) Installation
To set up the quickstart, you need to follow the same steps as installing Joomla 5. You can't add the quickstart to an existing Joomla 5 site through the extension manager because it comes with all the core files of Joomla 5. So, just install the quickstart package as you would install Joomla 5. Follow the guide of quickstart installation.
Manual Installation
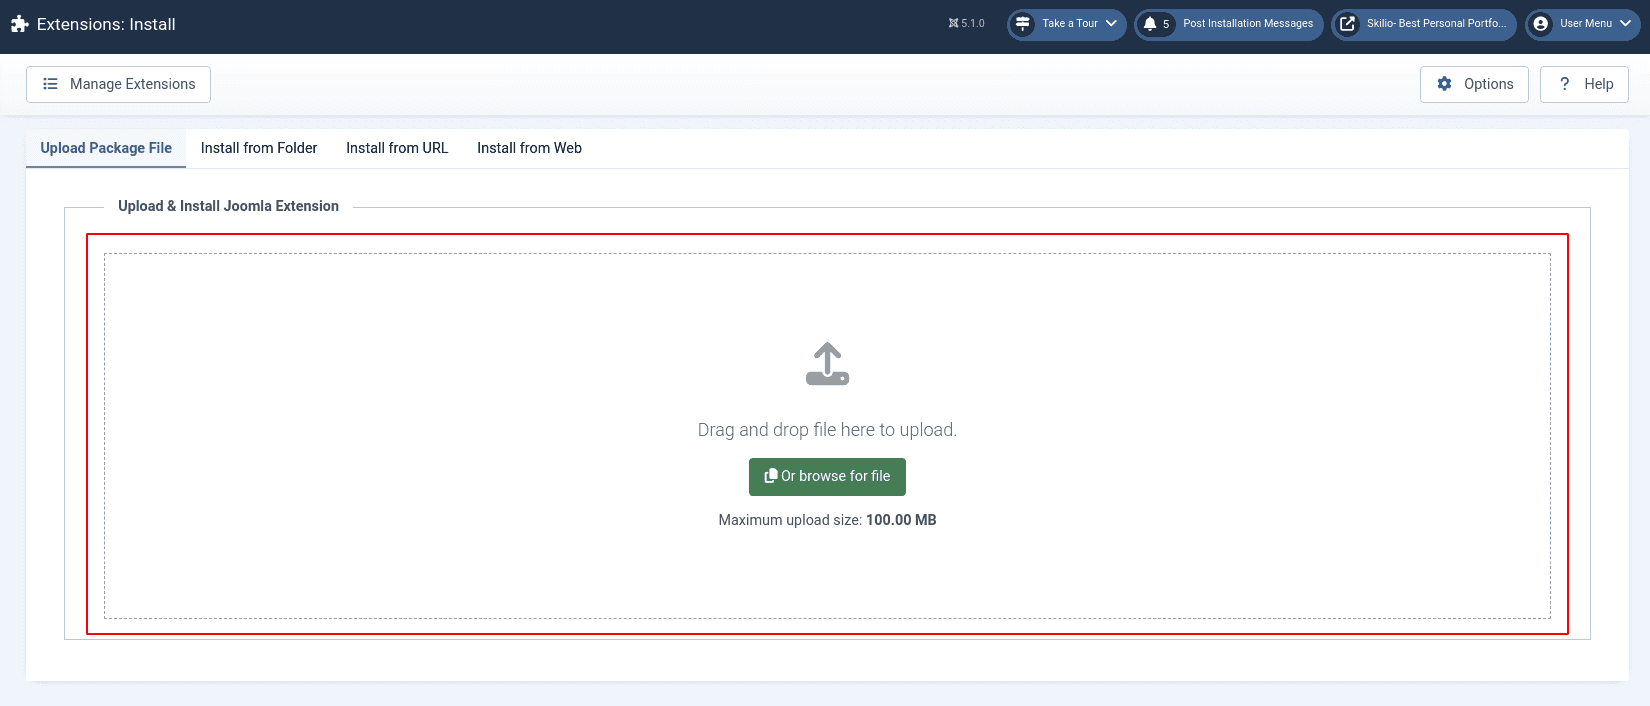
Install the Skilio template and Quix page builder (pro) on your existing Joomla website.Go to Extensions > Upload Package Files from the Install section in the site administrator panel System Dashboard. Drag and Drop or Browse the following files:
- Skilio Template
- Quix Pro
Skilio Template Installation
The Skilio template comes with the Helix Ultimate framework pre-installed, which means that you don't have to install the framework separately. The framework is included in the Skilio Template .zip file, which makes the process much simpler.
Once you have installed the template, go to the Plugin Manager in the Manage section of the System Dashboard. In the search field, type "Helix Ultimate" and either press Enter or click the Search icon. This will display the System-Helix Ultimate Framework plugin. Check the box next to it and click the Enable button to activate the plugin.

Quix Pro Installation
There are two versions of the Quix files available for installation. The first version is Quix 4, which includes the complete package of the Quix page builder. This version is named pkg_quix_pro.zip and has a size of 11 MB. However, Joomla sets a file upload limit of 2MB for installations, which can be challenging for users who lack technical expertise to increase the limit via the server or cPanel.
To overcome this limitation, we strongly recommend that users install the Quix installer file instead. The Quix installer's file name is com_iquix-1.7.0.zip, and it's only 48KB in size. Installing the Quix page builder using the Quix installer involves only 5 simple steps.
To make the installation process easier for you, we highly recommend that you follow the detailed instructions provided here:
(https://www.themexpert.com/docs/quix-builder/basics/installation).
Import Quix Presets
After downloading the quix-presets.zip file, begin by extracting its contents. Next, navigate to the Joomla site administrator panel. On the left-hand side, locate and click on "Quix - Page Builder."
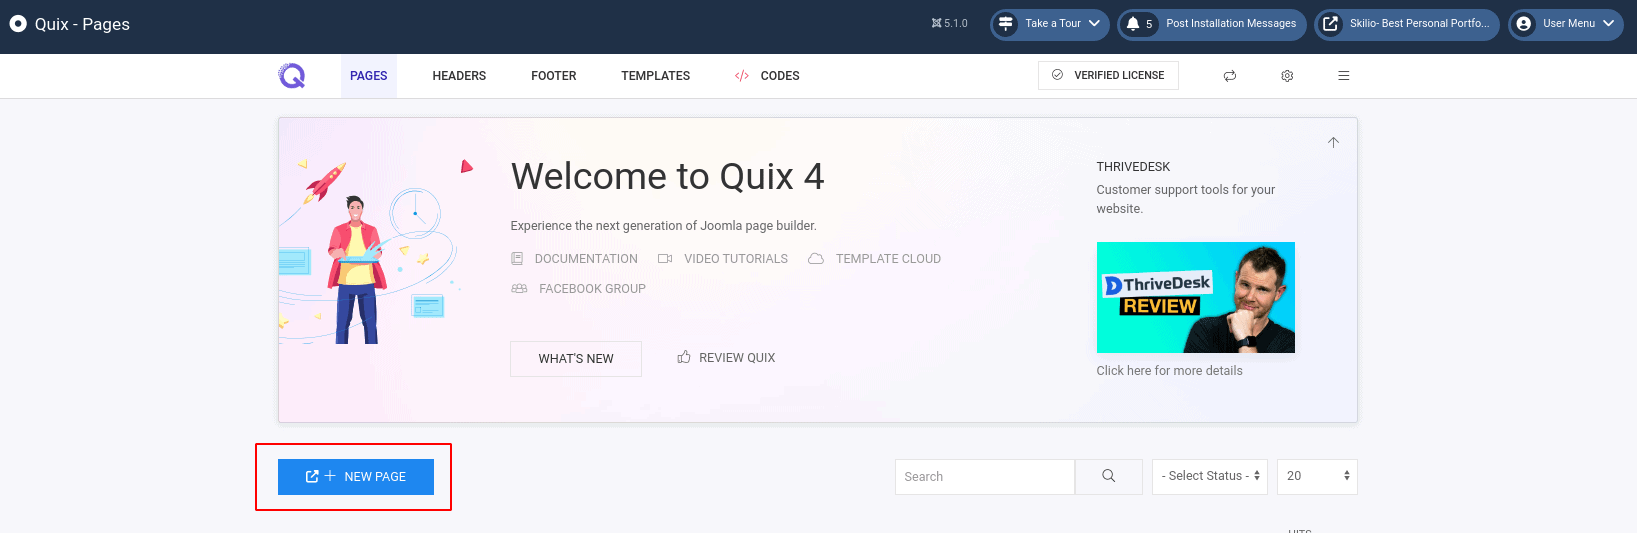
Click to display the Quix Panel. Next, click on the "New Page" button and enter the desired page name into the field. For instance, let's name it "Home." Once you have created the Home page, you can access the builder.
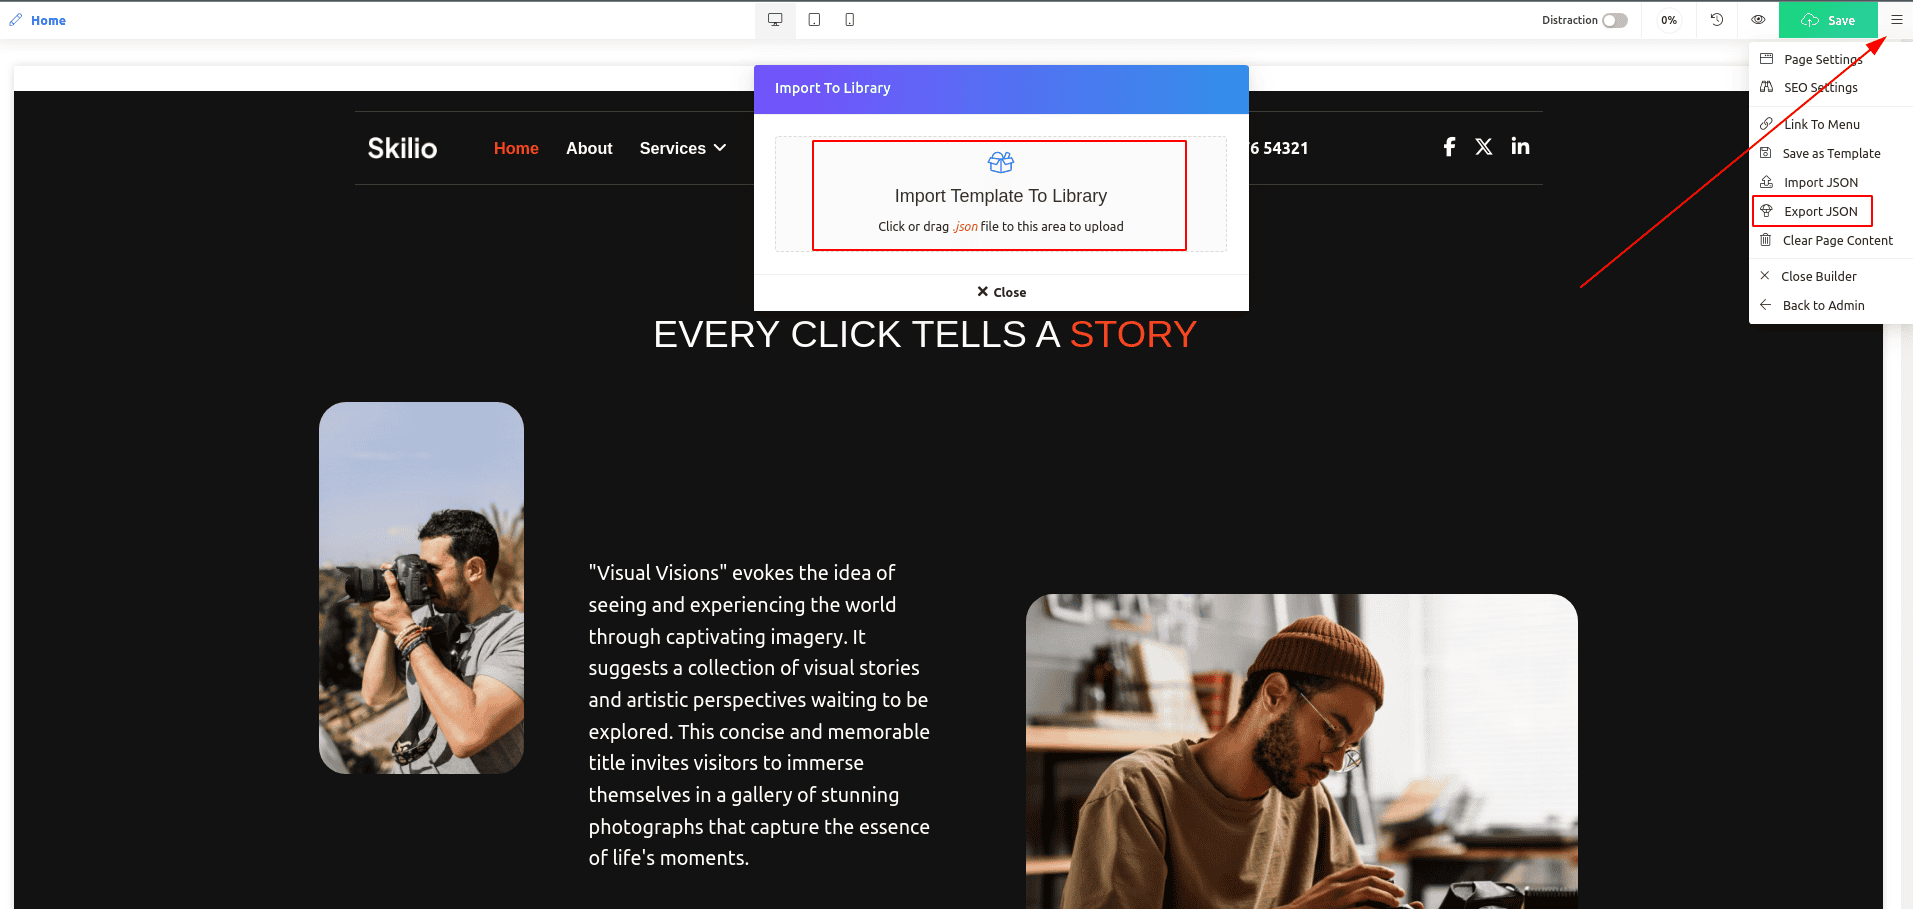
To import the Quix presets, you need to follow these detailed steps:
- Click on the "Bar" icon that is located on the right side of the top bar. This will open a dropdown menu.
- From the dropdown menu, select the "Import JSON" option.
- After selecting "Import JSON", the Import to Library panel will appear on the screen. This panel is where you will import the Quix presets.
The Skilio template Quix presets consist of seven different files: home.json, about.json, services.json, blog.json, contact.json, and footer.json, and lets talk.json. These files contain all the necessary information to create your desired website.
To import these files, you can either drag and drop each file into the Import field or click to upload them one by one.
Ensure that all files are imported before proceeding to the next step.
Once all JSON files are imported, you can proceed to open the My Templates panel by clicking on the "Add template" button located below the builder. The My Templates panel will allow you to view, edit, and use the imported Quix presets for your website.
![]()
Home Page Setup
To create a Home page layout in Quix, follow these steps:
- Click on the New Page button and enter a name for the page in the field provided. Click OK.
- Click on the Add template button and open the Quix Library panel.
- Select the My Templates tab and click on the Insert button for the Home page.
- To create and insert other pages, repeat the above steps for each page you want to create.
Once you have completed all the steps, you will have successfully created and inserted the layout for your Home page. The pages are:
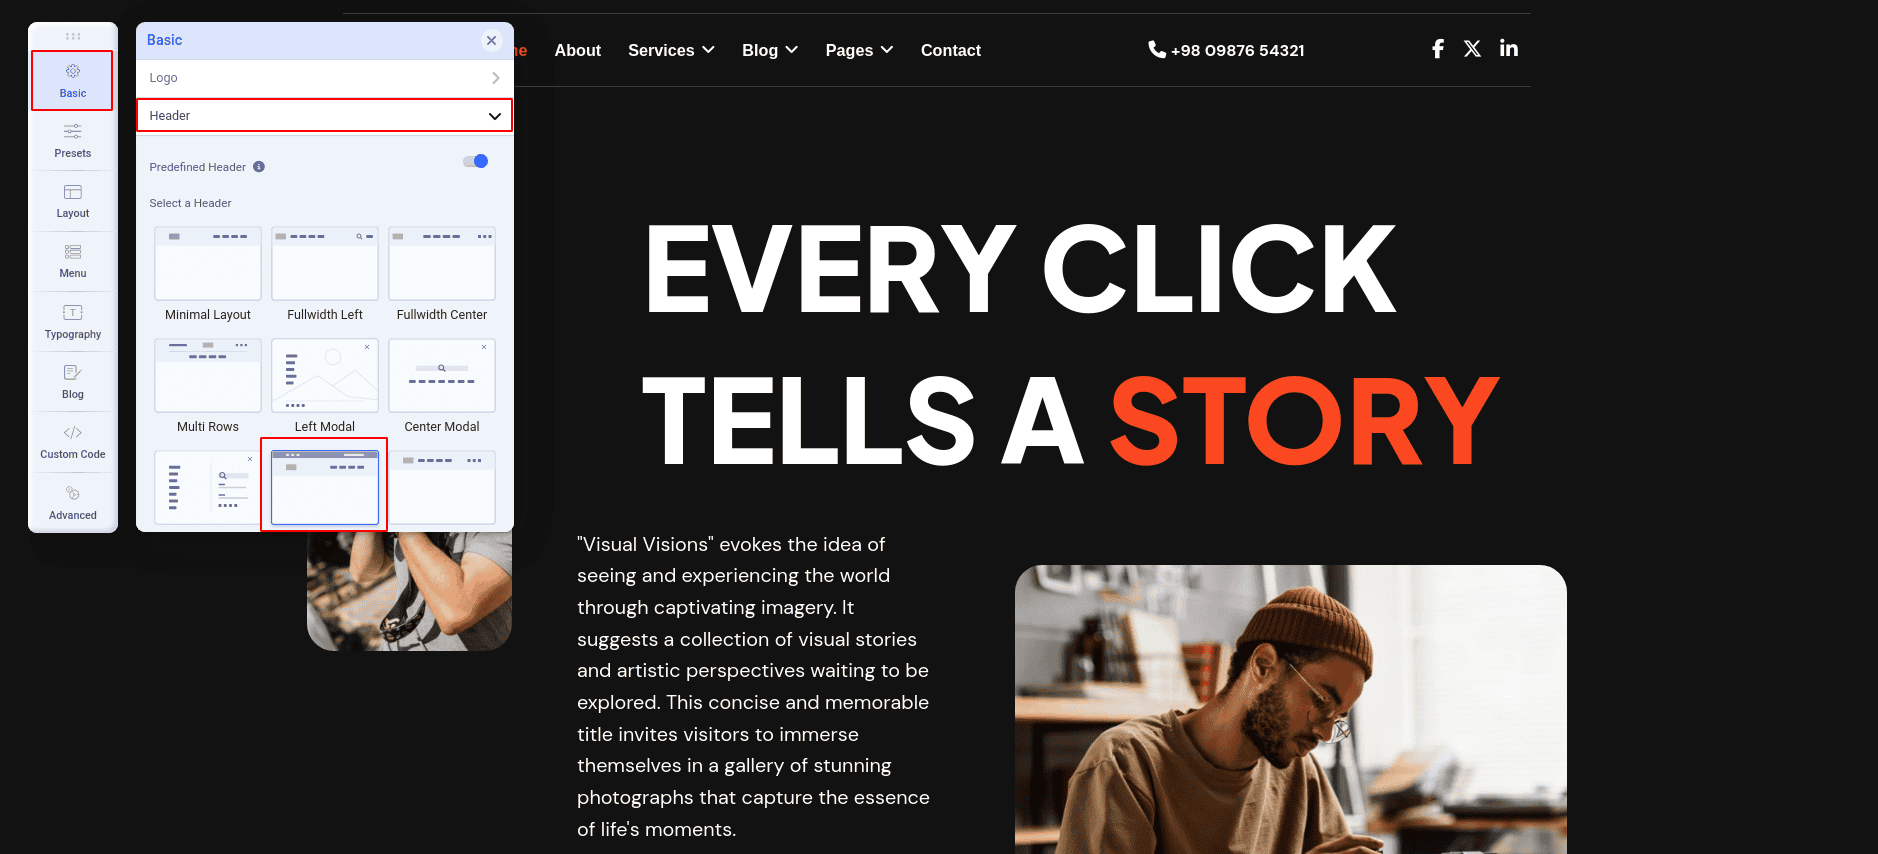
Header Setup
Now, let's add the header. Our header will resemble the following design.

To access the templates panel, navigate to Site Template Styles under Templates in the System Dashboard. Select Tx Skilio, then click Template Options.
Add Logo and Favicon
We must upload our site's logo and favicon in the Logo panel, located within the Basic settings.
![]()
Add Main Menu
A website's menu is a vital component as it guides visitors to the various pages on your site. Therefore, it is imperative to have an easily accessible menu. Let's create the main menu now so that users can find what they're looking for quickly and easily. To do this, navigate to the Menu Builder panel and locate the Menu settings. From the dropdown menu labeled "Select Menu Type," pick the main menu you want to display. Typically, this menu serves as the primary navigation system on your website and should be structured in a way that is intuitive and user-friendly.

Offcanvas Menu
In the Menu settings, you can find the Off Canvas panel which includes options to manage the off-canvas menu. These options allow you to display the website's menu on smaller devices like phones and tablets. There are three main settings for the off-canvas menu.
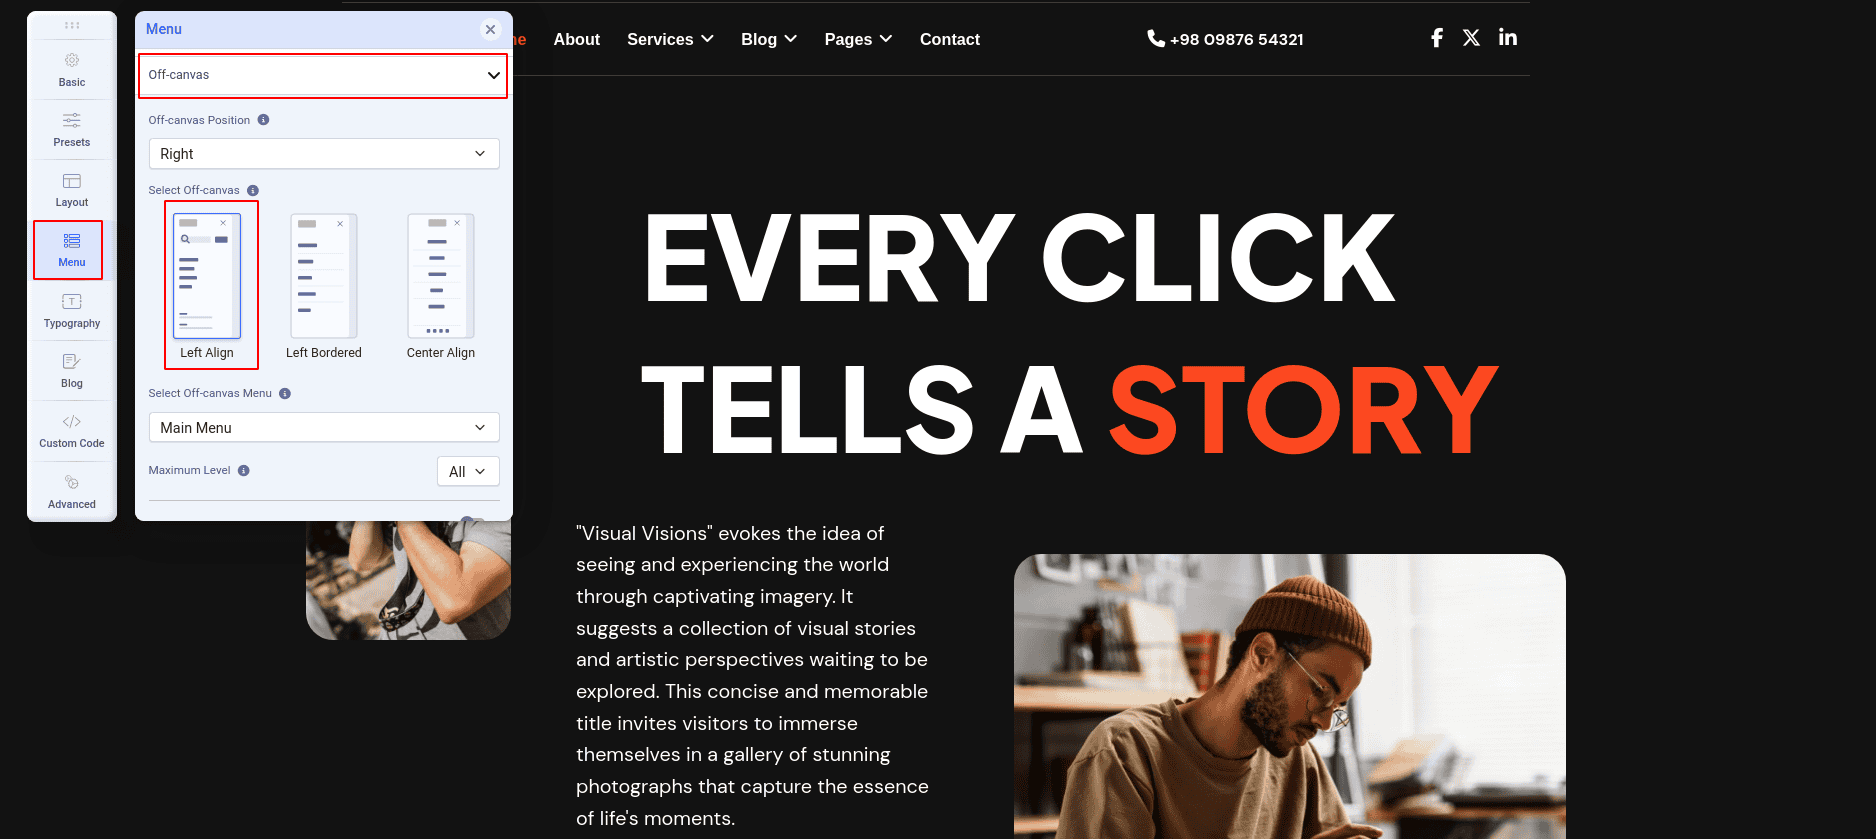
When setting up a mobile menu, you can choose where to place the menu icon on the screen. You have two options: Left or Right. In the screenshot below, you can see that we have selected the Right option, which positions the menu icon on the right side of the screen.

Select Off-canvas: There are three styles of the off-canvas menu. The styles are: Left align, Left Bordered, Center Align. If you select Left align style, the mobile menu will get the style.

Select Off-canvas Menu: In the small device will show the menu which you selected from the Select Off-canvas Menu drop-down.
Extra asset: How to Change Navigation Menu on Selected Page
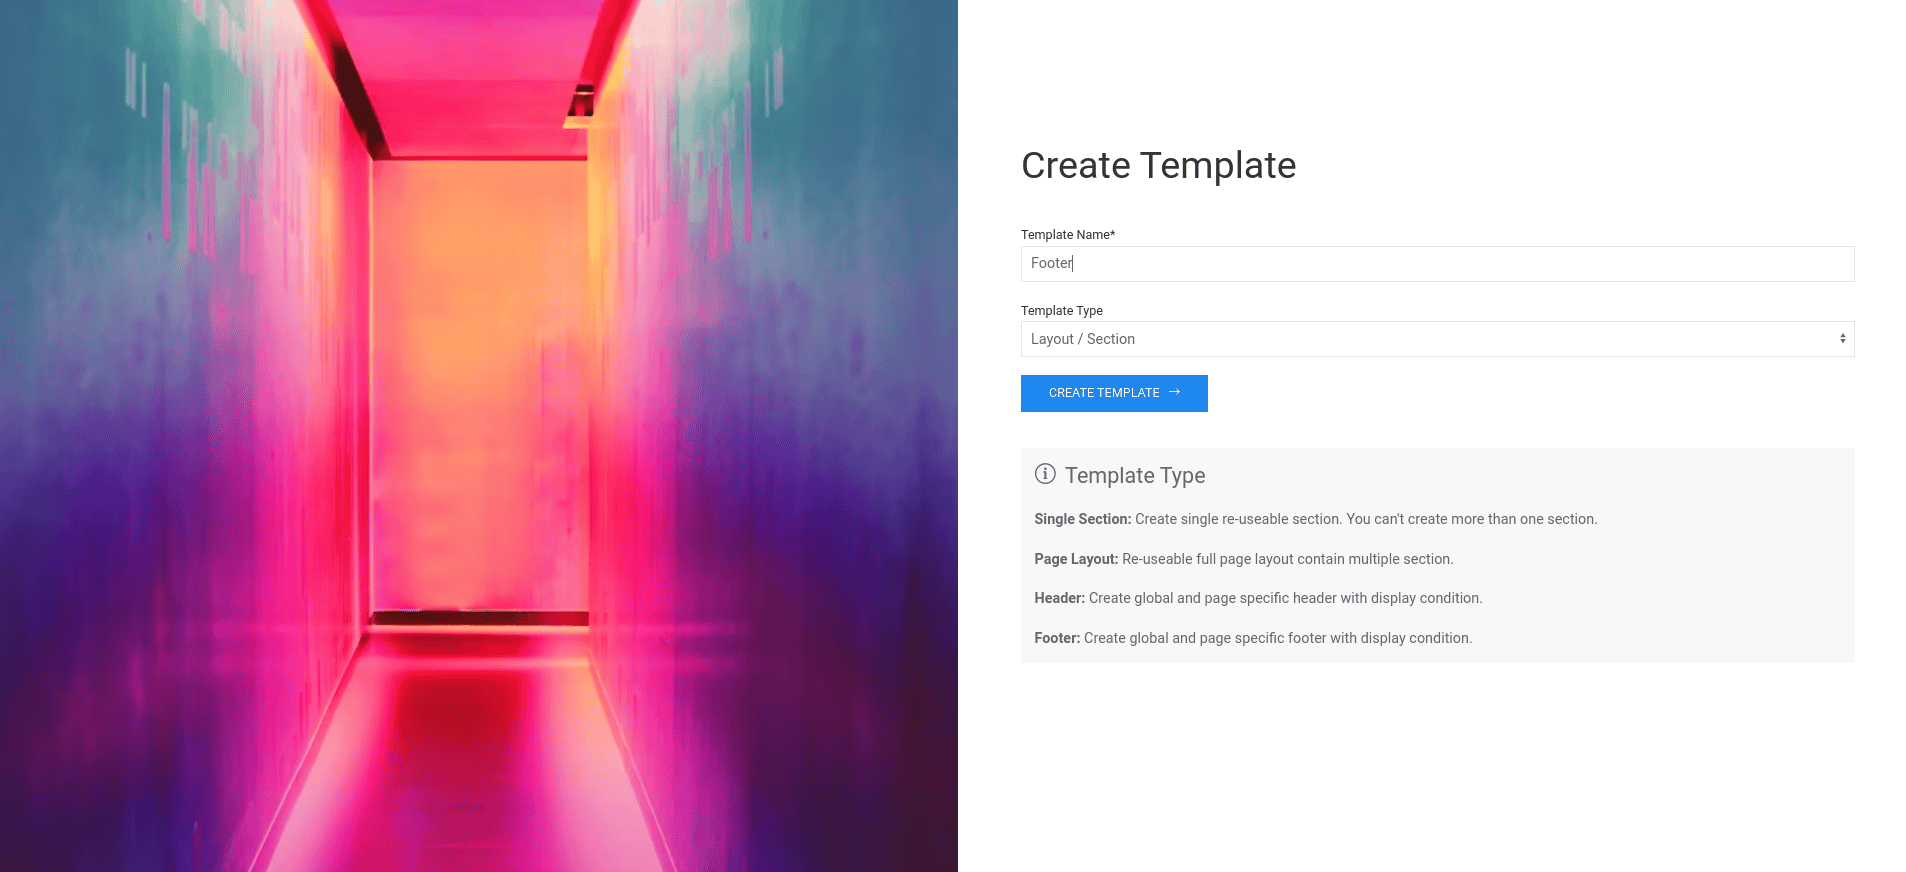
Footer Setup
We will setup the footer now. Our footer looks like this.

To craft a footer layout using the Quix page builder, adhere to the following steps:
- Access Quix by selecting "Quix Page Builder" from the left side of the site administrator panel.
- Within Quix, navigate to the "Footer" panel.
- Click on the "New Template" button.
- Input "Footer" in the Template Name field.
- From the Template Type dropdown menu, opt for "Footer".
- Ensure to save your settings by clicking on the appropriate options.
Once created the Footer, click on the Add Template button. Now insert the footer.
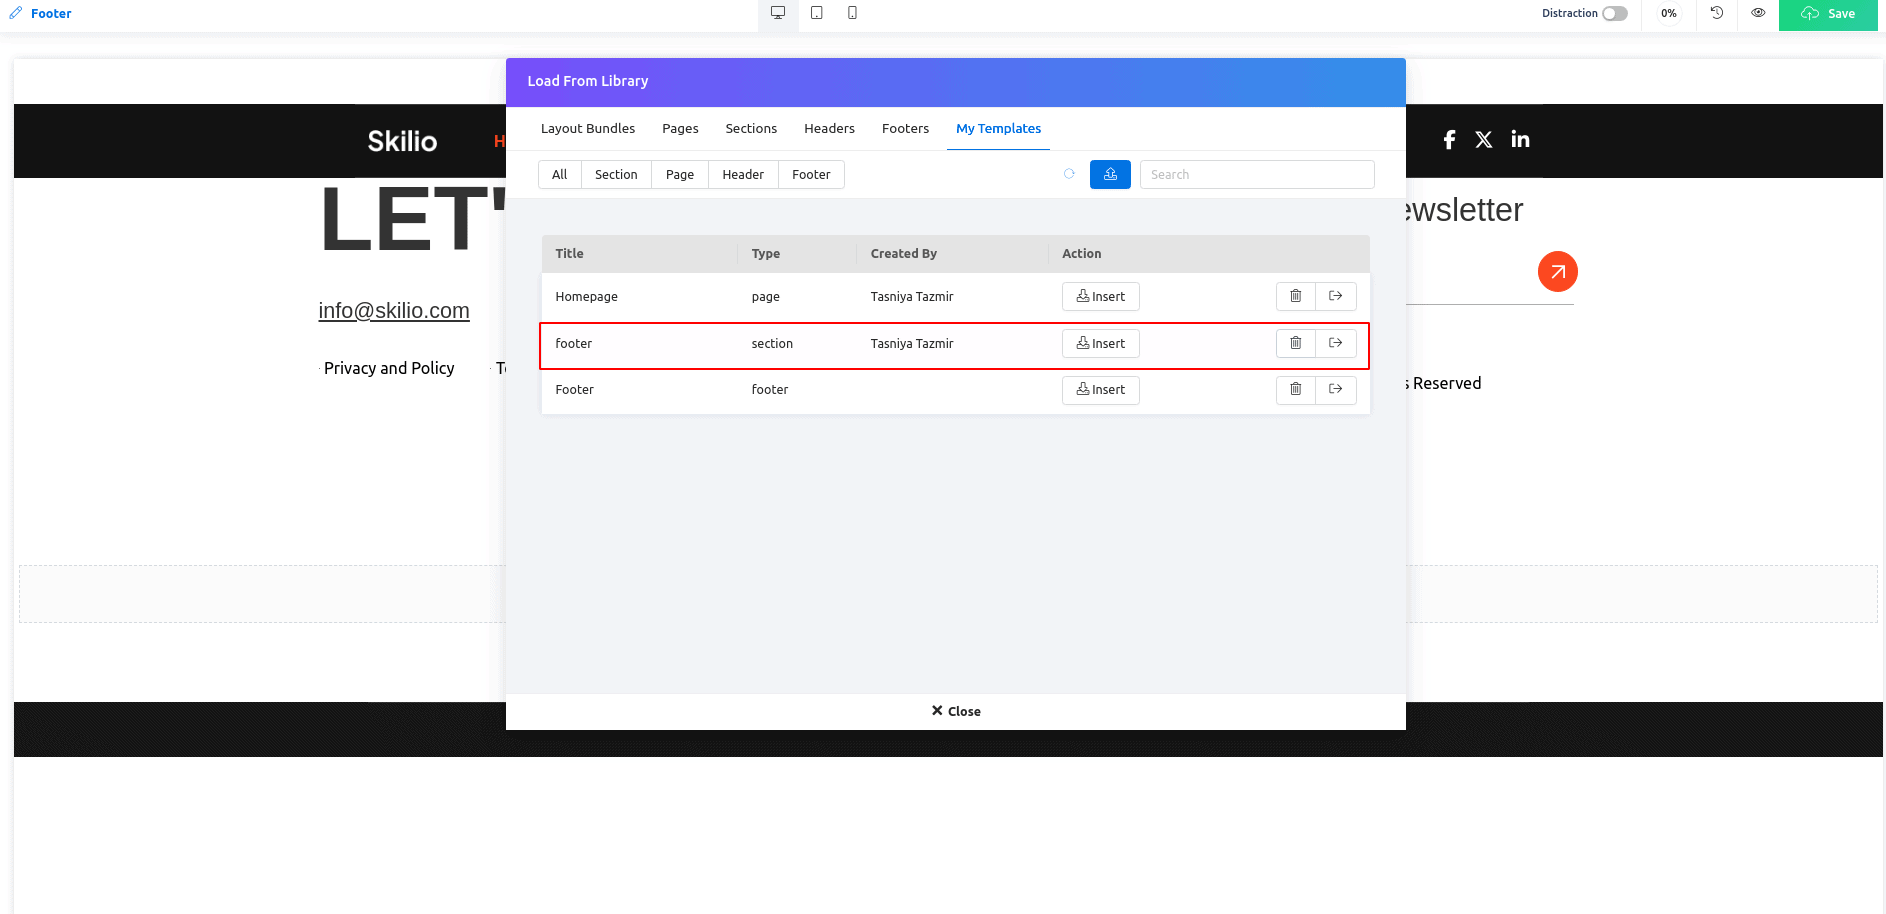
Once you've inserted the footer, click on the "Save" button. This action will prompt the Publish Settings to appear. Click on the "Add Condition" button, where you'll encounter two options: "Include" and "Default - Entire Site," with the latter being selected by default.
Selecting "Include" will position the footer in the specified footer area on your site. Alternatively, opting for "Default - Entire Site" will ensure the footer is displayed across all menu items you select.

Activate Quix License
To unlock the complete potential of Quix and utilize all its features, you must activate the license. Below is a step-by-step guide on how to activate the license: (https://www.themexpert.com/docs/quix-builder/how-to-activate-quix-4-license).
Upgrade Instruction
Take a full backup
It is advisable to create a comprehensive backup before initiating any upgrades. This precautionary measure minimizes the risk of data loss in case of any unforeseen issues. In the event of a problem, having backup files enables you to restore your data, ensuring everything remains secure and safeguarded.

Grow rapidly with our Joomla SEO service done by the veterans
With over 12 years of business and a vast array of Joomla templates and extensions, we know Joomla SEO better than anyone you could possiblly hire.
Improve my ranking