Whether your business is large, or bootstrapping with your startup, naturally you want to reach your customer applying all your marketing strategies. But today's customers have been prudent enough to decode your marketing traps. Now a days, they are seldom got allured to click on your online advertisement and even they don’t believe in product ratings. But don’t worry, people still believe in quality contents. A statistic shows 57% of companies with a blog have acquired a customer from their blog. If you want to boost your website conversion, you should include it right away.
Adding a blog in a website is pretty easy, but each CMS follows different ways. My today’s job is to show you how to add blog in a Joomla powered website. There are couple of Joomla blogging component and extensions are available online, some are free and some are premium. I have chosen K2. K2 is powerful, Free, and choice of millions of Joomla webmasters as a content extension.
For quick demonstration, I have selected Bolt template from ThemeXpert template directory. Bolt is responsive supported Joomla 2.5 to Joomla 3.x. I can assume you have downloaded the template, if you're new to Joomla, here is the in depth details of Joomla installation. So, lets get into details K2 blog installation.
Step 01
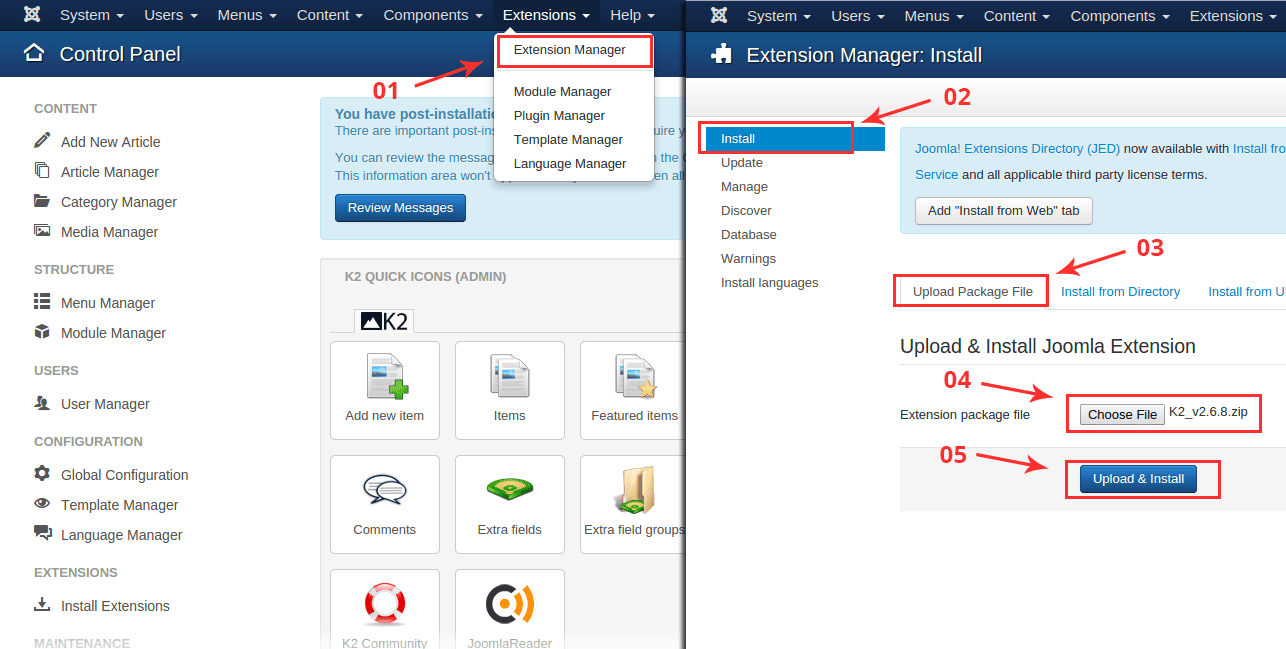
To install a blog in your Joomla website, you have to download K2 first from K2 official website. and then install K2 component via Extension > Extension Manager > Install > Upload Package File link from the Joomla Back-end.
Step 02
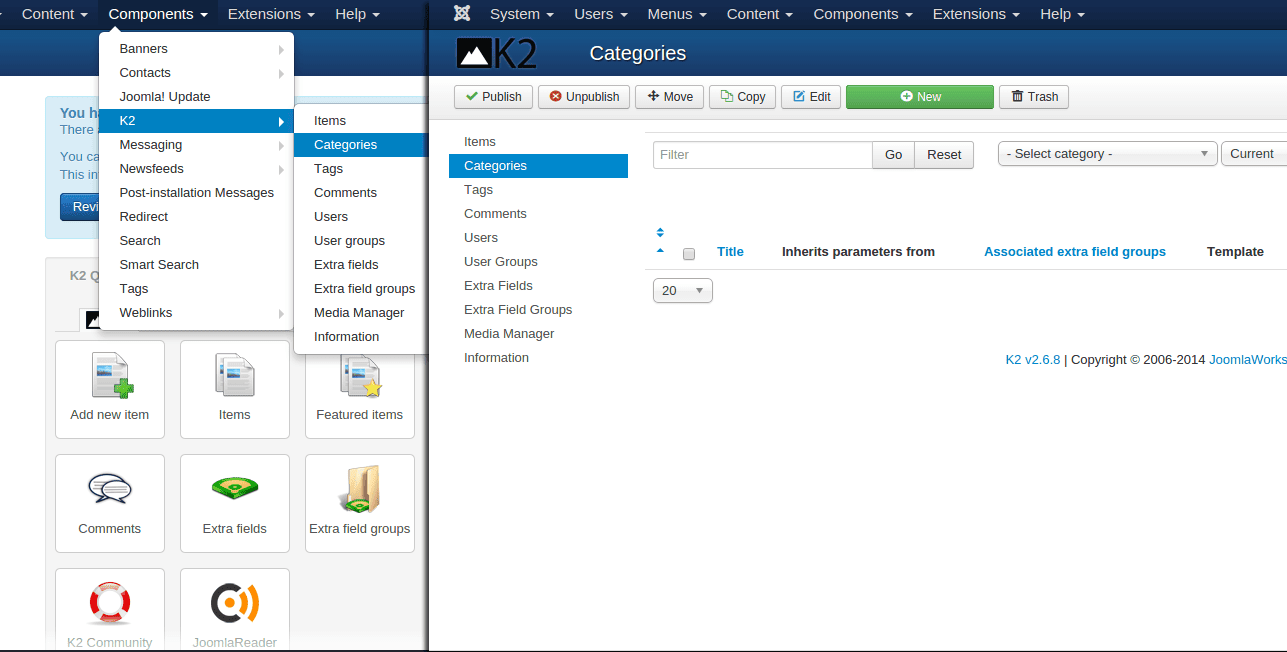
After installing K2, the first task you must do is to create a category in K2 component. Because each blog must publish under a category, if you don’t define category first, no blog post (K2 Items) can be published. To create a category, head over to the K2 category manager following Component > K2 > Categories link.
Step 03
You can see in the above image, there is no category available in the K2 category manager. To create a category, click on New button from the category menu bar. New button will open up Add Category panel with numerous option handles. In this tutorial I will not go into details explanation of these options. I will only create category with default option comes with K2. Make sure, you checked Yes for Publish and select public from Access Level drop down. Just add title of category(I titled K2 Cat) and click Save and Close.
When you click save and close, you can see your created category is available in K2 category manager. You can see in the image below, K2 Cat category has been added.
Step 04
Now we will create K2 items (blog Items). Get into K2 item manager from Component > K2 > Items link. You can see, there is no items available in K2 items manager. To create new items click on New button from top menu.
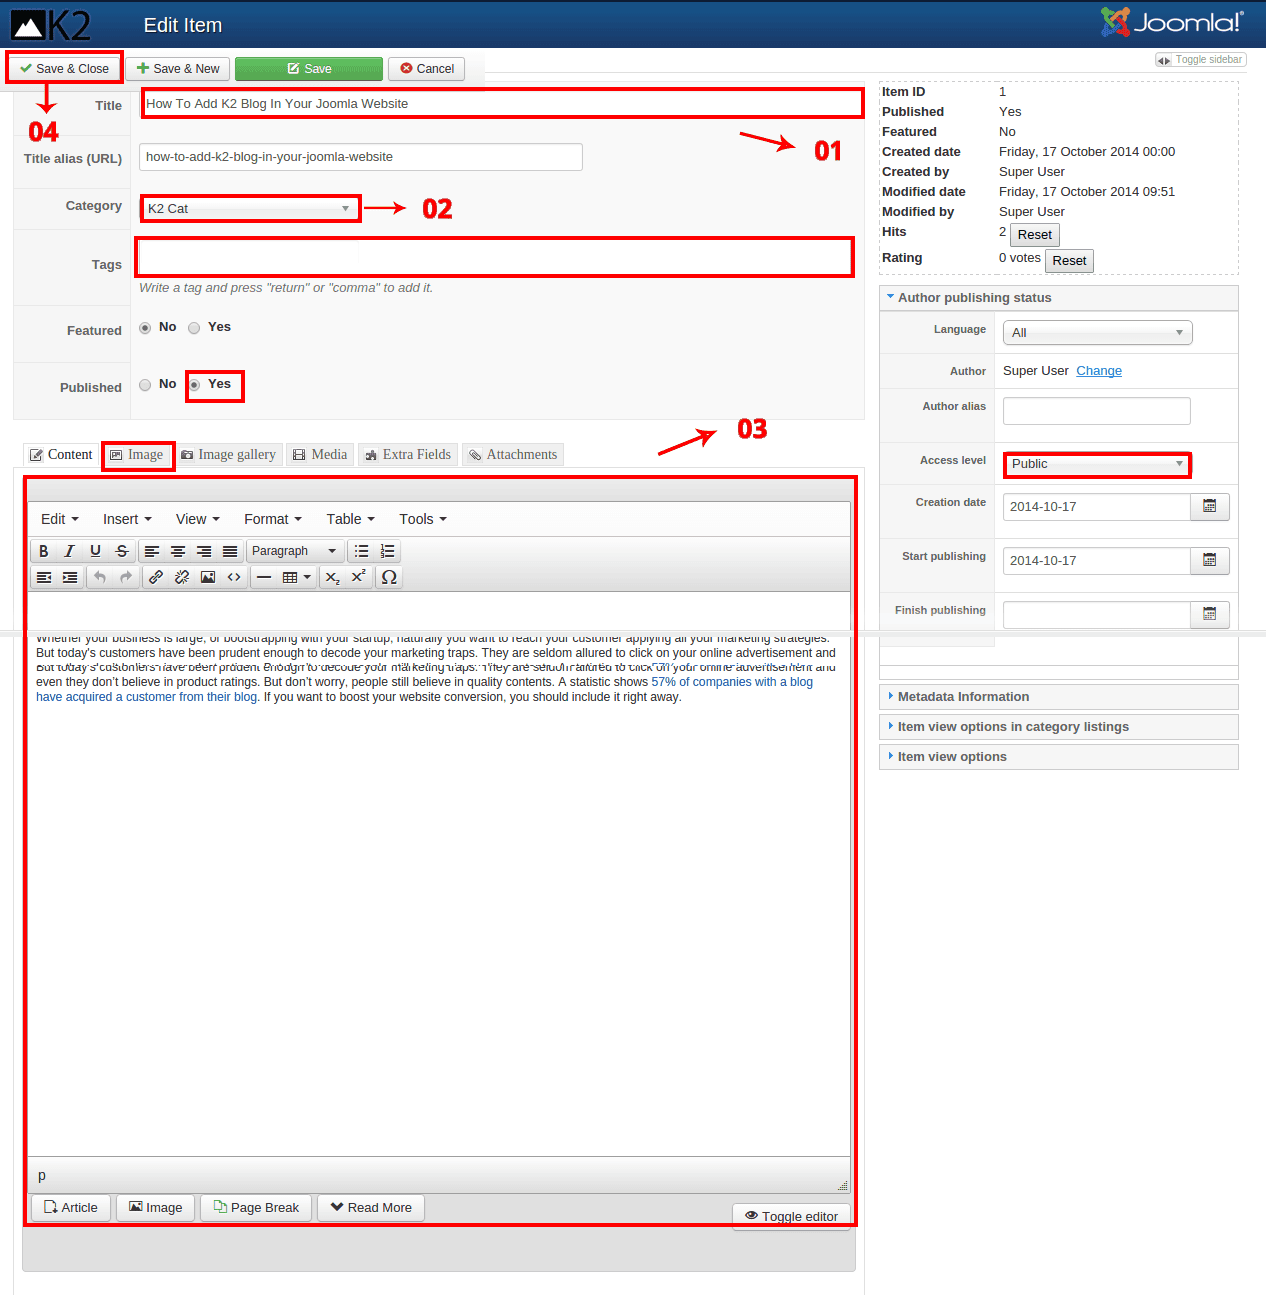
Now Add item/ blog title in Title field, select K2 Cat Category from category dropdown, add item description under content tab (You can add images from Image tab and tags from Tags Field). Here In Add Item panel various options are available but I will not go for explanation for the options. I will only create new item with default settings, but make sure you have checked the Yes for publish settings, and selected public option from Access Level drop down. When you done with all desired setting, click Save and Close.
Now in K2 Item Manager you can see an item has been added.
Step 05
We have almost done our process, but could not access our created item from front-end. To access item from front-end, we will add a new item in main menu and access K2 item under K2 Cat category. To add new item in main menu, click on Add New Menu Item via Menus > Main Menu link.
Now add Menu Title (I titled Blog), and click on Select button from Menu Item Type. Unfold K2 tab. It will open up some options, select Categories from the options and click Save and Close.
Step 06
Now head to the font-end of Bolt template, you can see a item call Blog added in the main menu. Under the Blog menu item you can see, our created K2 item has been published with full-fledged blogging system.
Suggestion For K2 Integrated Template
Conclusion
Here in this tutorials I've only shown the basic installation of K2 Blog, I haven’t gone for blog styling. But don’t worry in coming tutorials, I will show the extensive details of K2 options and its possibilities. If have any suggest for our upcoming tutorials or any question to ask. Please feel free to add in comment, we really appreciate for your response.


