One Page Website is one of the hottest and newest trend in web Design. The fascinating trend are getting popular for number of factors, but the most important is: All the necessary contents of a business can be displayed on the same page instead of using lot of pages.
We received numerous requests from our client about how to turn ZenithII joomla template as one page template. Here is our process to turn a standard Joomla template to one page template. Creating one page website in Joomla is pretty easy. To learn this process, you required basic understanding of CSS and Developer tool such as : Chrome developer tool or Firebug. In this tutorial we'll use Chrome developer tool.
If you wish, check our latest post for creating one page template -A Complete Guide to Create Marketplace Ready Onepage Joomla Template
Before digging deeper we need to know what is the key elements on any one page template:
- Sticky Header
- Scrollspy - It is for automatically updating nav targets based on scroll position.
- Smooth Scroll - It is for scrolling between section smoothly
- Some animation on scrolling ( optional )
Everything is dependent on content and i assume you already have some content on your Homepage to implement One page style. In this tutorial we’ll use our latest ZenithII template which is Free and easy to use.
Sticky Header
Creating Sticky header is very simple. You do not need to write single line of code. Just follow few steps
Step 01
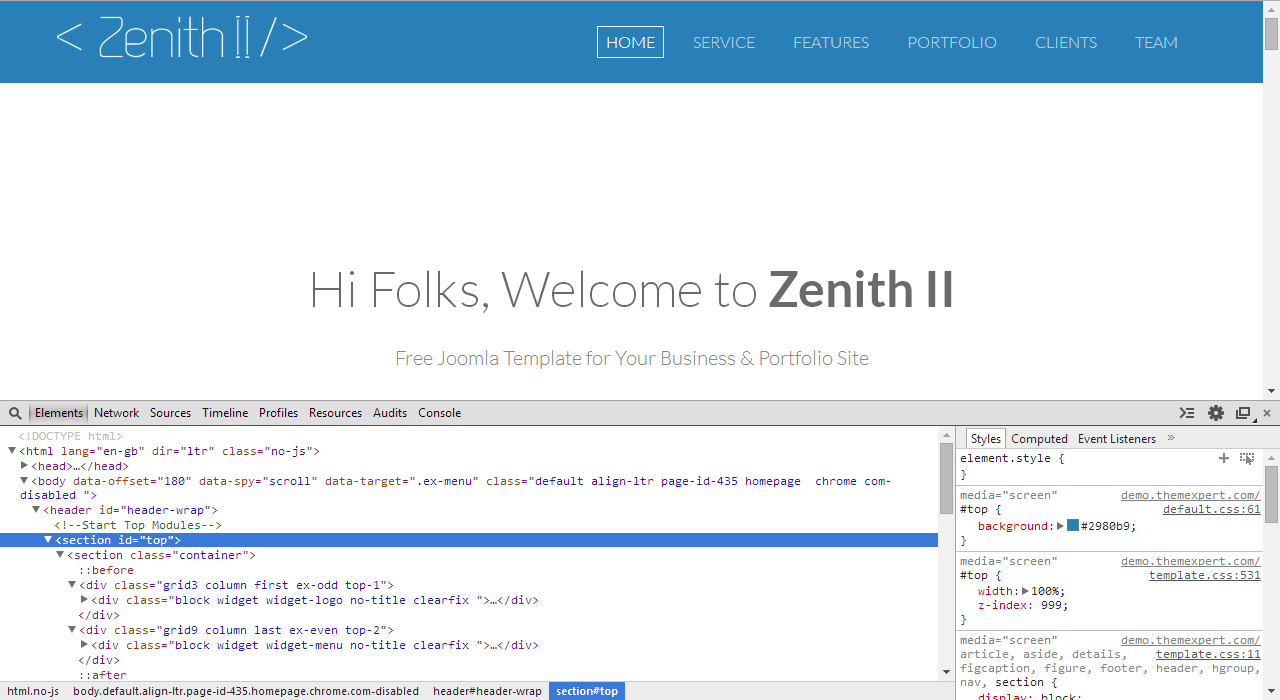
Open ZenithII from your preferred browser. Find out the header wrapper element inspecting through chrome dev tool.
Step 02
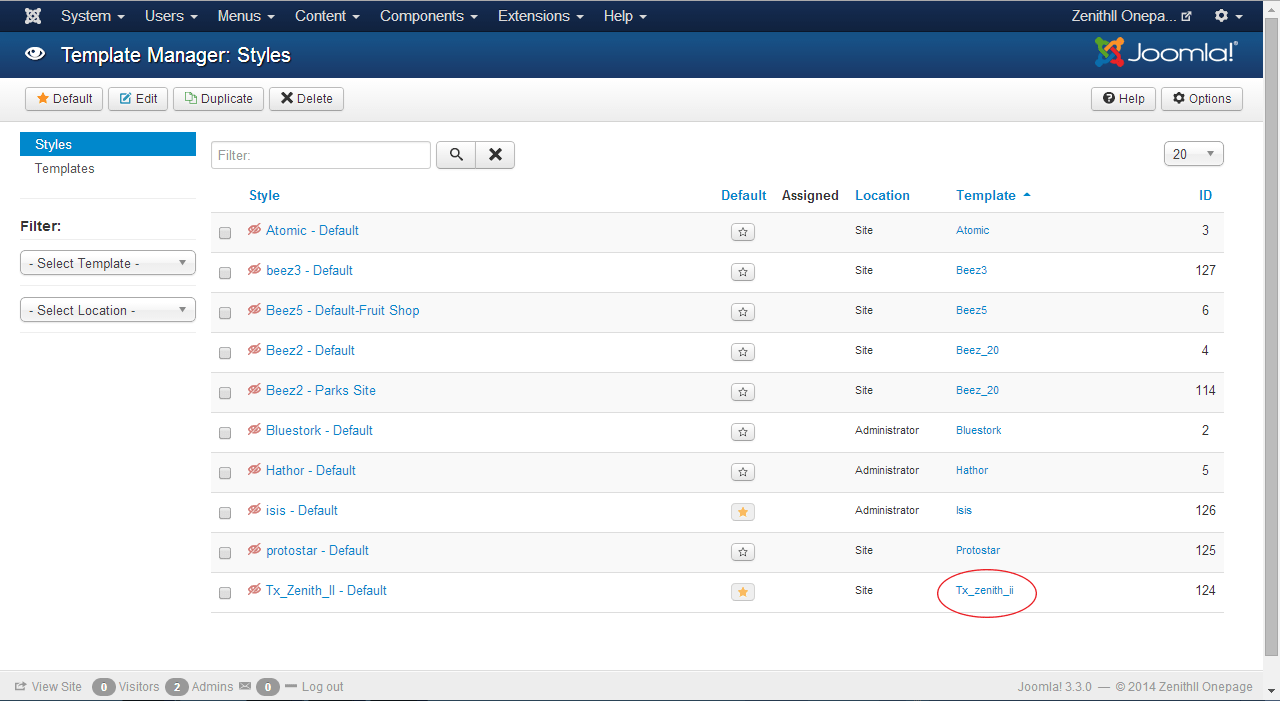
Log in to Joomla admin panel and head to the Extensions > Template Manager. Click on Tx_zenith_ii from Template column.
Step 03
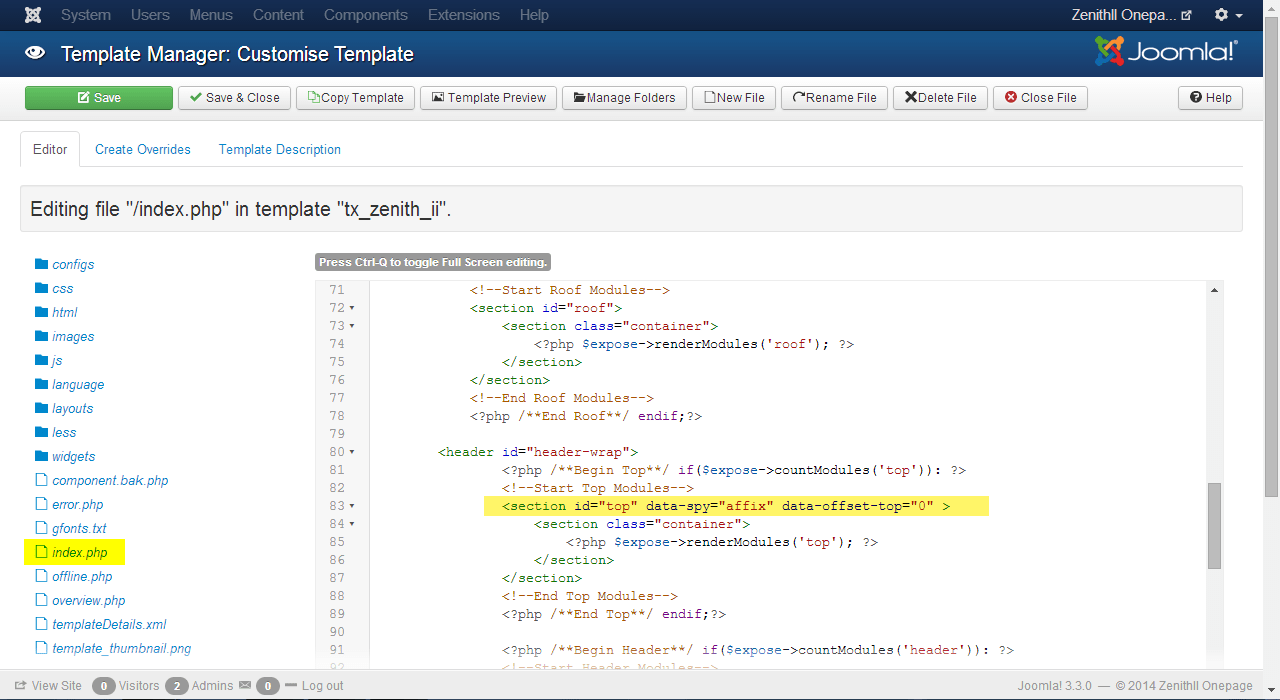
Click index.php from the Editor tab. Find our header wrapper element that we inspected in first step, paste this following code and hit Save & Close button.
data-spy="affix" data-offset-top="0"
Step 04
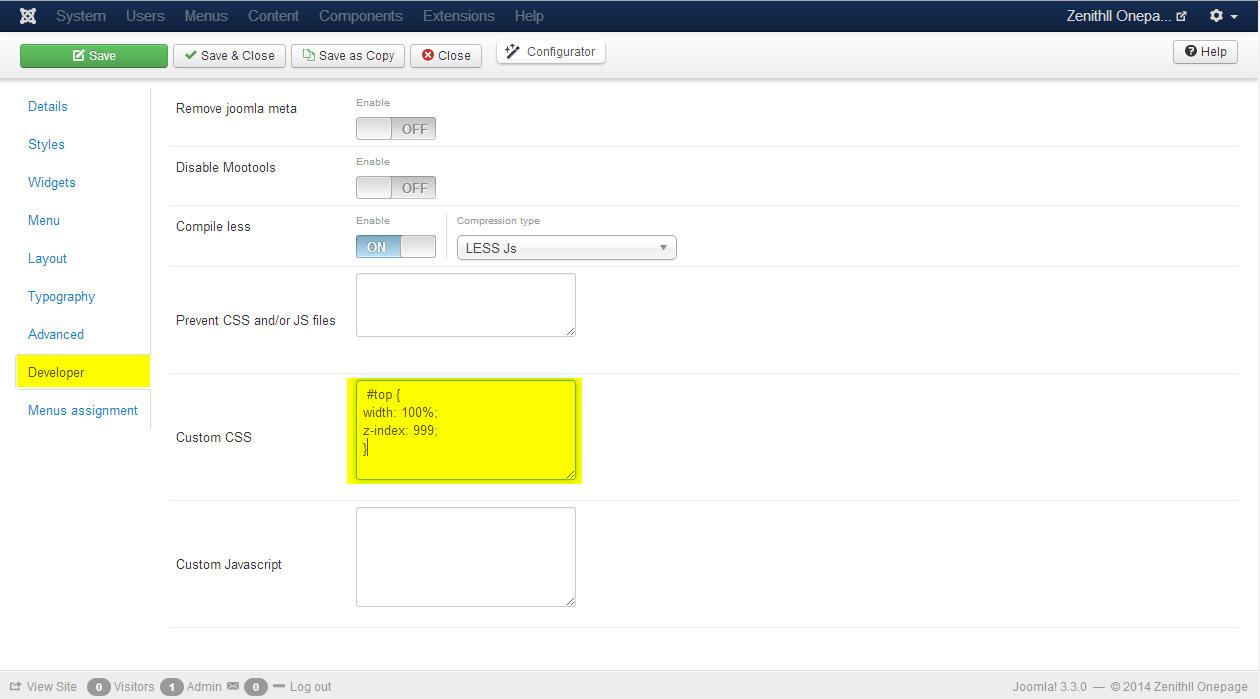
Go to the Template Manager again and click Tx_Zenith_II - Default from Style column, get into the Developer tab, paste the following code in Custom CSS box and hit save button.
Code:
#top {
width: 100%;
z-index: 999;
}
.nav > li > a:hover{ background: transparent; }
Scrollspy and Smooth Scroll integration
Integrating Scrollspy in menu is as simple as we made Sticky Header. The process is comprised of few steps below:
Step 01
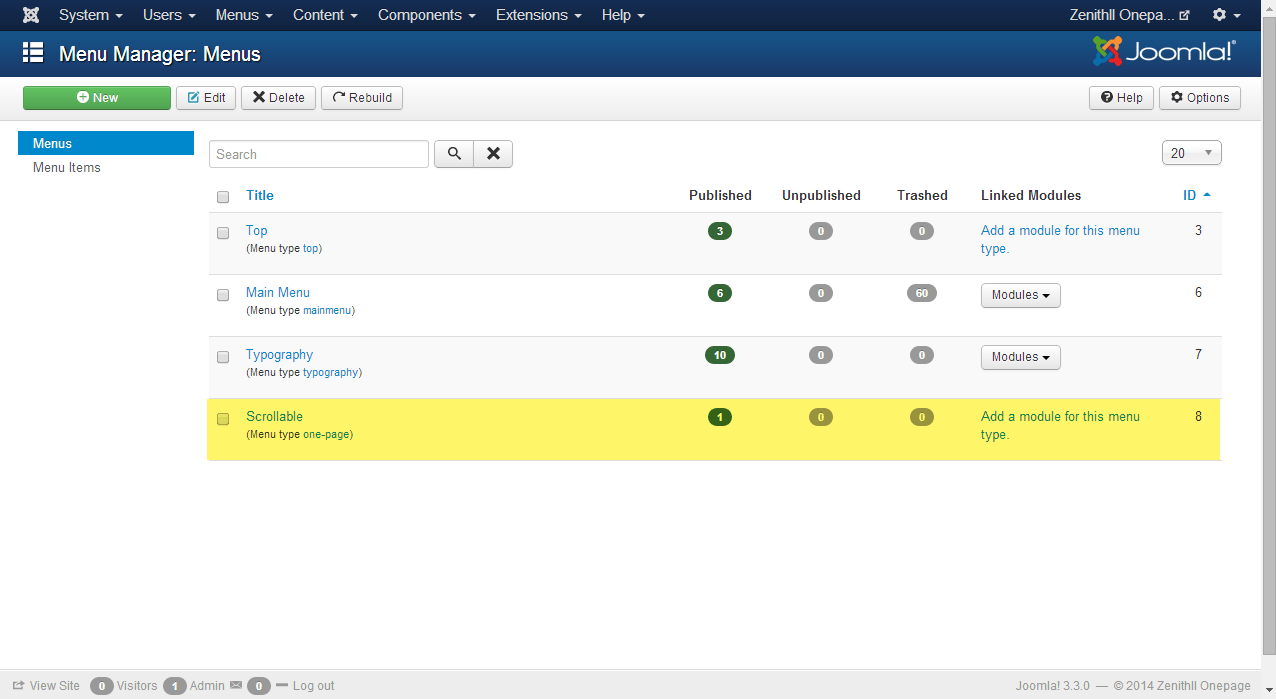
We'll create a menu group for scrollspy. Click Menus > Menu Manager > Add New Menu . For our tutorial we'll create a menu called 'Scrollable' but you can name it as you prefer.
Step 02
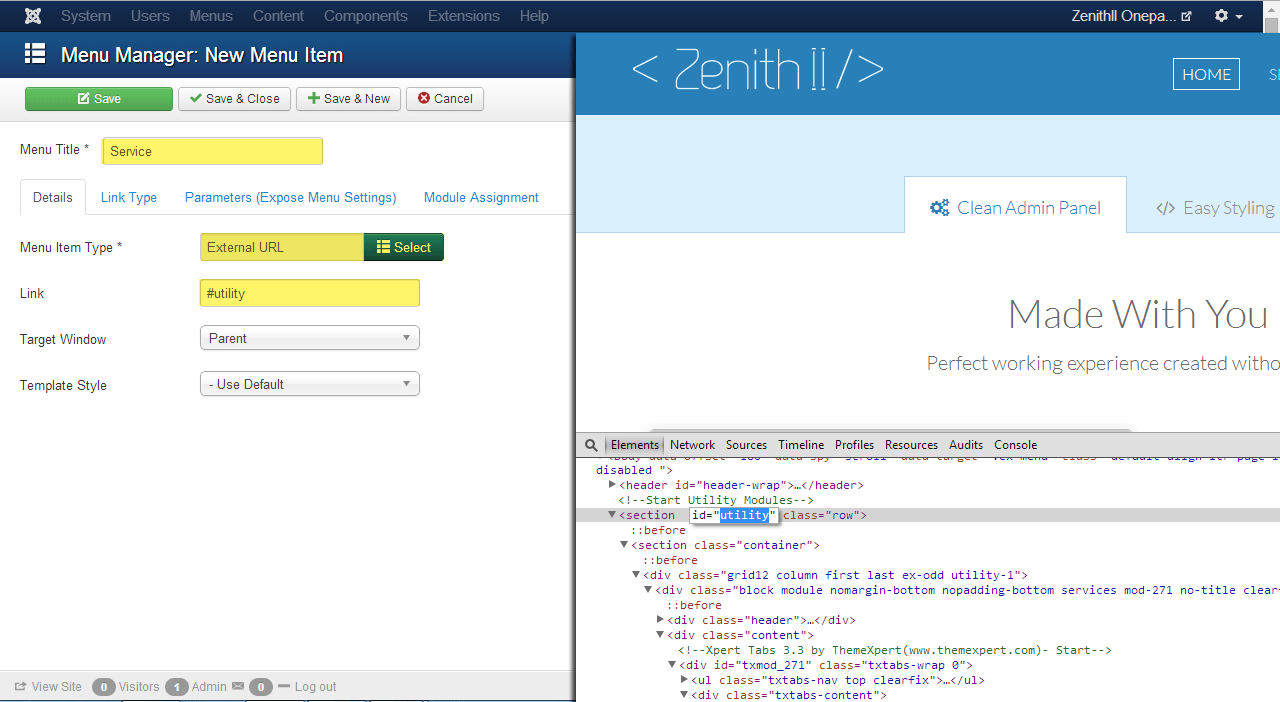
Back to the front-end. We’ll use developer tool, and find out the section ID that we want to link with menu item. And add menu item with external link in Scrollable menu.
In the image below you can see, We have a section ID utitlity and we'll refer this as Service in menu. Now, head to the backend, get into Scrollable menu from Menus and create new menu item called Service. Select External URL for Menu Item Type and use that section id utility with # in Link input box and hit save.
Step 03
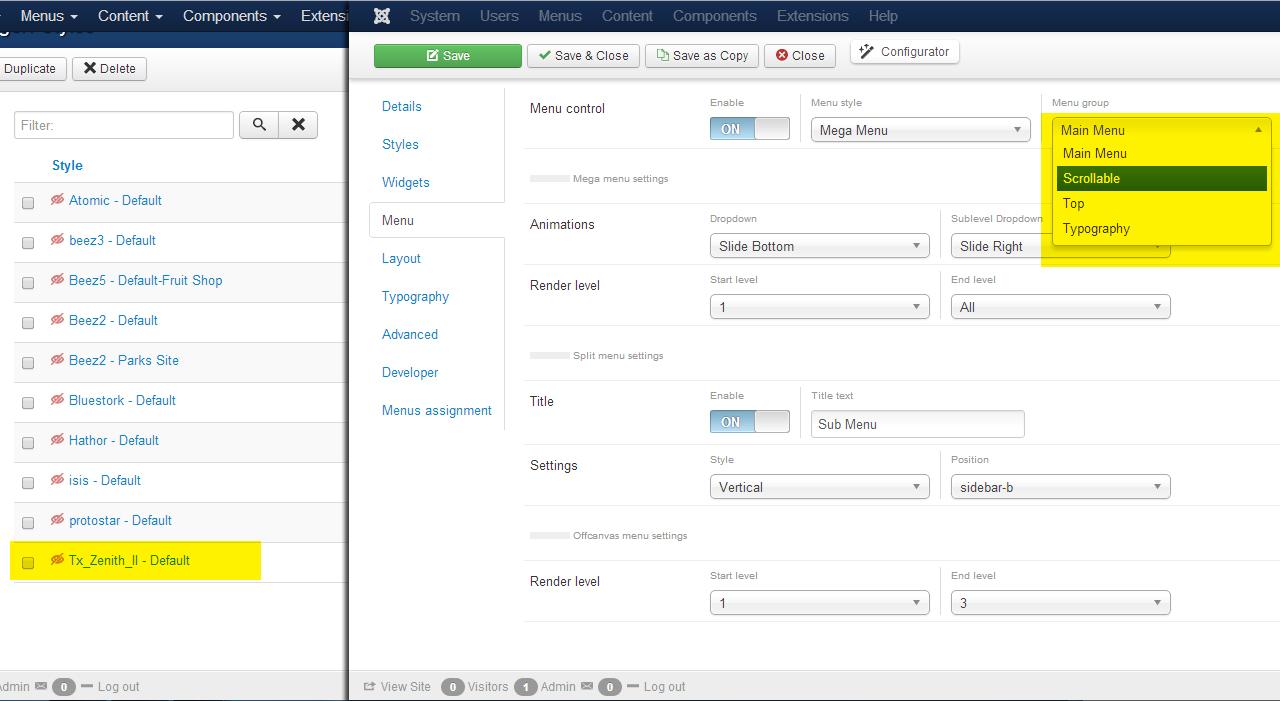
Head to Template Manager and open Tx_Zenith_II - Default from Style column, Get into Menu Tab, select scrollable from Menu group
Step 03
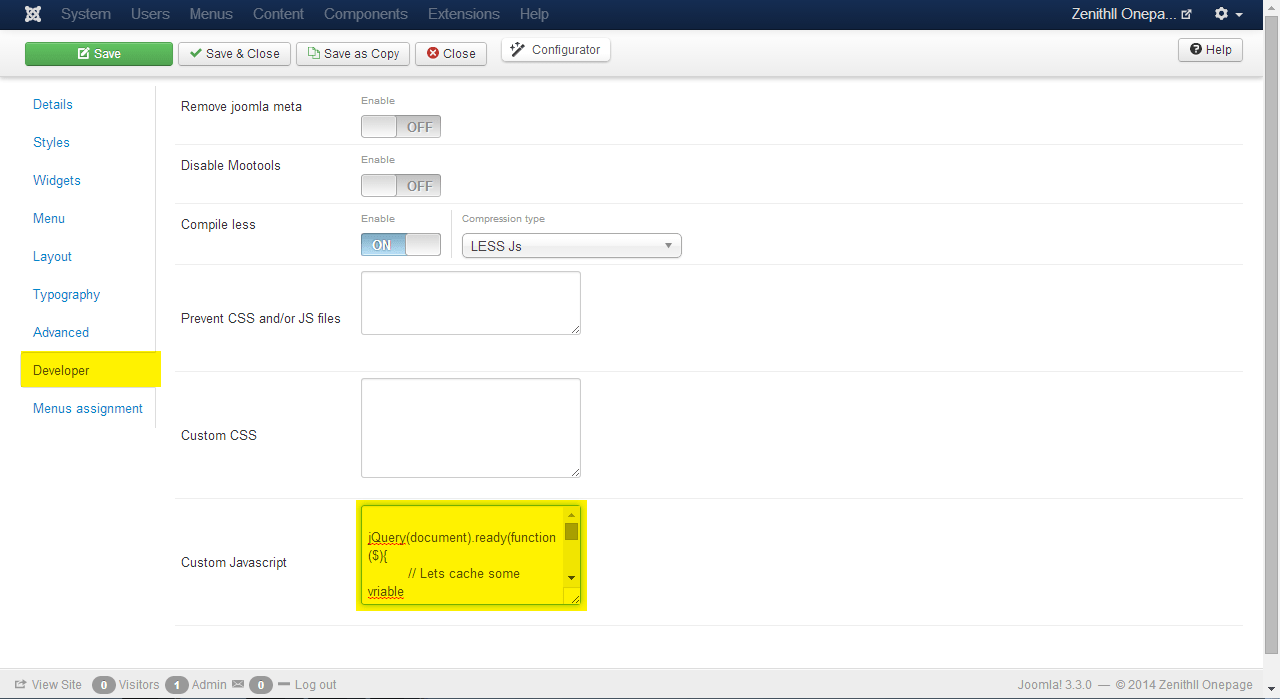
Now click on Developer tab, paste the follow code in Custom Javascript and hit Save and Close.
Code
        jQuery(document).ready(function($){
          // Lets cache some vriable
          var $menu = $('.ex-menu > ul.l1'),
              $menu_items = $('ul.l1 > li');
          // Add .nav class to menu, dammm bootstrap is tightly itegrate with it
          $menu.addClass('nav');
          // Smoothscroll animation, who didn't love fancy stuff? :)
          $menu_items.on('click', '>a', function(){
            var target = $(this).prop('hash');
            if(target) {
             event.preventDefault();

             $menu_items.removeClass('active');
             $(this).parent().addClass('active');

             $('html, body').animate({
              scrollTop: $(target).offset().top - $('#top').height()
             }, 500);
            }
          });
        });
Step 04
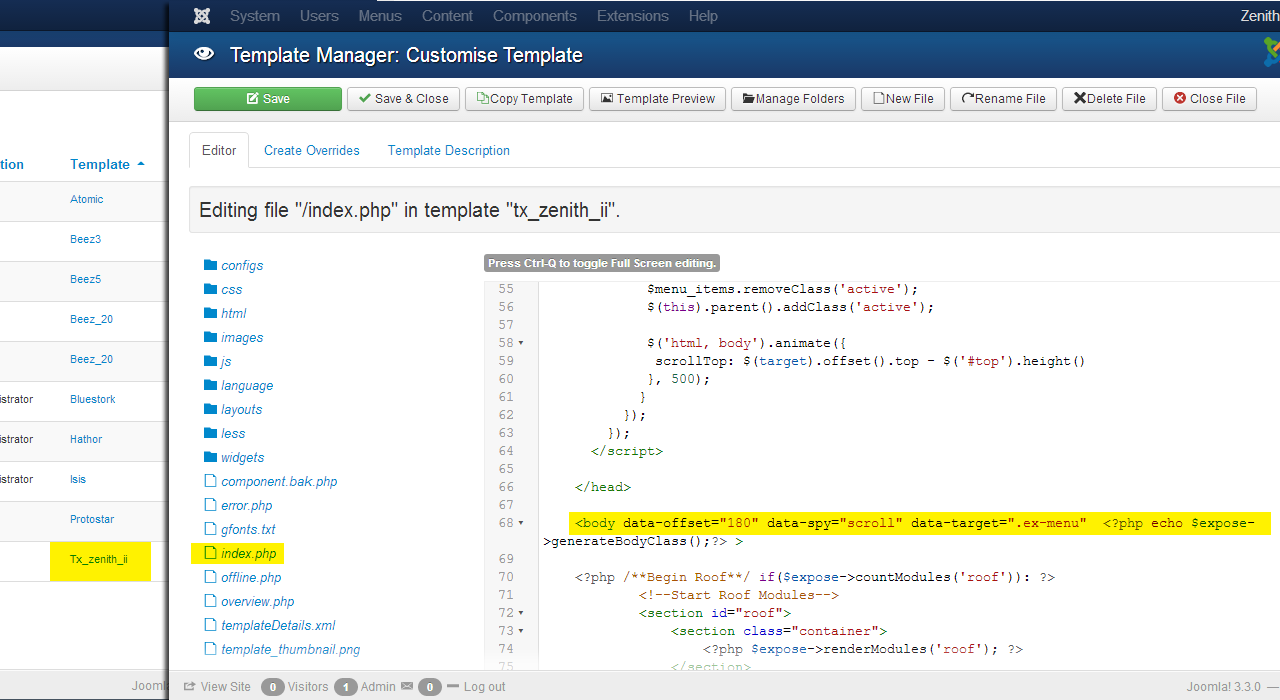
Click on Tx_zenith_ii from Template column, paste the following codes in body element in index.php file. And hit Save & Close button
data-offset="180" data-spy="scroll" data-target=".ex-menu">
Conclusion
In this tutorial we have only added single menu item service menu but you are not limited. We can add many menus as we mentioned in step 2.
Such as: you want to add new menu item Portfolio and link with portfolio section. Simply find our portfolio section ID with developer tool and create portfolio menu item with external link.
Scrolling animation effect requires a dedicated tutorial that why we did cover in this tutorial. Hoping to cover in next tutorial.Stay connected.
Have you found this tutorial helpful ?
Resources:


