Part 1

Key Features
- 8 Homepage style
- Drag & Drop page builder – Elementor
- RTL Support
- LearnPress LMS integration
- Sensie LMS integration
- LearnDash LMS integration
- Built-in course and lesson type
- Multiple course style : Grid / List
- Multiple teacher style
- Course details page style with pagebuilder
- Teacher page details style with page builder
- Notice page
- Contact form 7 integration
- weForm integration for course booking
- WooCommerce support
- Apple TV effect
- Event calendar integrations
- Event listing and details page style
- Testimonial widgets for pagebuilder
- Redux2 Framework
- CMB2 metabox integration
- Bootstrap framework
- Full responsive
- Megamenu
- Array of built-in page
- Dynamic navigation
- Quick Social sharing
- Animation slider
- Instagram integration
- 1 click installation and dummy data import
- Mailchimp integration
- Huge shortcode collection
- Customization
- Flexible blog layout option
- Fast and Excellent support
Requirements
In order to run Edumodo smoothly on your server, you need to fulfill this requirement listed below:
- Wordpress: 3.9+
- PHP 5.6+ (Recommended PHP 7.1)
- Elementor Page Builder
Download
Head over to Edumodo download page on www.themeforest.net then download the EdumodoPackage.zip file. In this .zip file, you have everything you need.
Video Tutorials
If text doesn't work for you, well you can try the video tutorials from here.
Installation
Installing WordPress
To install this theme, you must have a working version of WordPress already installed on your server. If you need help installing WordPress, go through the link and follow the instructions: Installing WordPress
Installing Theme
There are a couple of simple steps to install Edumodo theme on your server. It's quite straightforward.
If you are starting from the scratch, we recommend you to follow the installation guide below to install with the pre-built existing demo data. This is the simplest way to get started.
On the other hand, if you already have an existing WordPress site and want to apply Edumodo theme, in that case, you just need to install the following package:
- edumodo.zip
You can find this package inside the downloaded .zip file of Edumodo theme. So, before getting started with the installation process, Extract the .zip file and you'll find the desire edumodo.zip in the Theme folder after the extraction.
- Log in to the WordPress Administration Panels.
- Now, go to
Appearance> Themes> Add New> Upload Themethen click on the Choose File button then select the edumodo.zip file and hit upload. - After installation being done, roll over to
Appearance> Themes. - Find just uploaded theme on the Theme Thumbnail area.
- Click the Activate button below to the theme's thumbnail, to set it as default.
Do not forget to Activate the theme as default after installation process successfully been done.
To know more, visit WordPress Codex
Step by Step Getting Started Wizard
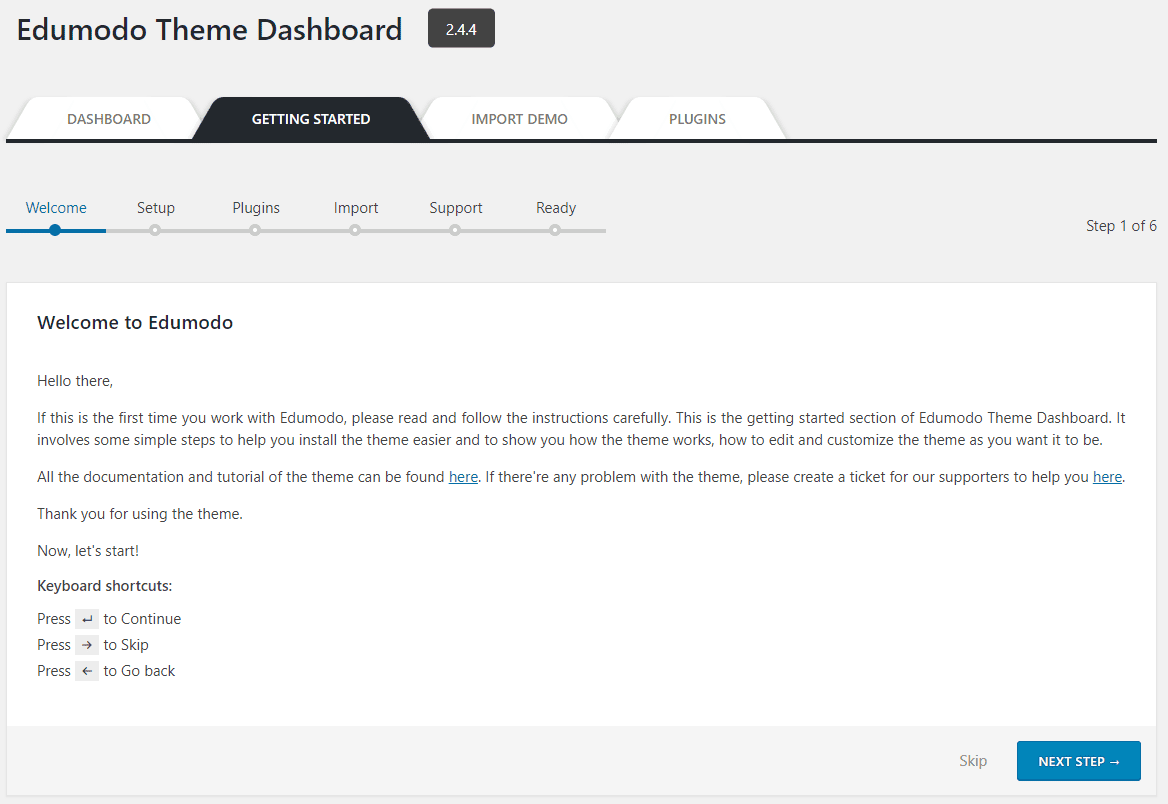
As soon as you activate the theme, step by step Getting Started wizard will appear. By following the instructions you will be able to easily install required plugins and demos that you want. In third step of the wizard it will help you to install and activate plugins.
Install & Activate Required Plugins
There are ten plugins, required for Edumodo theme to work properly. Those are listed below:
- Edumodo Core: Theme core functionality (CPTs and shortcodes).
- Elementor Page Builder: Drag and Drop page builder.
- Redux Framework: Used to build its backend admin panel.
- CMB2: For building meta boxes.
- WPForms : For creating contact form. (Additionally we have also provided support for contact form 7 and weforms.)
- Revolution Slider: Create and use elegant sliders on your site.
- WooCommerce : For selling goods online (optional)
- The Events Calendar : For creating Events (optional)
- Widgetkit for Elementor: For creating stylish sections.
- LearnPress : Comprehensive LMS Plugin for WordPress (optional)
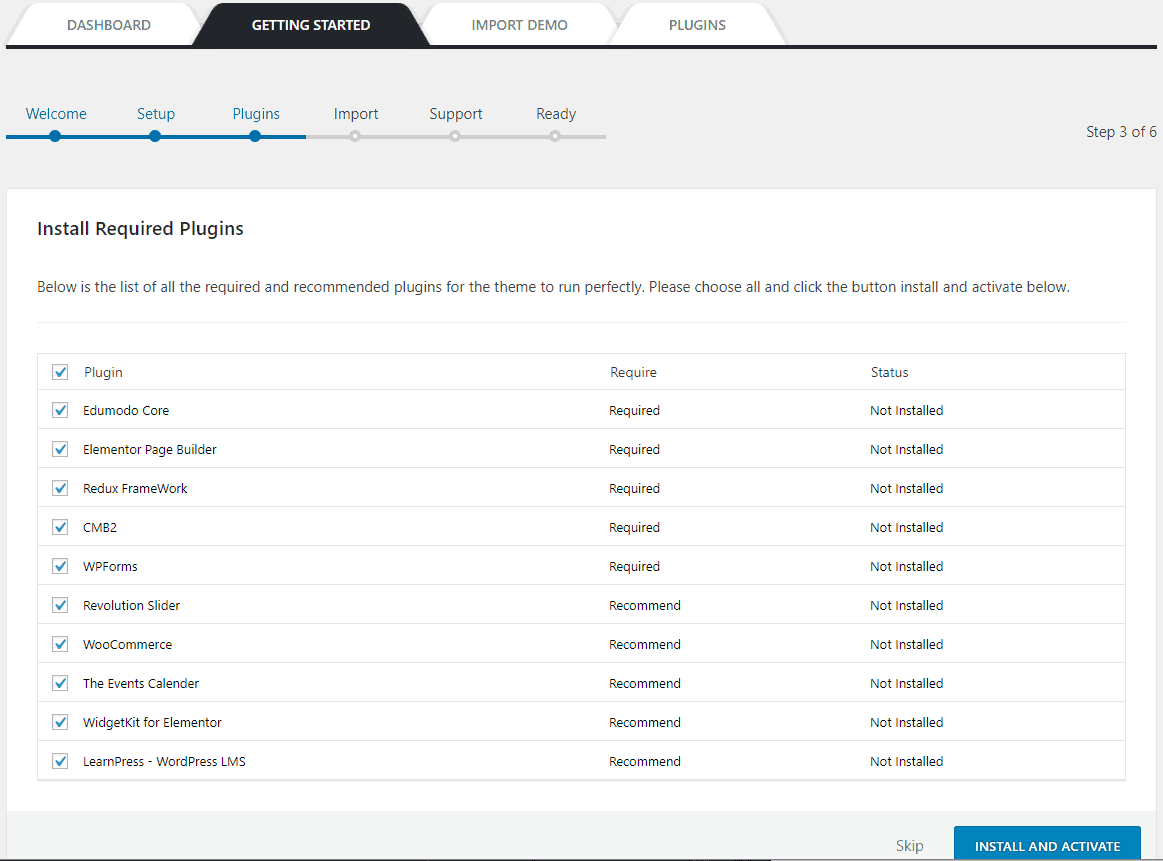
- Just click on INSTALL AND ACTIVATE button.
- Now wait until the plugin installation process is completed.
- If you do not want to install plugins or want to manually install later, click on the Skip button.
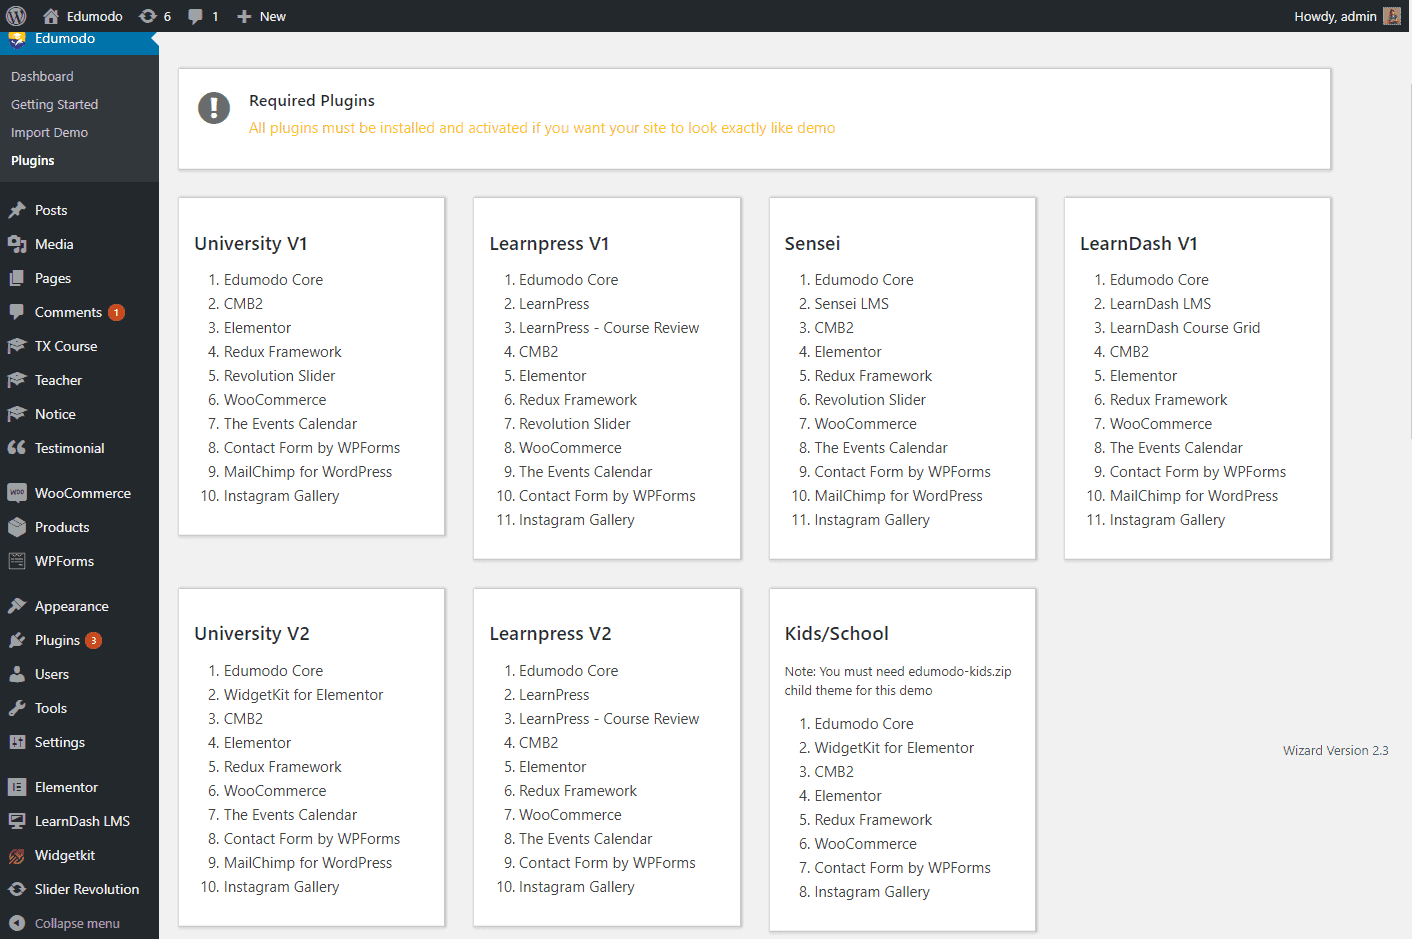
To manually install plugins, do it from WordPress plugins directory and do it in default order. We have provided some plugins in the Edumodo package folder. You can also install those plugins to your website by using Upload & install function of WordPress from plugins options.
You might need some more plugins installed and activated, according to the demo you want to import.
Permalink Flash
Before importing data it is very much important to flash permalink. Or else your site with imported dummy data may not look exactly like demo. (At first time it is not necessary to flash permalink)
You must flash permalink before using any LMS or in time of switching from one LMS to another.
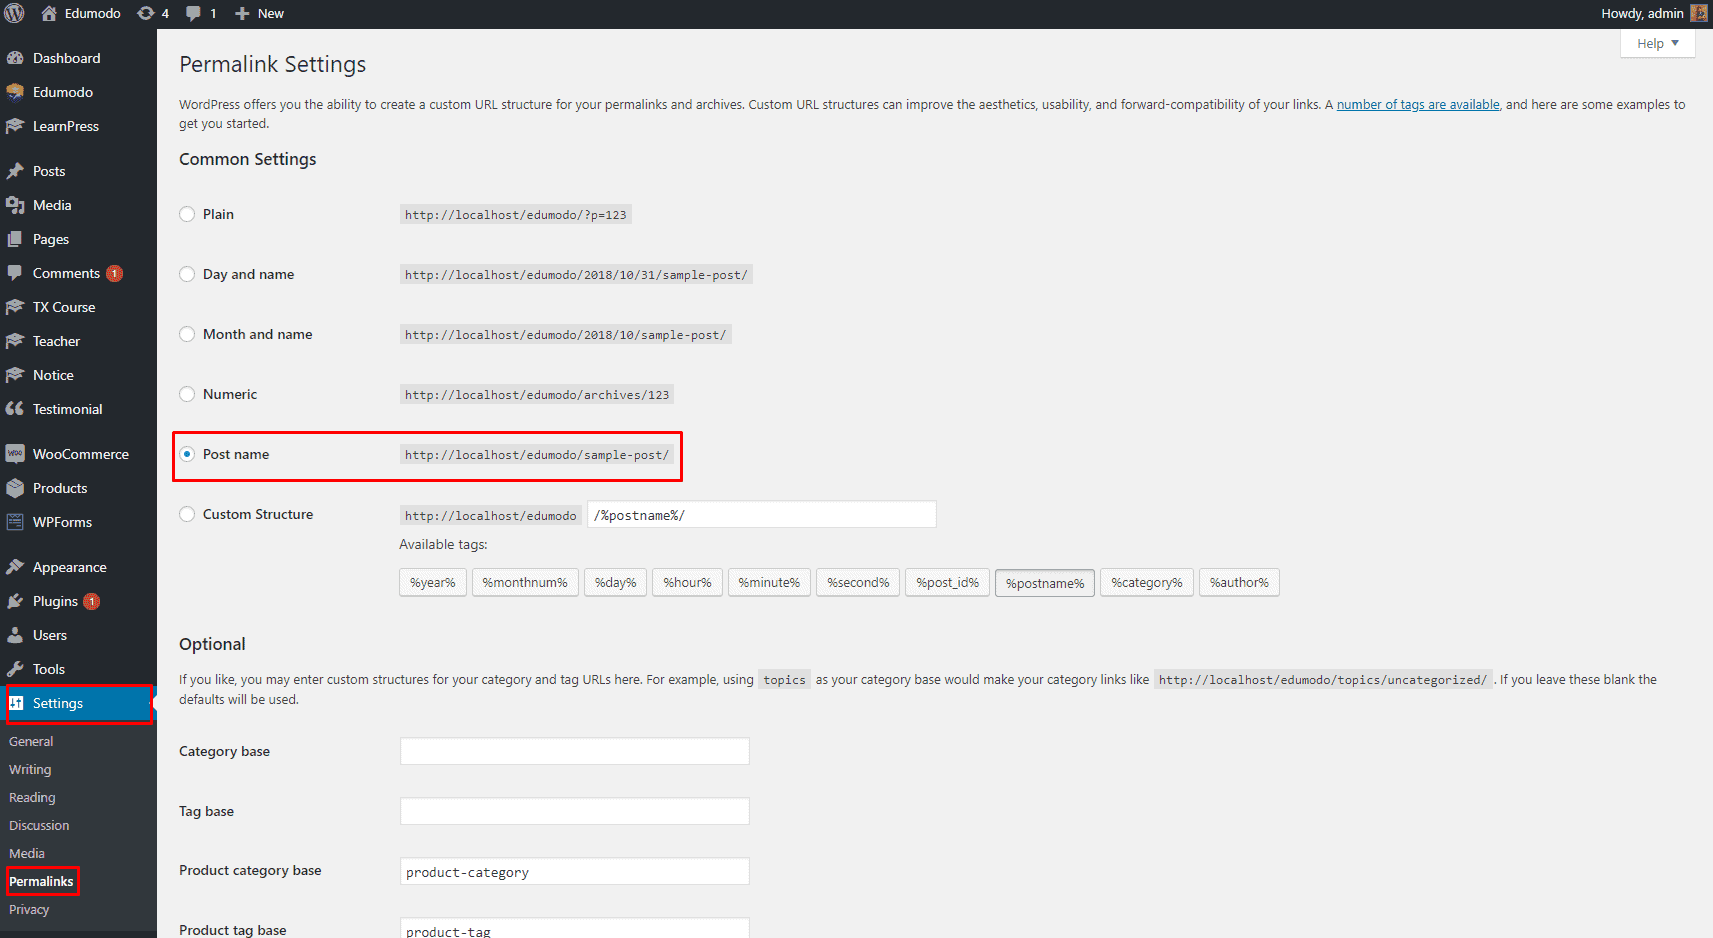
To flash permalink
- Go to
Settings > Permalinks - From Common settings choose
Post nameand click save changes.
Now you can import demo data perfectly.
If you still face any problem check the video below and install and import demo data after wathcing the video.
Import Demo Data
You can import demo data at the moment Getting Started wizard starts. Or try the following procedure.
You must have installed all the required plugins, before you import any demo data. For importing demo of any LMS, (deactivate any other LMS first) download & install your preferred LMS and then try to import demo data. For importing demo data of kids layout, first install kids child theme, activate it then import it.
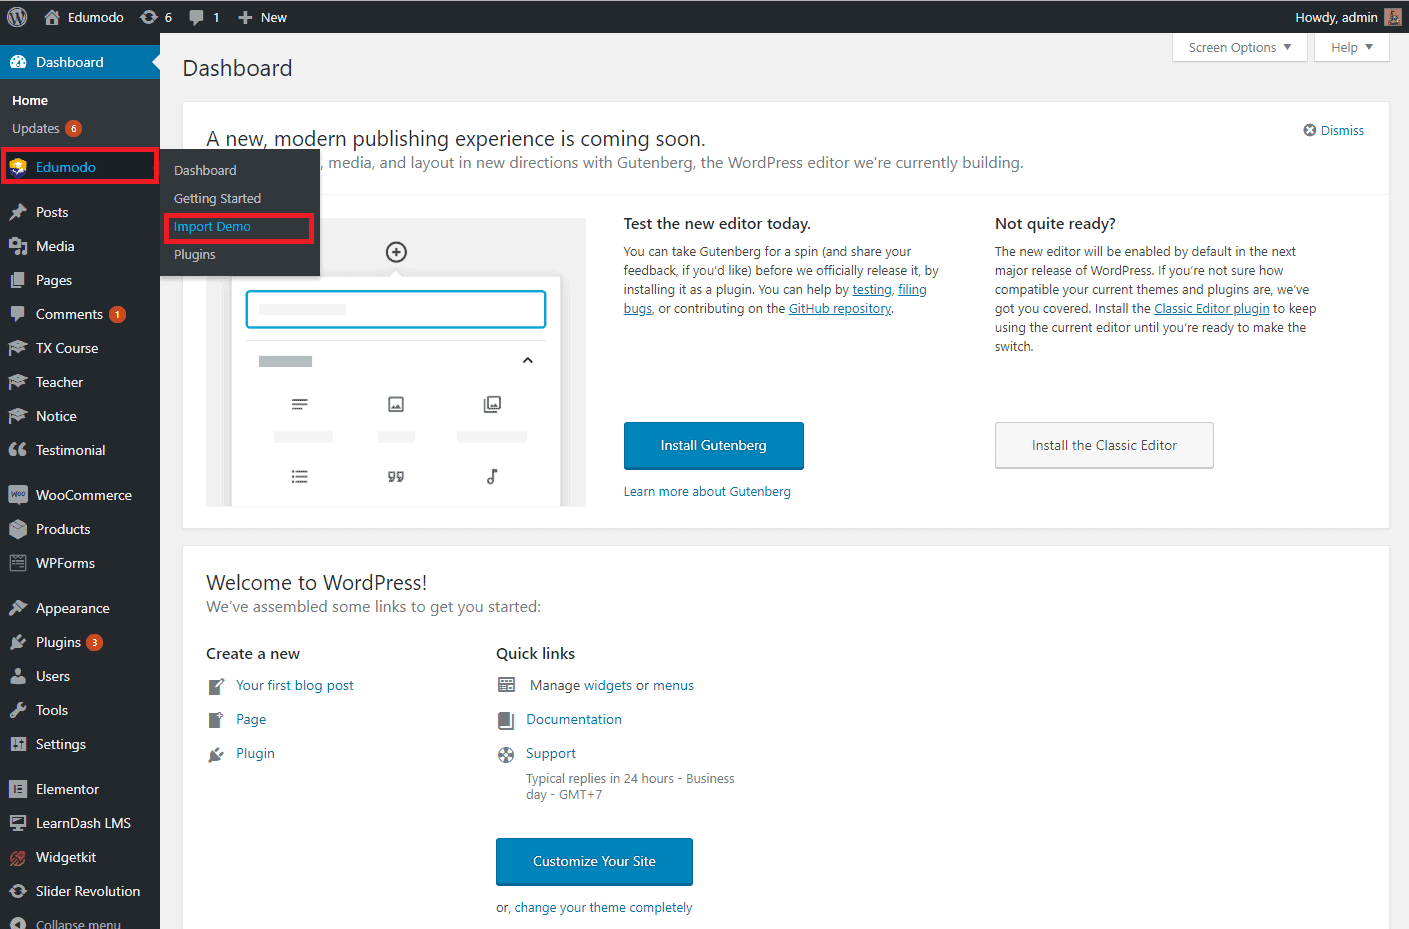
- Log in to the WordPress Administration Panels.
- Go to
Edumodo> Import Demo
- Chose the layout and click on
Installbutton. - Click on
Import.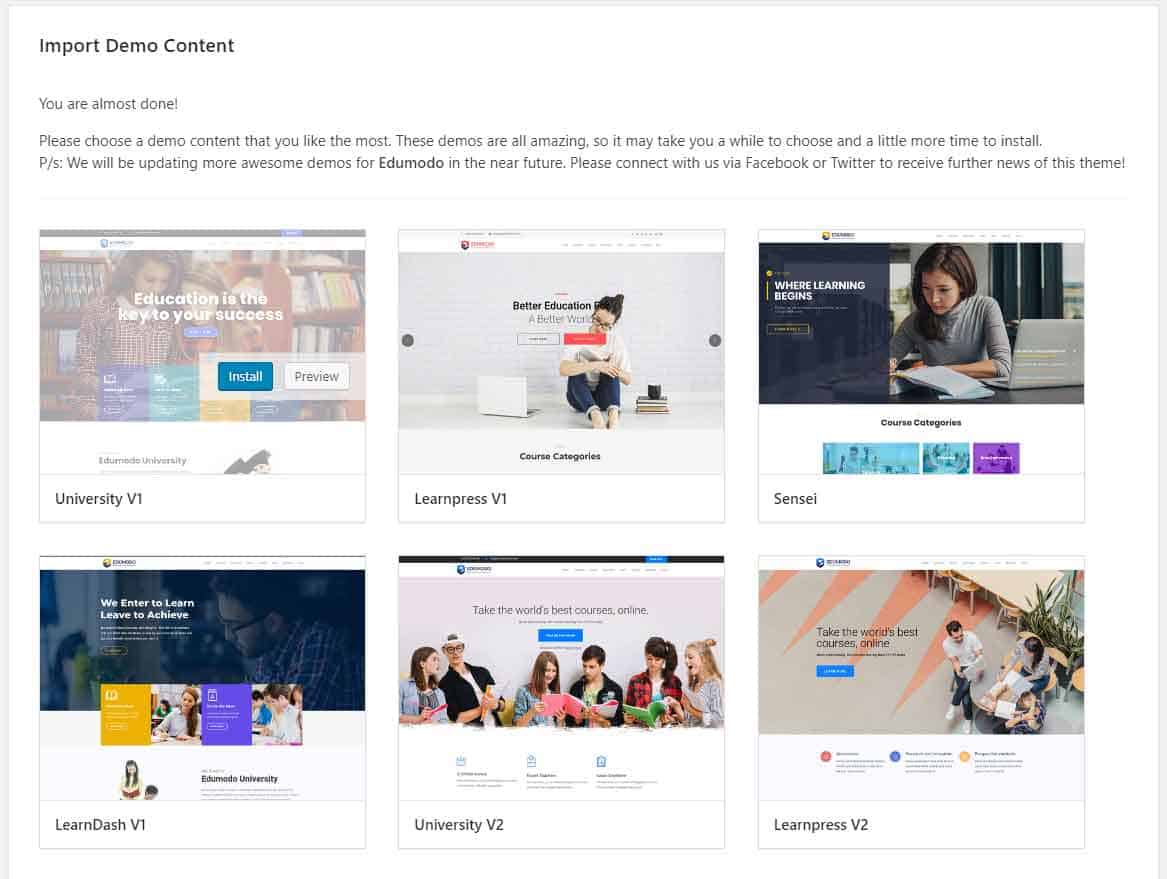
It will take some time to load all demo data on your server. Wait till it shows you a successful data importing message.
Kids layout Demo data import
To import the demo data of kids layout, at first you must install the child theme that is provided with the theme package. After the installation is complete, activate it and now you can import demo data of kids layout. Now import the demo data in regular way.
Child Theme
In the edumodo package there is two child theme available in it. Kids-child.zip is for using the kids layout and edumodo-child.zip is for inheriting the functionality and styles of the main theme.
If you cannnot activate the child theme, you can watch the video below to do it.
Updating theme
Remaining in the backdated versions may slow down performance of the theme and you might miss the latest features. You can update edumodo in two ways, manually or automatically.
Automatic update
We recommend you to update theme automatically because it the best practice and you won't have to face any hassle.
- Go to this link https://envato.github.io/wp-envato-market/dist/envato-market.zip and download Envato Market plugin.
- Now install and activate it.
- Click on Envato Market and generate personal token.
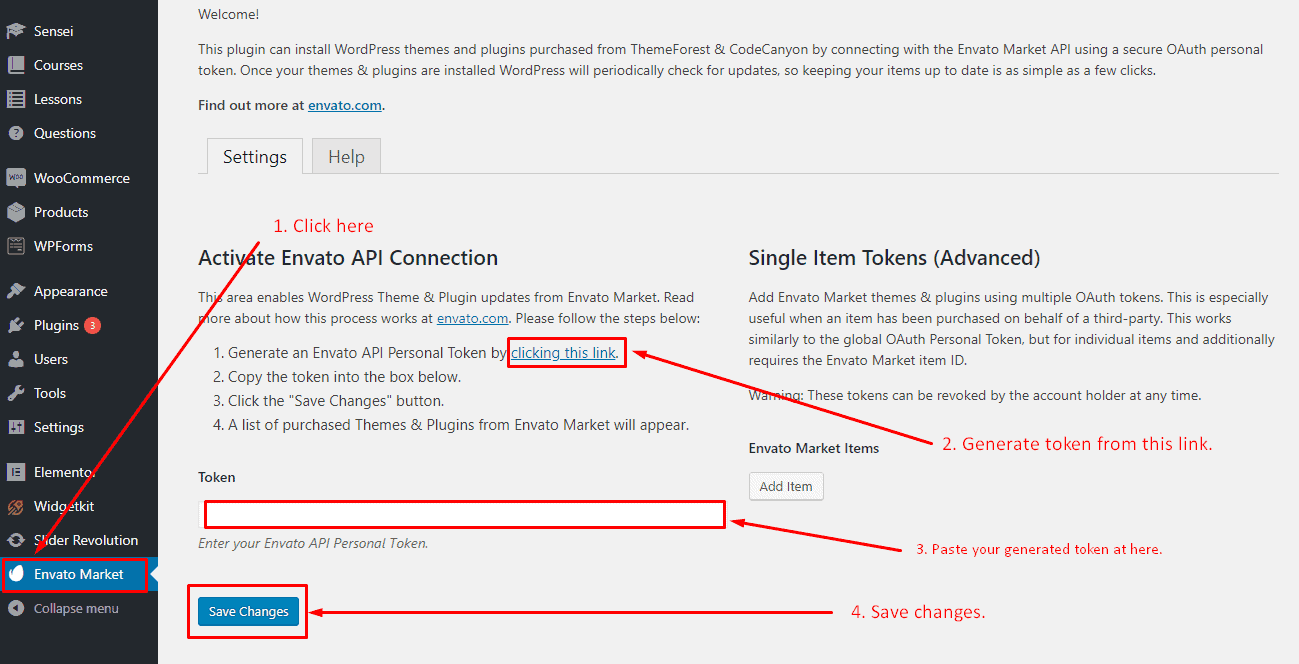
- Sign in with your login details and agree the terms and conditions.
- Click on Create Token
- Now copy and paste it on the token field of your sites token field.
- After you click on save changes, you will get notification for updates and you will be able to update your theme automatically.
- You can view the video details of this process from below.
Manually update
To manually update we recommed you to use a file manager.
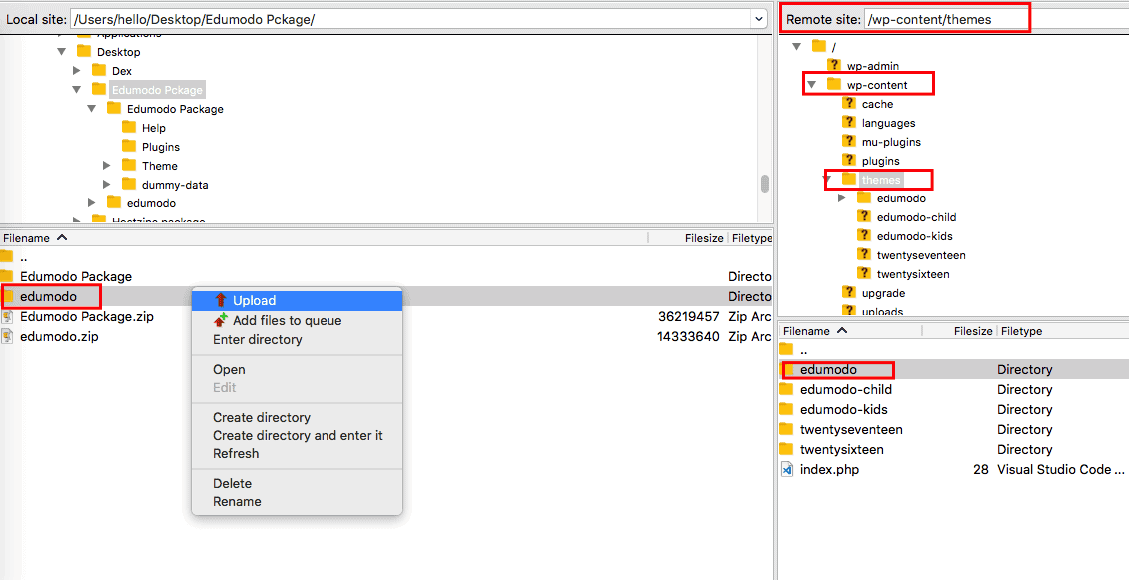
- First go to the cPanel of your site or use an FTP program like Filezilla to explore the root directory of your site.
-
Now go to public_html/wp-content/themes or in your themes folder.
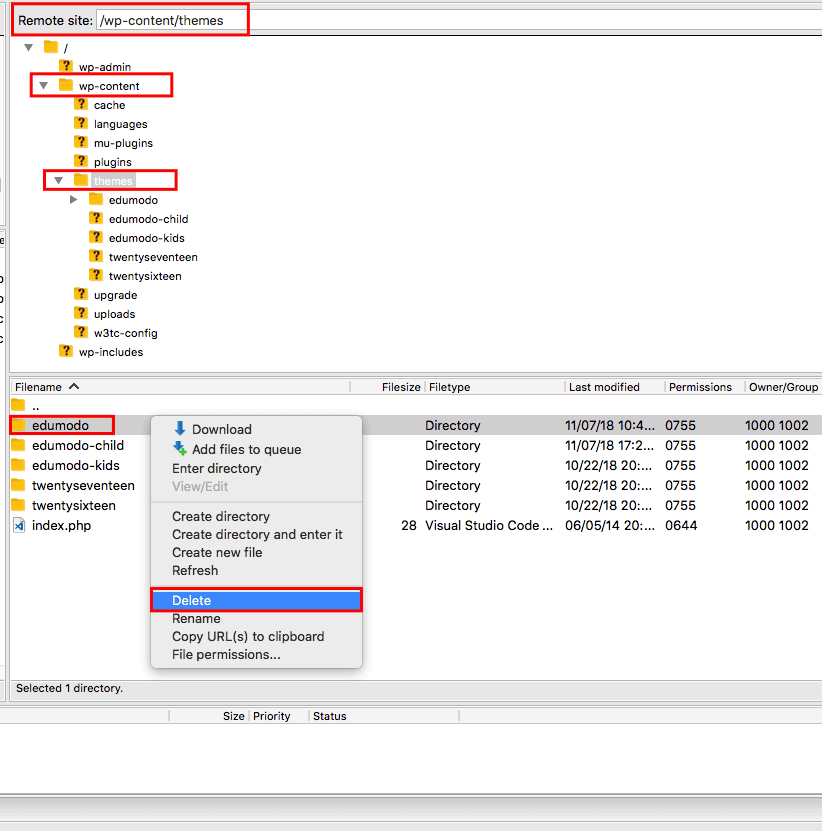
- Find the theme name edumodo or whatever name is and delete it.
- Now from latest Edumodo Package folder (which you have downloaded from envato) go to
Theme. - Extract edumodo.zip and upload the theme in that folder. (If your theme name was academia, you must rename extracted theme name to academia too.)
If you manually update your theme, you must update edumodo core plugin.
- Now reload your site. Your theme is now updated.
If your site is set to automatic update there is no need to update theme manually.
Updating Edumodo Core Plugin
- First go to the cPanel of your site or use an FTP program like Filezilla to explore the root directory of your site.
-
Now go to public_html/wp-content/plugins or in your themes plugins folder.
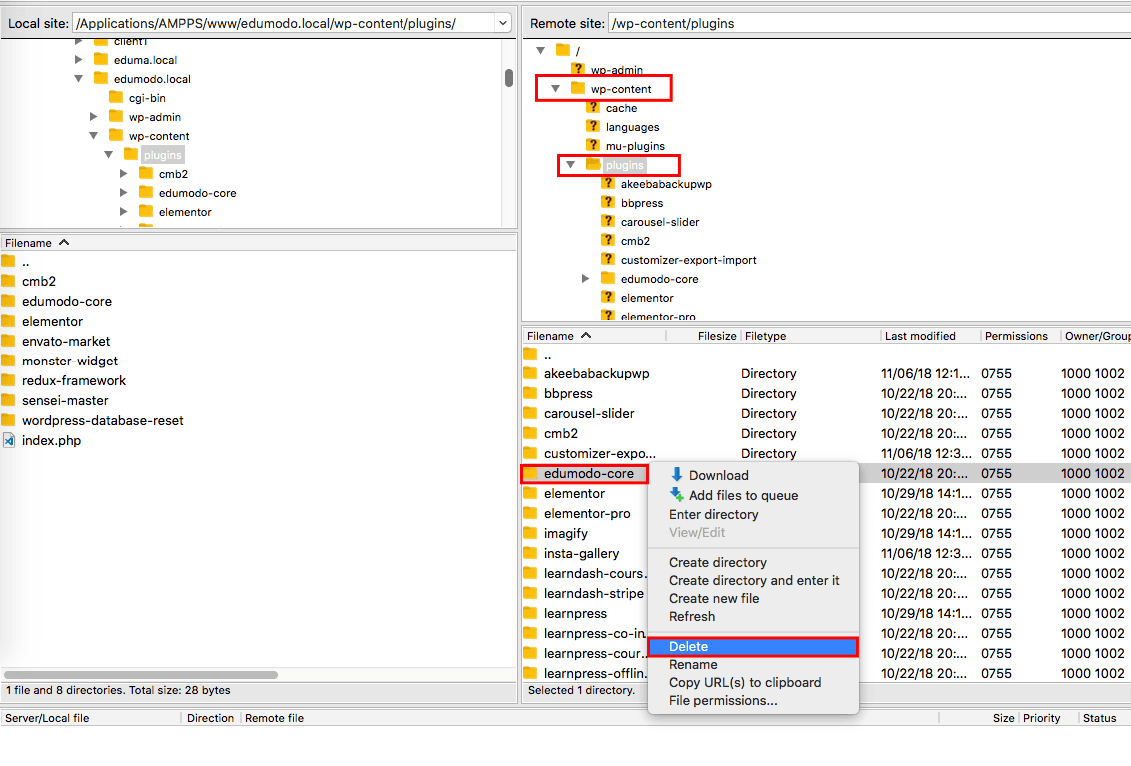
- Delete edumodo-core folder.
- Now from latest Edumodo Package folder (which you have downloaded from envato) go to
Plugins. -
Extract edumodo.zip and go to plugins folder.
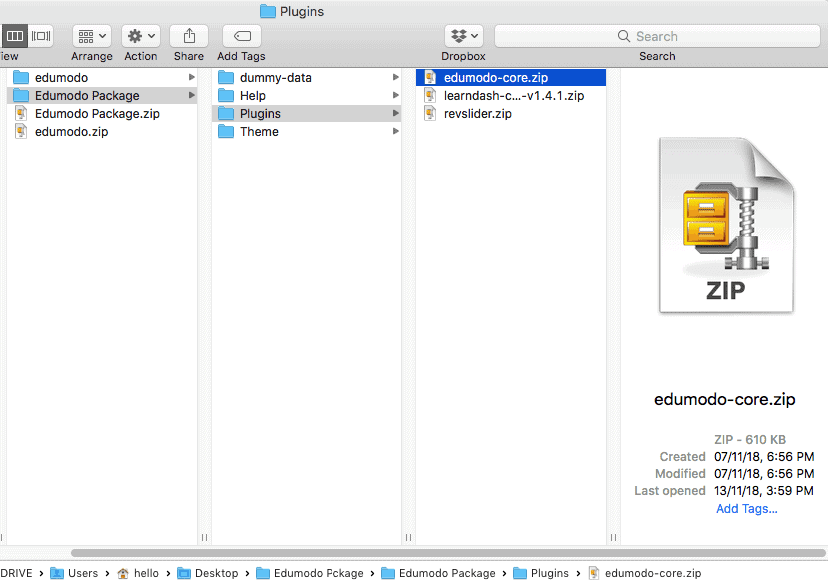
-
Extract edumodo-core.zip and upload the this folder to public_html/wp-content/plugins or in your themes plugins folder.
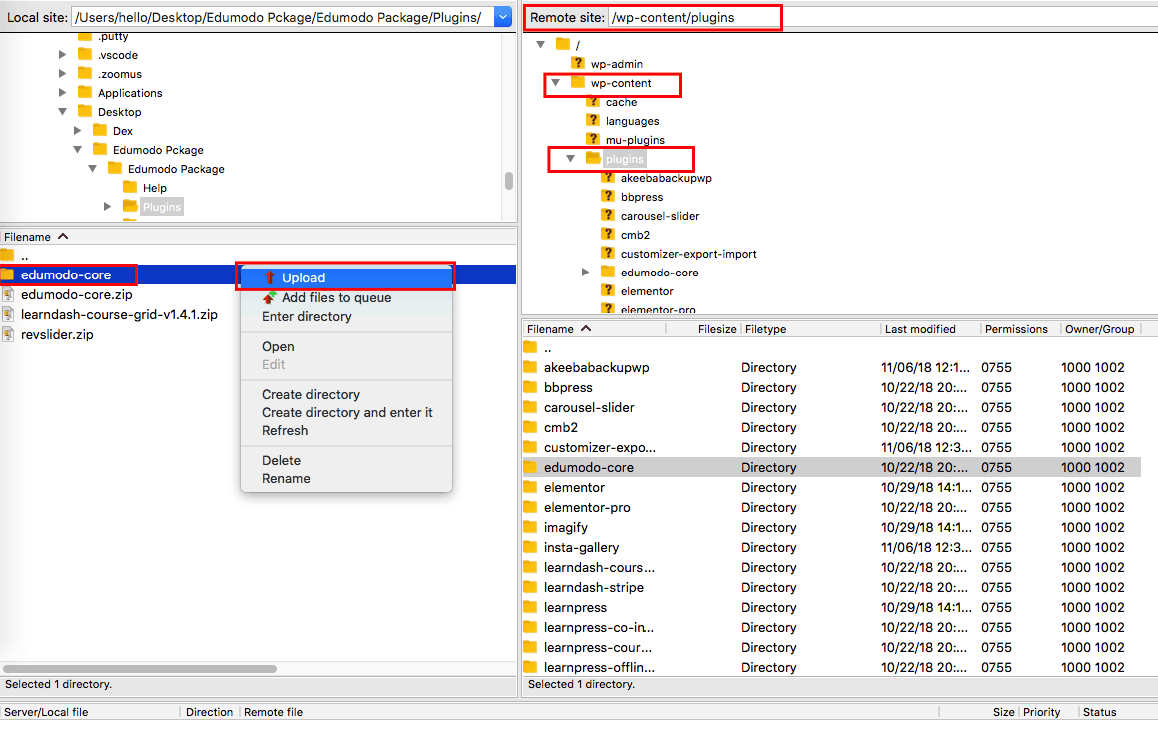
- Now reload your site. Your core plugin is now updated.
Events Settings
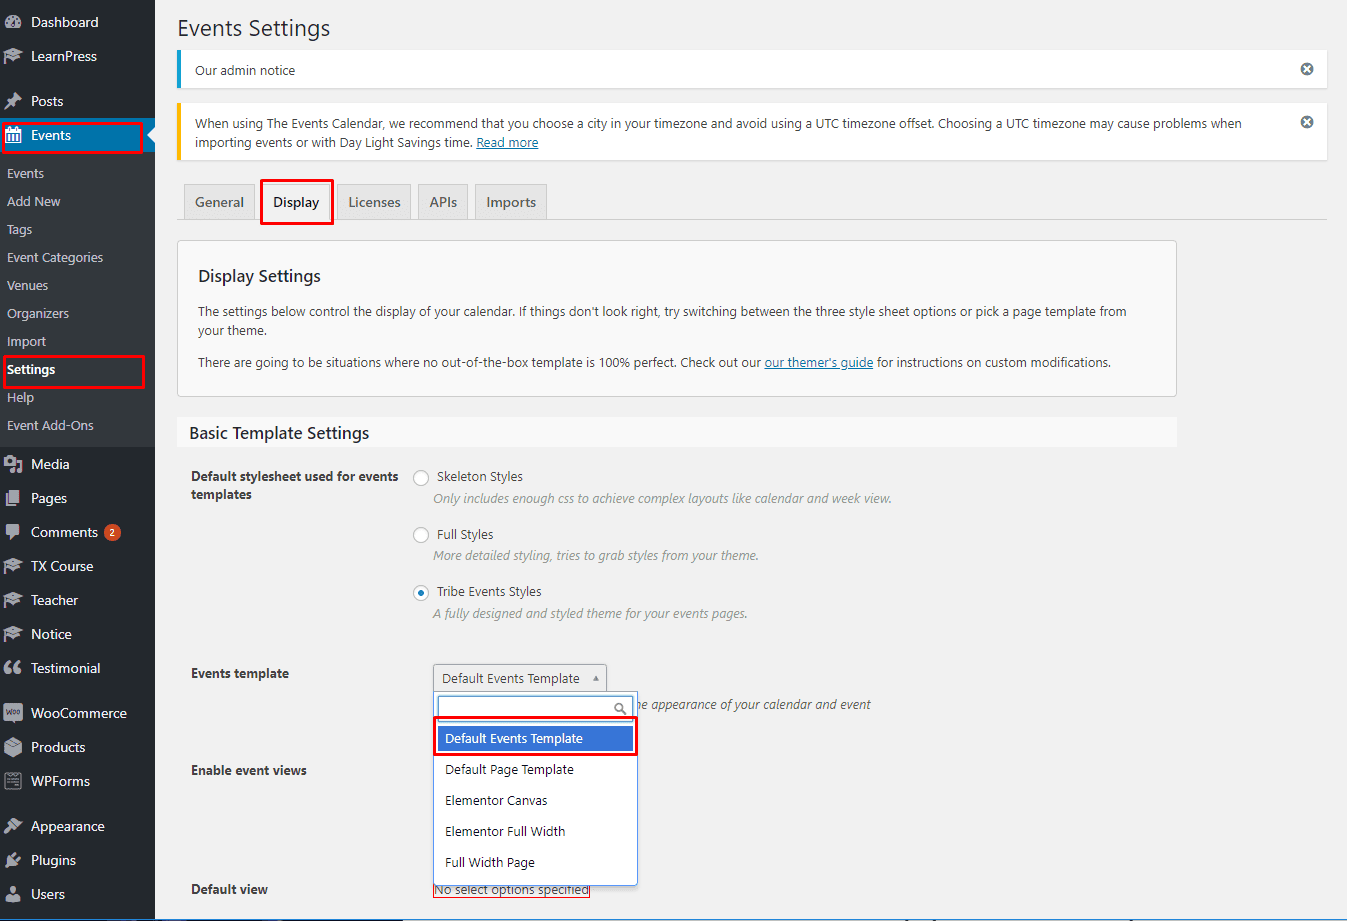
To get the default style of template demos of event calendar, you have to configure it. After importing the demo,
- Go to `Events > Settings
- Now select display tab.
- Under
Events template, select Default Events Template and click save changes.
Now you will get all the default styling for events calendar.
You must install main theme, before installing child theme.
Theme Settings
You can differently customize theme according to your need using Easy Customization feature.
- Click on Appearance at left-bottom corner of the module screen to open up Edumodo Options panel.
General Settings
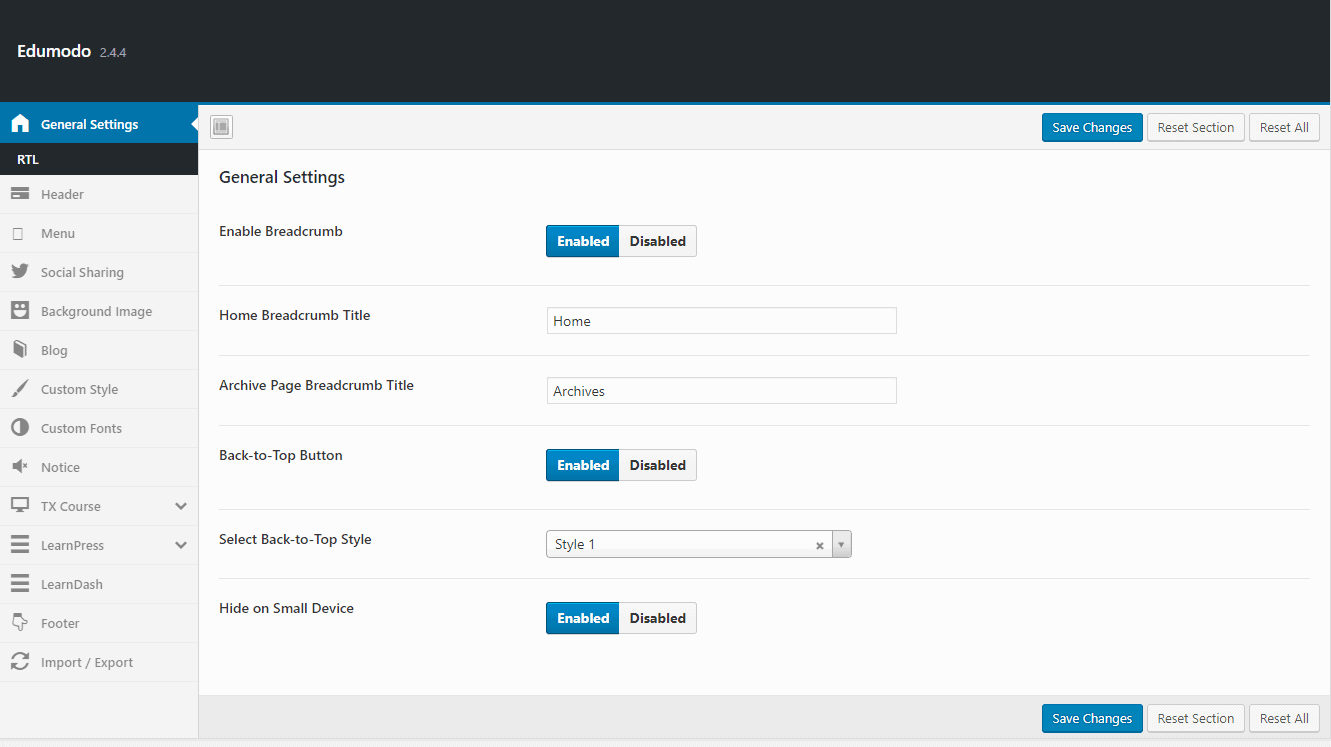
- Enable Breadcrumb : Allows you the control over enabling or disabling breadcrumb for your site.
- Home Breadcrumb Title : Give the title you want to show on your Home Breadcrumb.
- Archive Page Breadcrumb Title : From here you can set custom title for archive page breadcrumb.
- Back-to-Top Button : This option allows you to enable or disable “back to top button”. By clicking in this button user will be able to move to top without scrolling.
- Select Back-to-Top Style : Select the style for your back to top button from here. There are a total of two different styles available for this button.
- Hide On Small Device : If you do not want to show “Back to Top Button” on your mobile devices or any small devices than turn this option on.
RTL
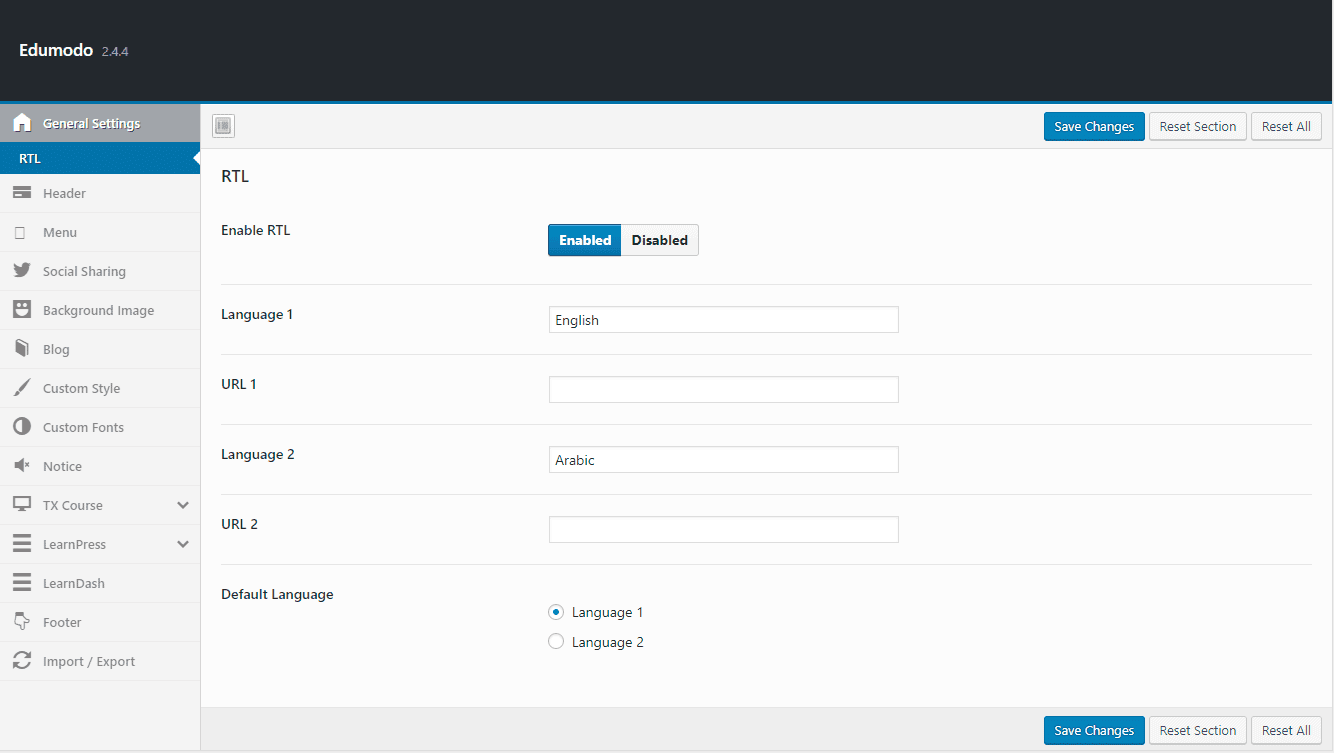
- Enable RTL : To enable rtl support on your site, enable this option. If you do not want to use any rtl supported languages, keep it disabled.
- Language 1 : Define the name of your language 1 which will be shown on your header.
- URL 1 : Put to URL of language 1 at here.
- Language 2 : Define the name of your language 2 which will be shown on your header.
- URL 2 : Put to URL of language 2 at here.
- Default Language : Choose the default language that you want to show on your site.
Header
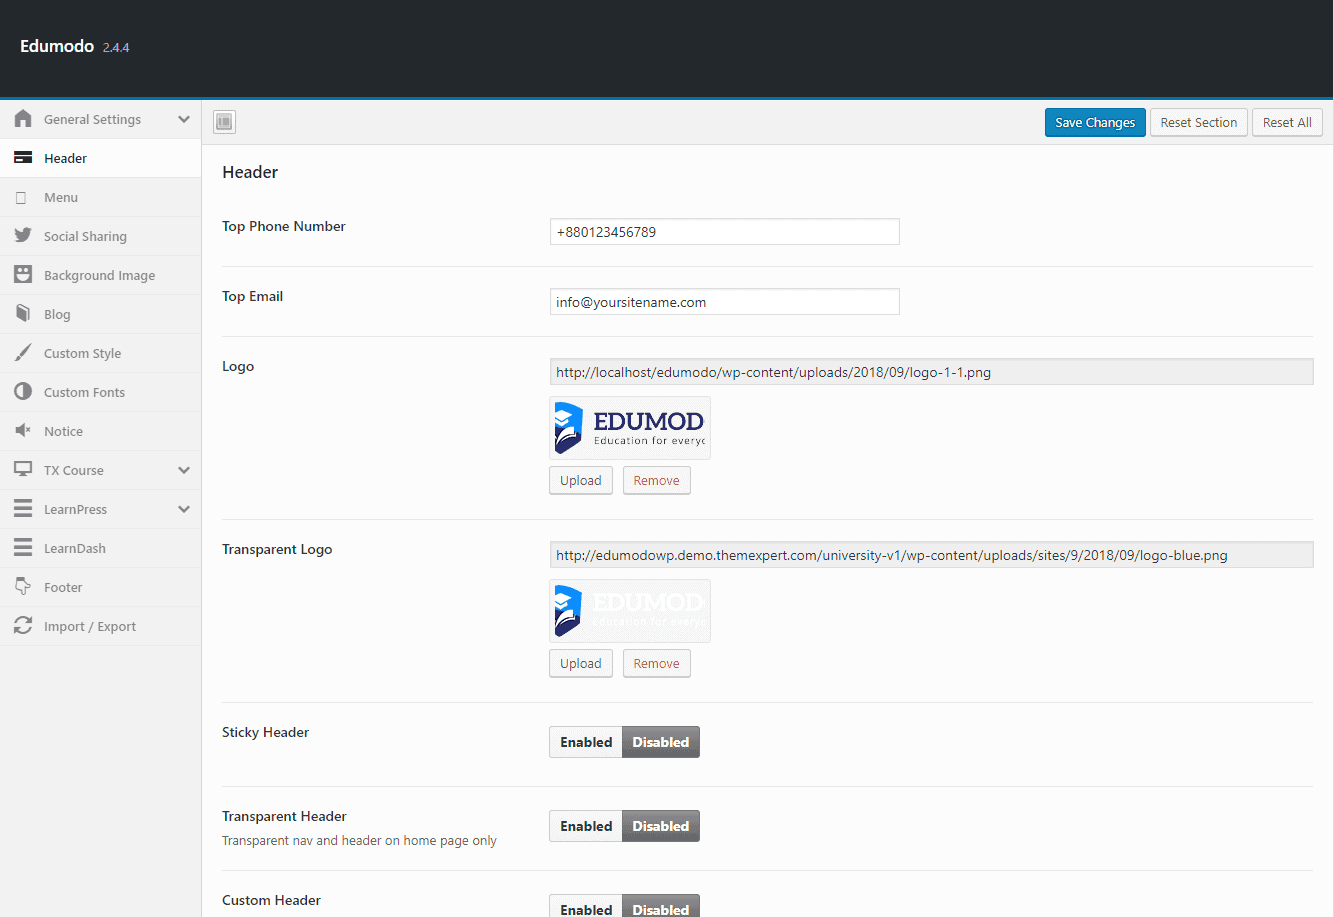
- Top Phone Number : Write the phone number of your company that you want to show on top of your site.
- Top Email : Write the email of your company that you want to show on top of your site.
- Logo : Upload your branding logo using the Upload button.
- Transparent Logo : Upload your transparent branding logo using the Upload button.
- Sticky Header : Make your header sticky by enabling this option.
- Transparent Header : With this option you can make nav and header transparent, which are on homepage only.
- Custom Header : To customize header enable this option else keep it disabled.
- Menu Area Height : Customize the height of menu area of header from here.
- Header Area Height : Customize the header area height from here.
- Enable Header : Allows you the control over enabling or disabling header for your site.
- Enable Header in Single Post : Allows you to enable or disable header in the single post.
- Select Header : Select your preferred header variation from here. The one you will select will be visible on your site.
Menu
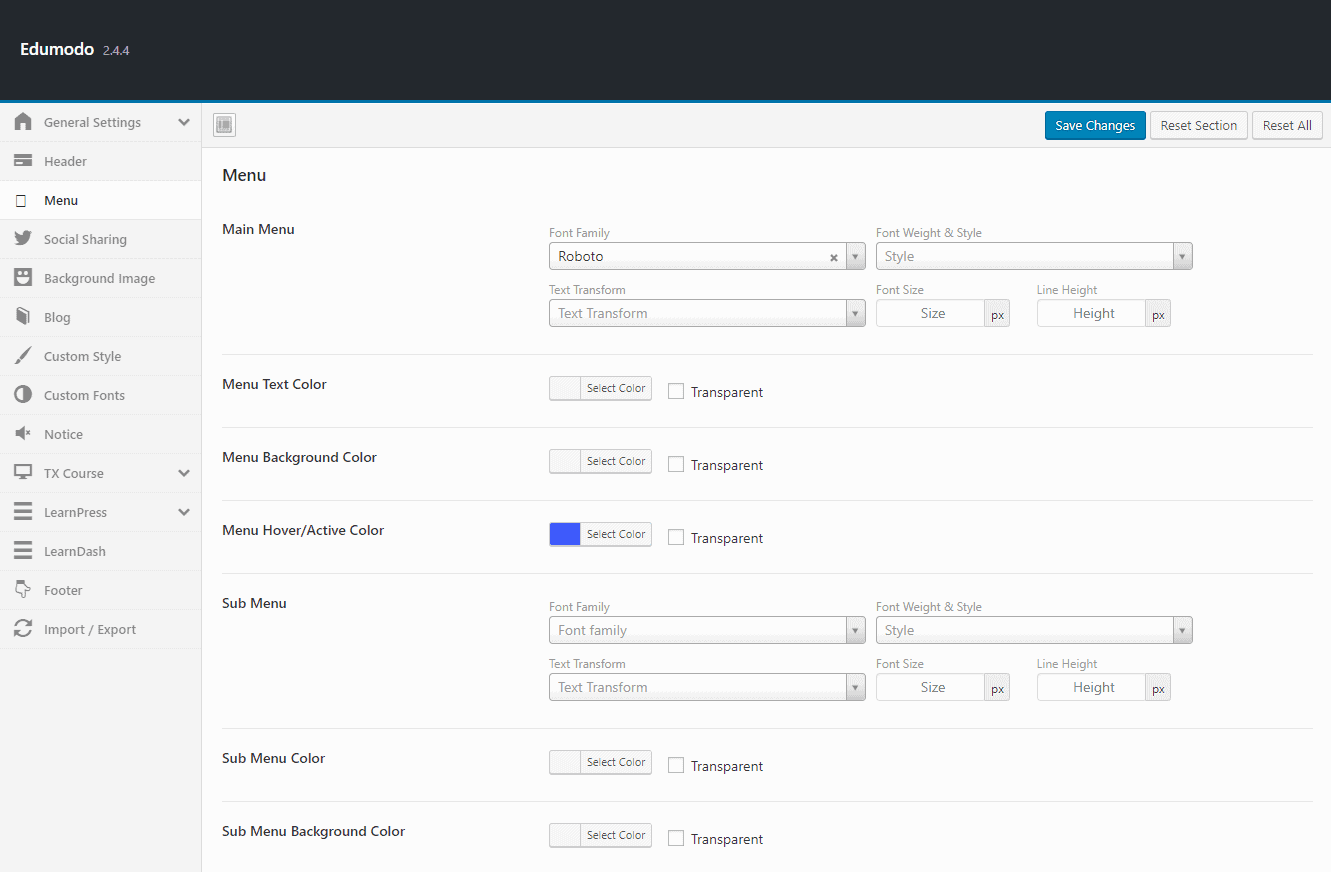
- Main Menu : Customize your main menu typography from here. You can change font, weight, style, size and line height from here.
- Menu text Color : Apply preferred color to your menu text color from here, you can even make it transparent by ticking on transparent option.
- Transparent Menu Text Color : Apply preferred color to your transparent menu text from here, you can also make it transparent by ticking on transparent option.
- Menu Background Color : Apply preferred color to your menu background color from here, you can even make it transparent by ticking on transparent option.
- Menu Hover/Active Color : Select your preferred menu hover color from here, or make it transparent by ticking on transparent option.
- Sub Menu : Customize your sub menu typography from here. You can change font, weight, style, size and line height from here.
- Sub Menu Color : Apply preferred color to your sub menu text color from here, you can even make it transparent by ticking on transparent option.
- Sub Menu Background Color : Apply preferred color to your sub menu background color from here, you can even make it transparent by ticking on transparent option.
- Sub Menu Hover/Active Color : Select your preferred sub menu hover color from here, or make it transparent by ticking on transparent option.
Social Sharing
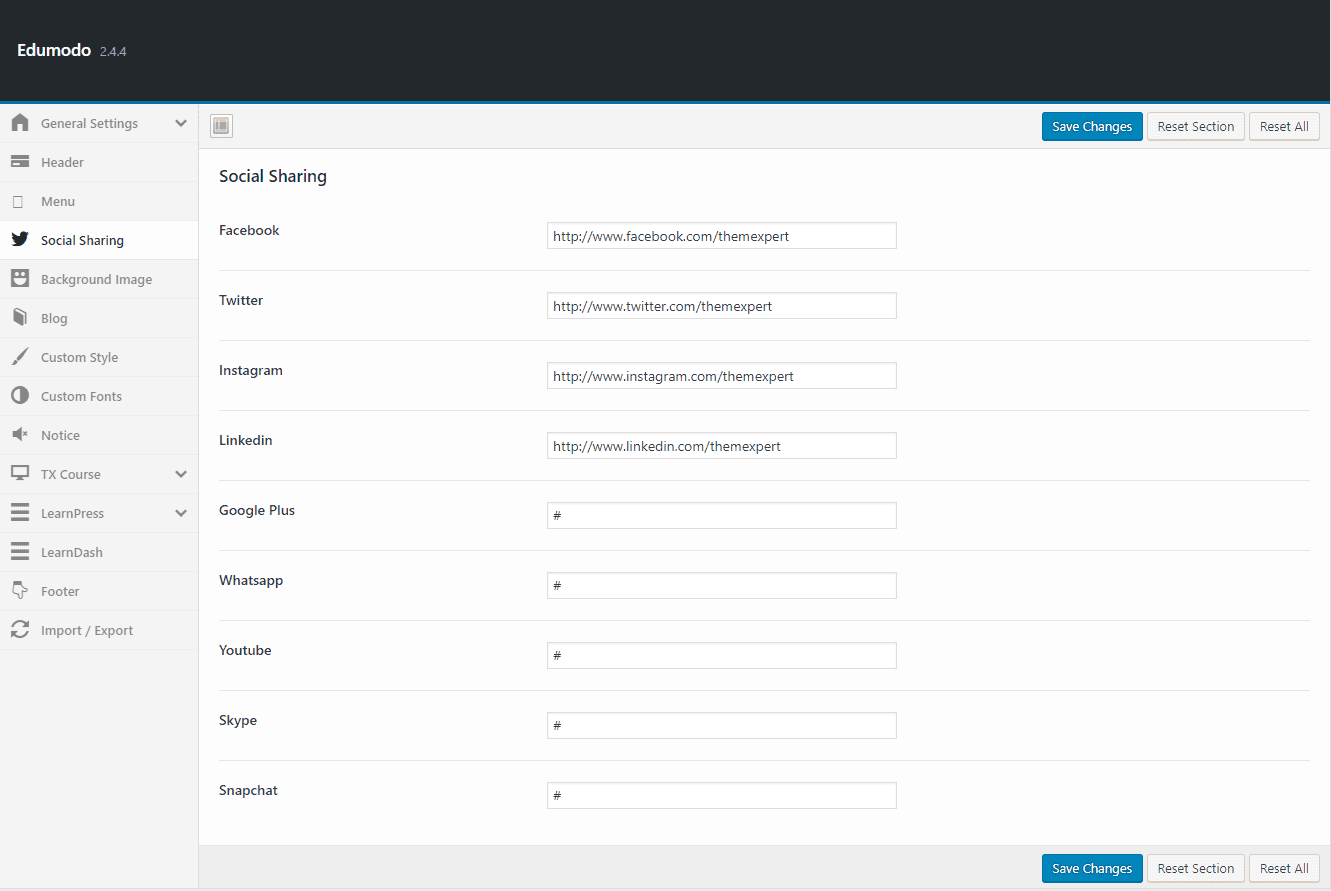
- Facebook : Put your facebook link at this field.
- Twitter : Put your twitter link at this field.
- Instagram : Put your instagram link at this field.
- Linkedin : Put your linkedin link at this field.
- Google Plus : Put your google plus link at this field.
- Whatsapp : Put your whatsapp link at this field.
- Youtube : Put your youtube link at this field.
- Skype : Put your skype link at this field.
- Snapchat : Put your Snapchat link at this field.
Background Image
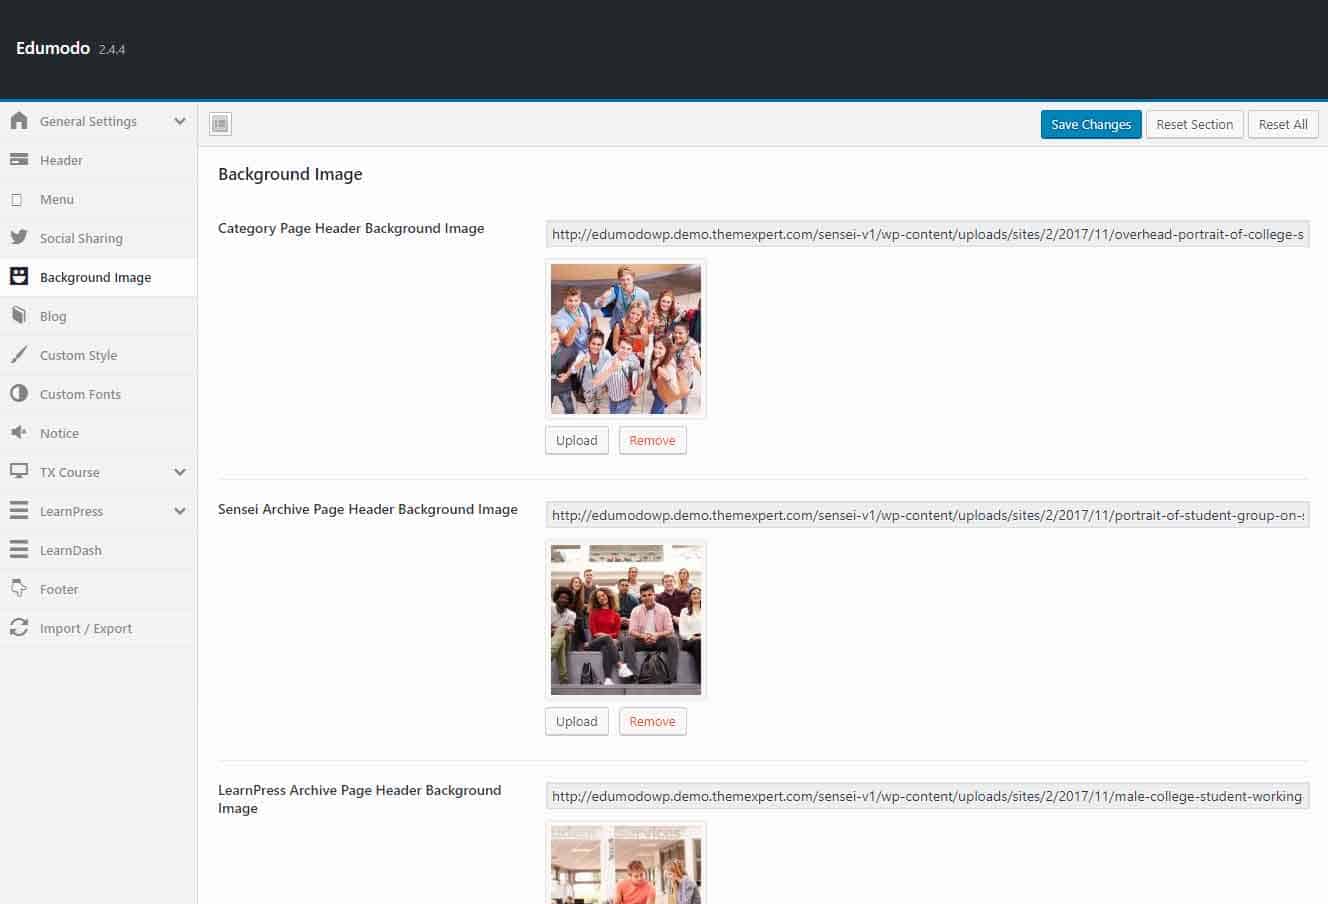
- Category Page Header Background Image : Set your preferred image for category page header background.
- Sensei Archive Page Header Background image : Set your preferred image for sensei archive page header background.
- LearnPress Archive Page Header Background image : Set your preferred image for learnpress archive page header background.
- Shop Page Header Background Image : Set your preferred image for shop page header background.
- Event Page Header Background Image : Set your preferred image for event page header background image.
- Teachers Archive Page Header Background Image : Set your preferred image for teachers archive page header background.
- Search Page Header Background Image : Set your preferred image for search page header background.
- 404 Image : Set your preferred image for 404 redirection page.
Blog
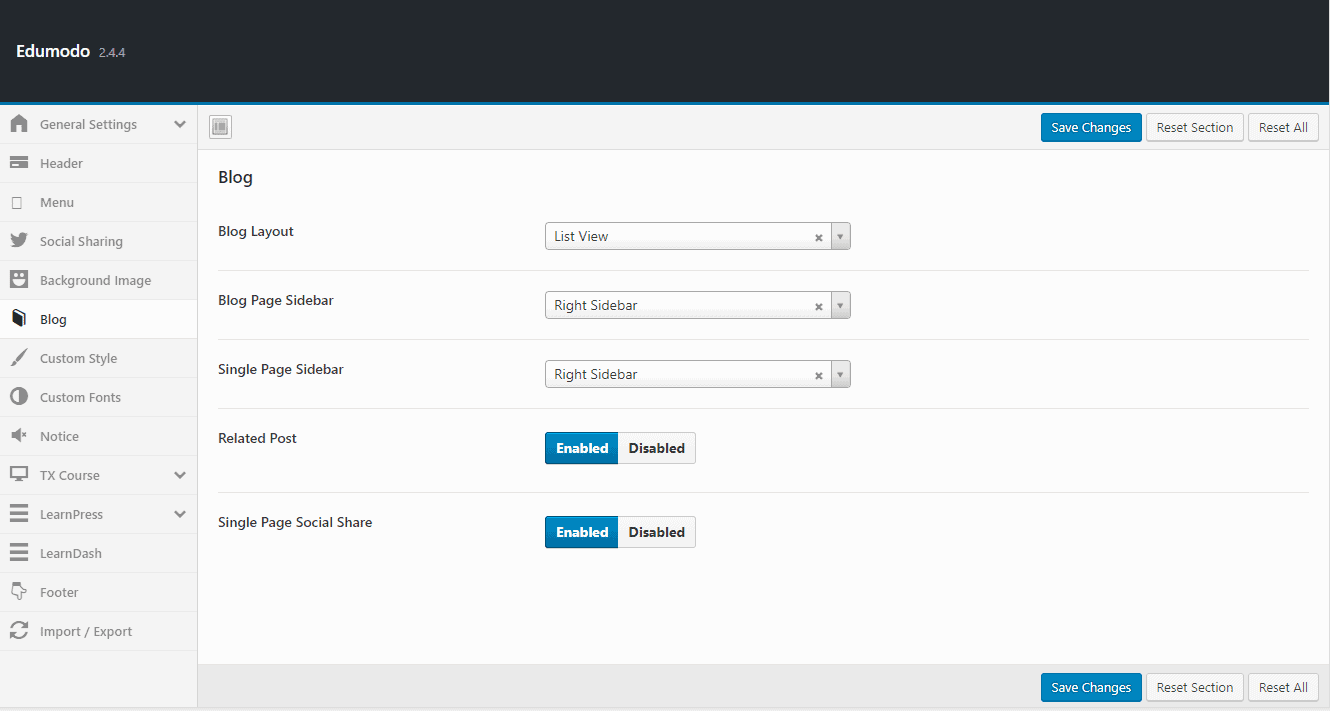
- Blog Layout : Choose your preferred layout for your blog. Currently there are two layouts available - List view and Grid view.
- Blog Page Sidebar : Choose the position for blog page sidebar.
- Single Page Sidebar : Choose the position for single page sidebar.
- Related Post : Toggle to enable or disable related post on your site.
- Single Page Social Share : Toggle to enable or disable blog social share on your site.
Custom Style
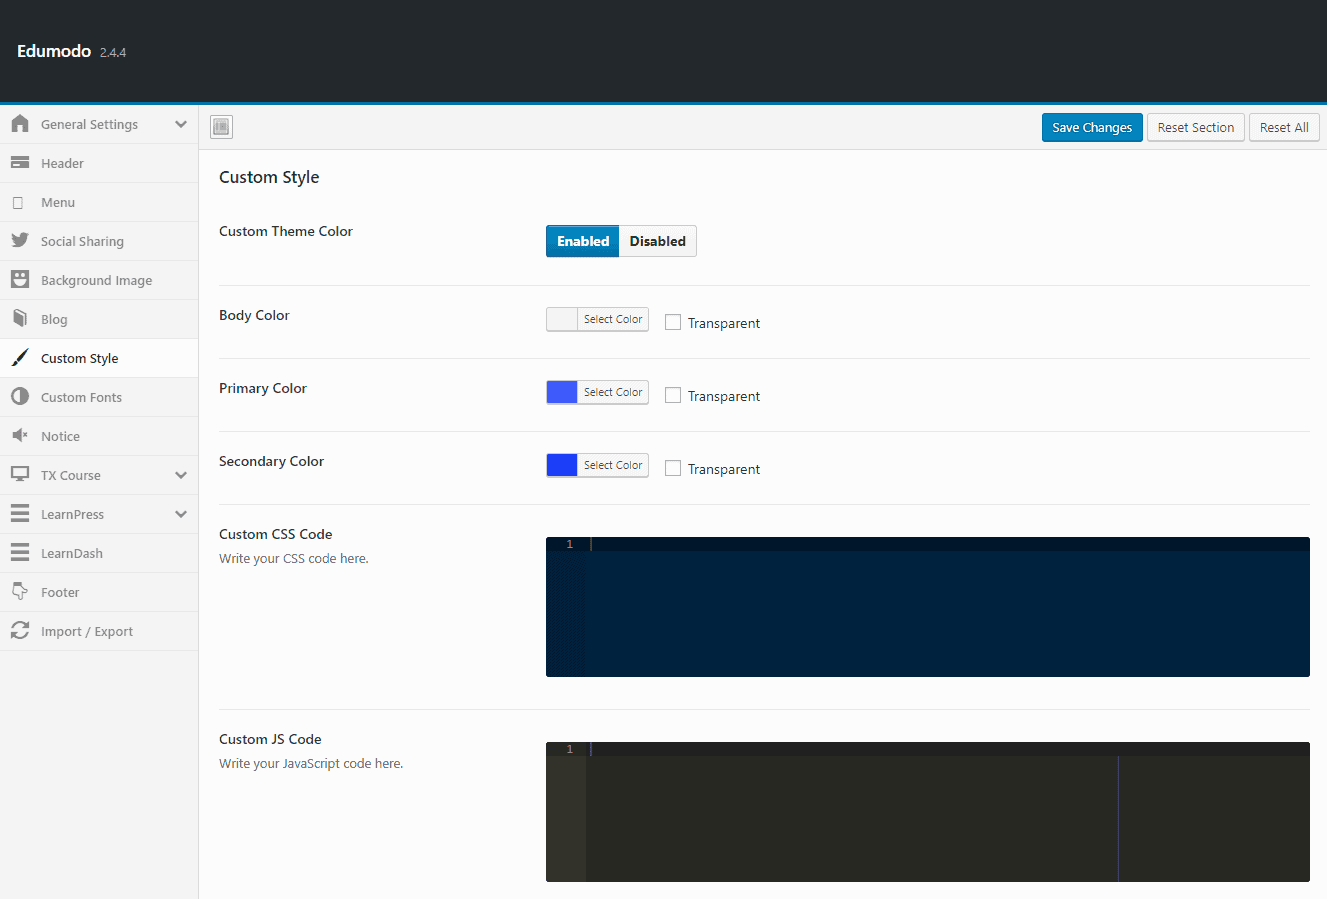
- Custom Theme Color : Toggle to enable or disable custom theme color.
- Body Color : Select your preferred body color from here or make it transparent by ticking on transparent option.
- Primary Color : Select your preferred primary color from here ank you can also make it transparent by ticking on transparent option.
- Secondary Color : Select your preferred secondary color from here ank you can also make it transparent by ticking on transparent option.
- Custom CSS Code : Put your custom css code at here.
- Custom JS Code : Put you custom JS code at here.
Custom Fonts
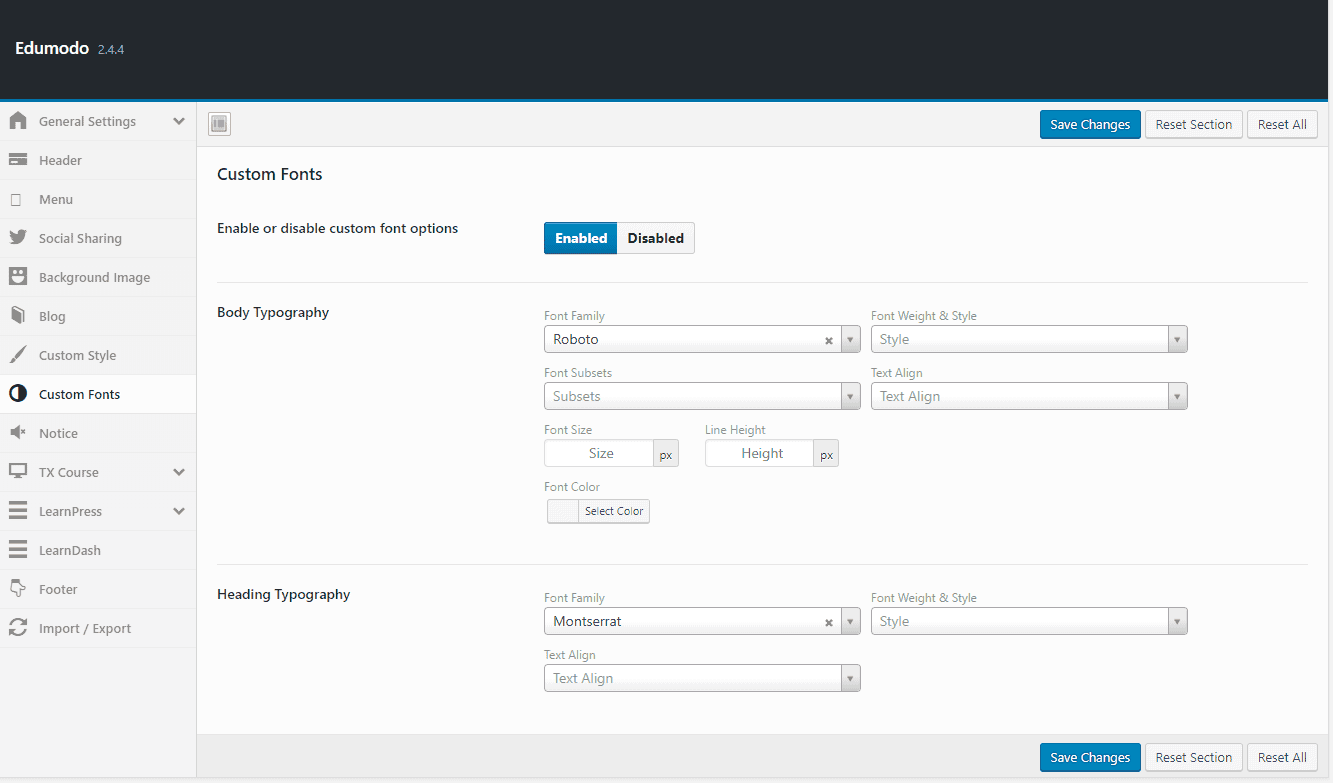
- Enable or disable custom font options : Toggle to enable or disable custom font options.
- Body Typography : Customize and set the typography for your websites body from here. Set font, weight, style, subsets, alignment, size, height, and color from here.
- Heading Typography : Customize and set the typography for your websites heading from here. Set Font family, weight, style, and text align from here.
Notice
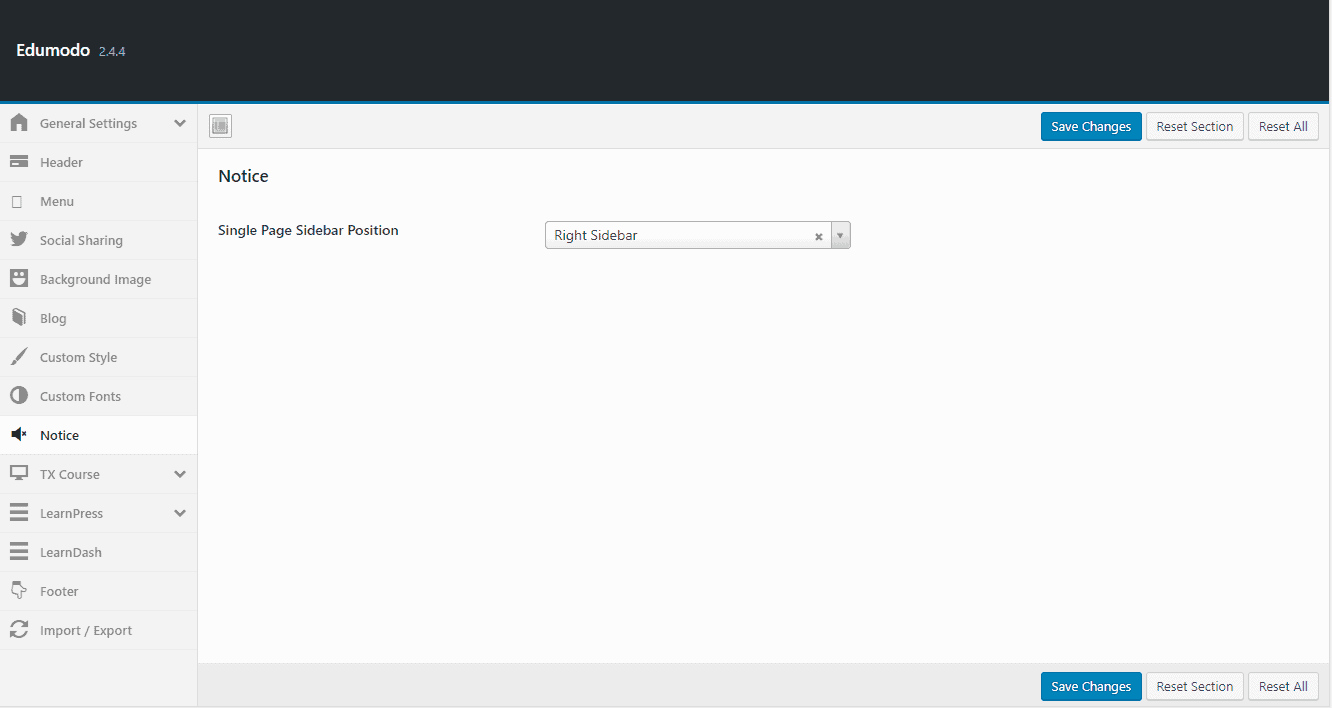
- Single Page Sidebar Position : Choose the position of single page sidebar.
TX Course
Archive Page
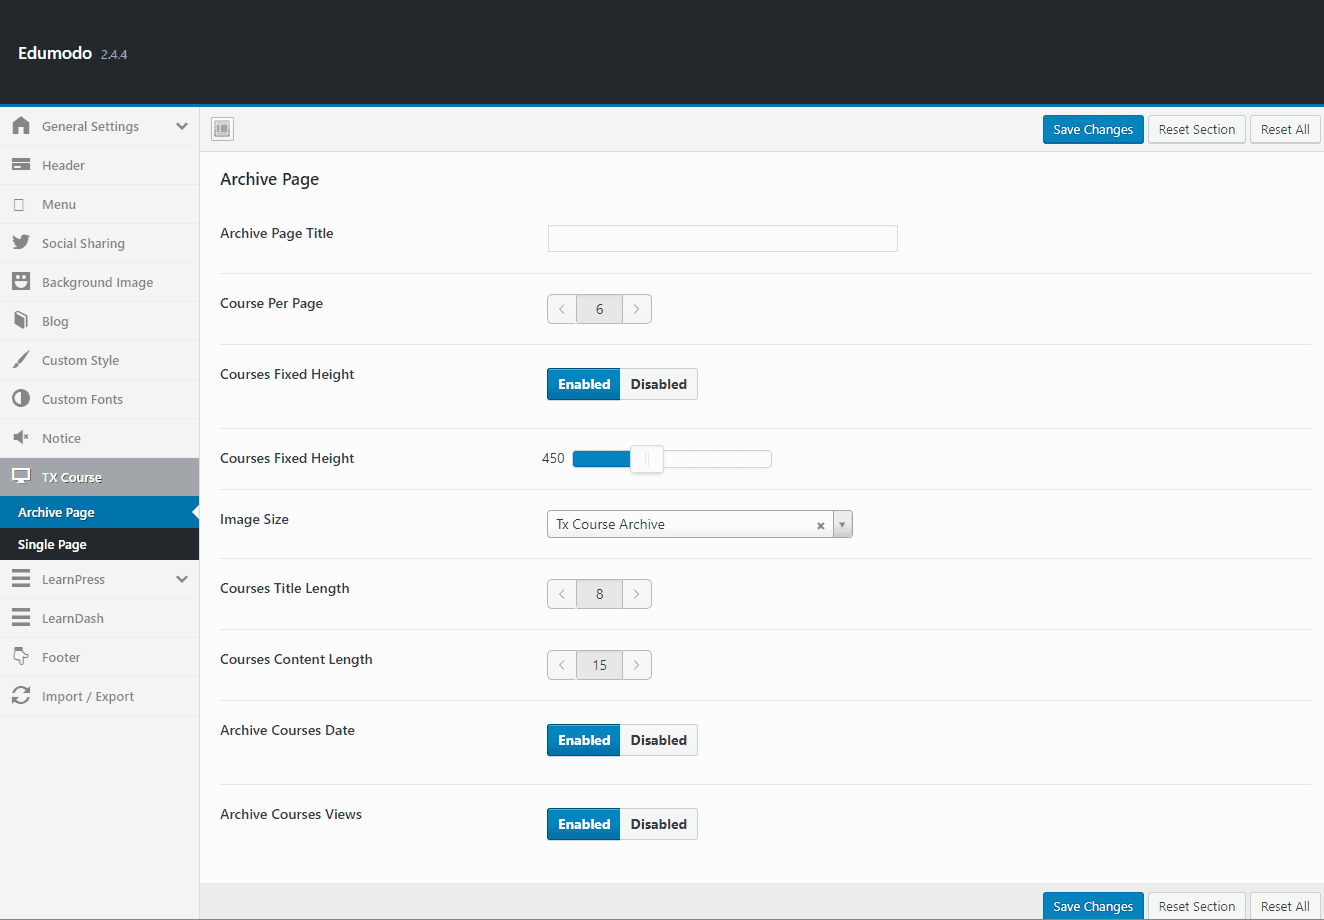
- Archive Page Title : Give a suitable title to your archive page from here.
- Course Per Page : Define how many course you want to show per page at here.
- Courses Fixed Height : If you want fixed height of your courses than enable this option.
- Set Courses Fixed Height : Increase or decrease courses fixed height from here.
- Image Size : Define the image size for archive page from here.
- Courses Title Length : Define the Courses title length from here.
- Courses Content Length : Define the length of courses content from here.
- Archive Courses Date : Toggle to enable or disable archive courses date.
- Archive Courses Views : Toggle to enable or disable archive courses views.
Single Page

- weForms Shortcode : Put your weForms shortcode at here.
- Courses Date : Toggle to enable or disable courses date from here.
- Course Views : Toggle to enable or disable course views.
- Course Category : Toggle to enable or disable course category.
- Image Size : Define the image size for single page from here.
Learnpress
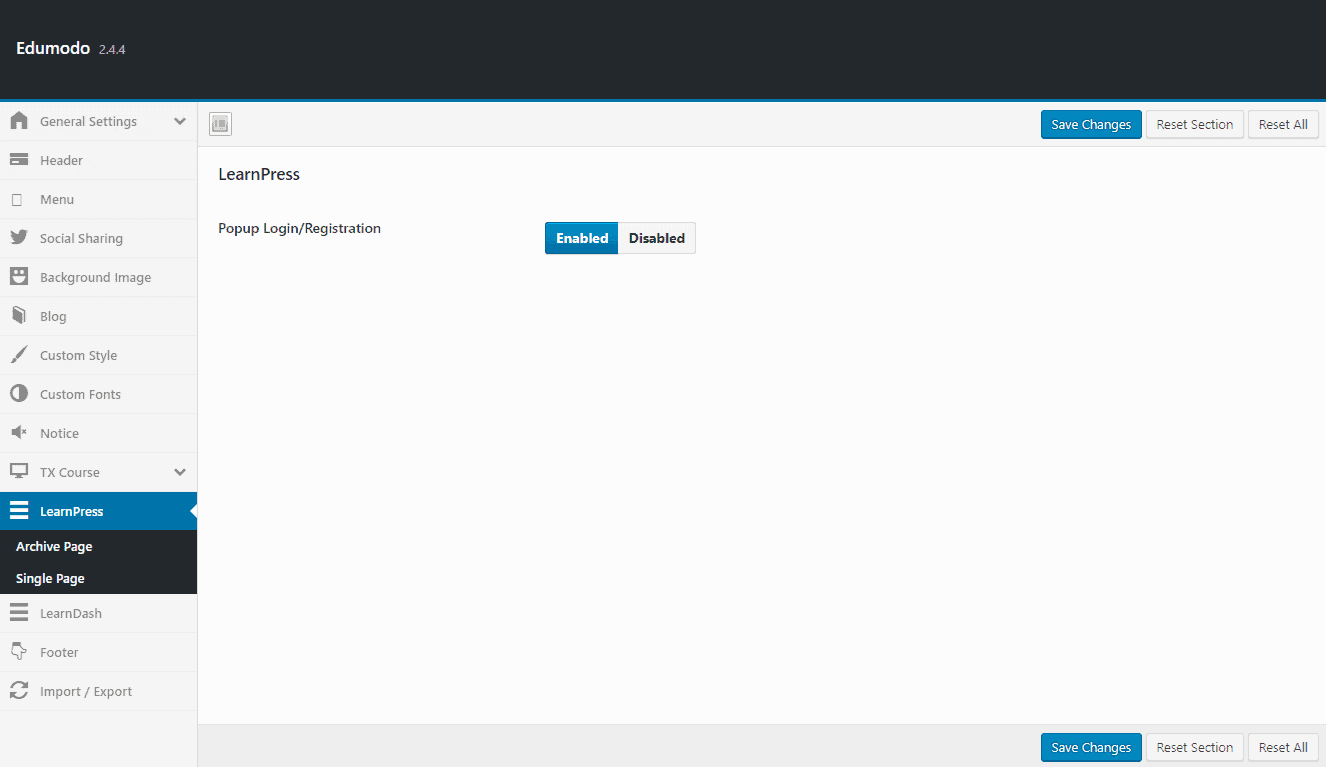
- Popup Login/Registration :
Archive Page
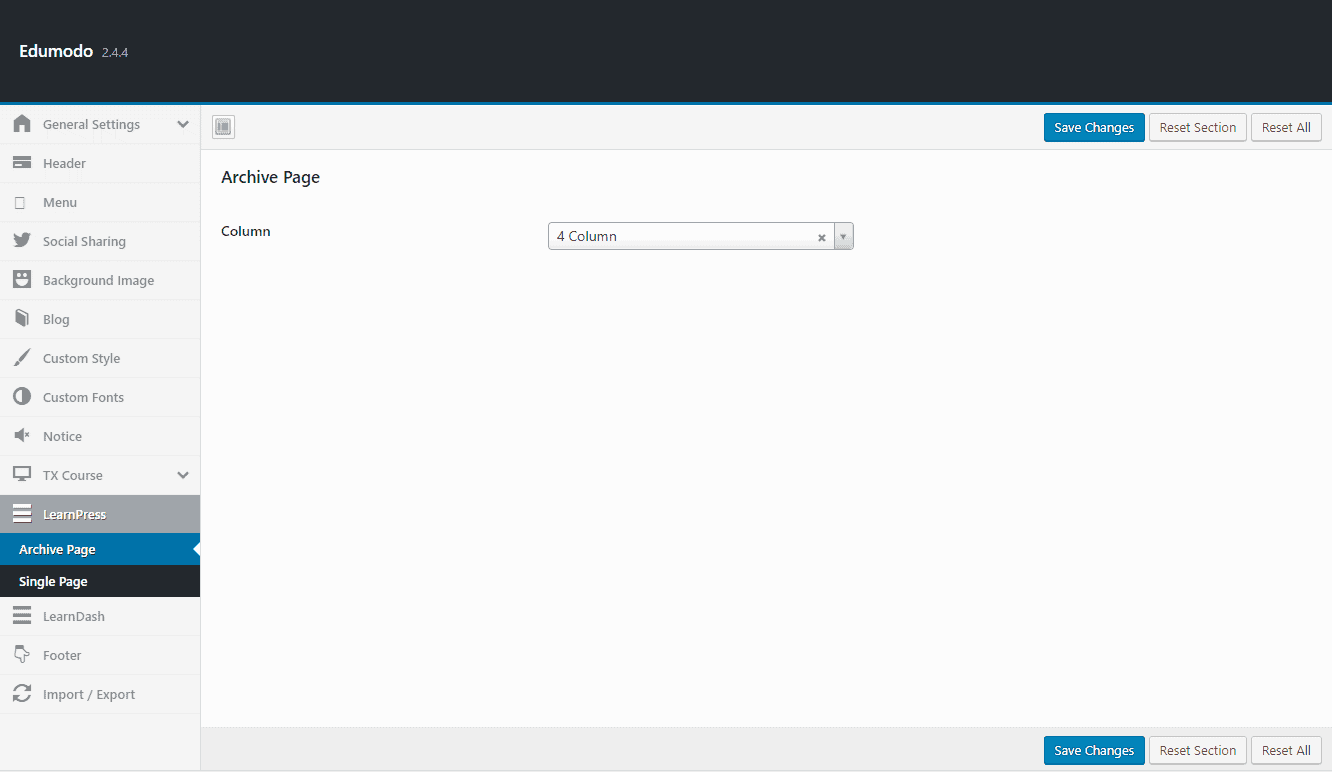
- Column : Choose how many columns you want in your learnpress archive press.
Single Page
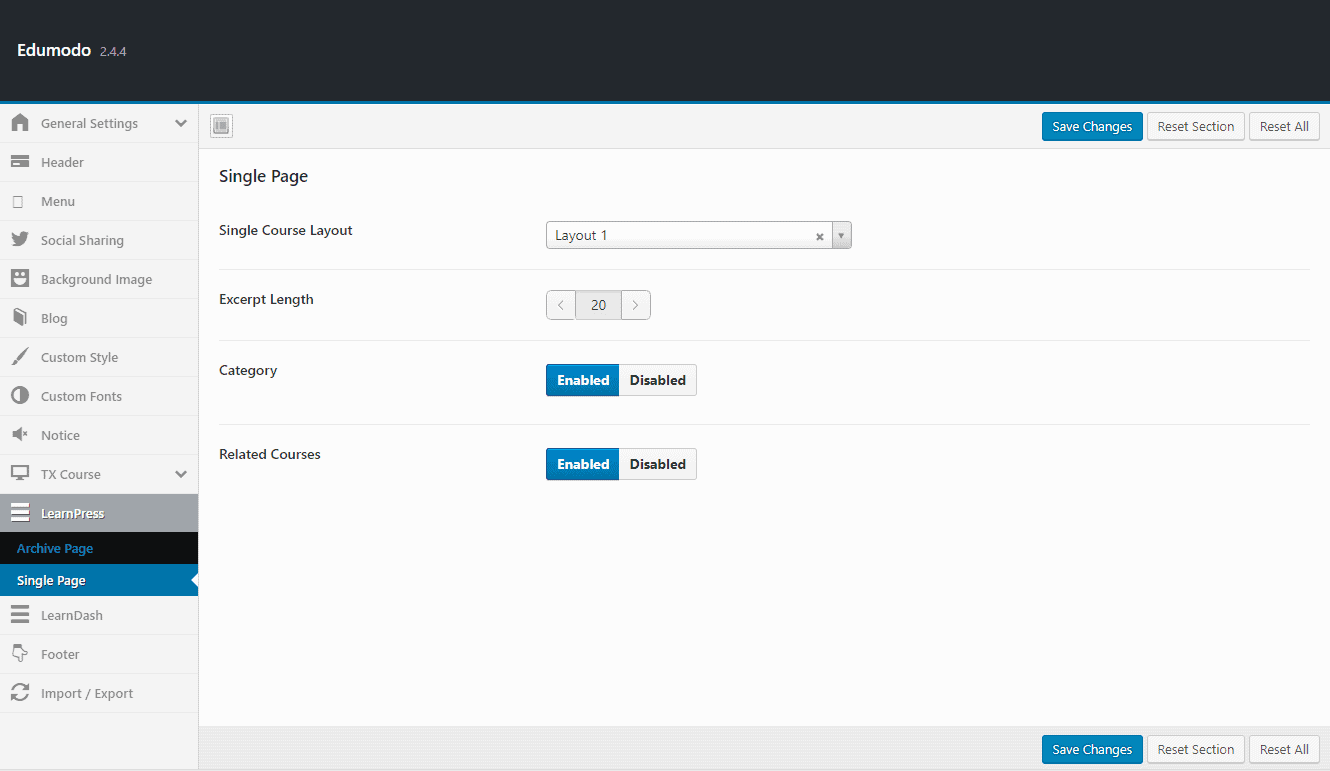
- Single Course Layout : Choose your preferred learnpress single course style from three different styles.
- Page Background Color : Pick a color you like for your page background.
- Excerpt Length : Define the excerpt word length of your single course layout.
- Created by : Enable this option to show the author of the course in the layout.
- Last Update : Enable this option to show last when the course was updated.
- Category : Enable this option if you want to use category on your single learnpress course layout.
- Enrolled : Enable this option to show the number of total students of your course.
- Related Courses : Toggle to enable or disable single page related courses for learnpress lms.
LearnDash
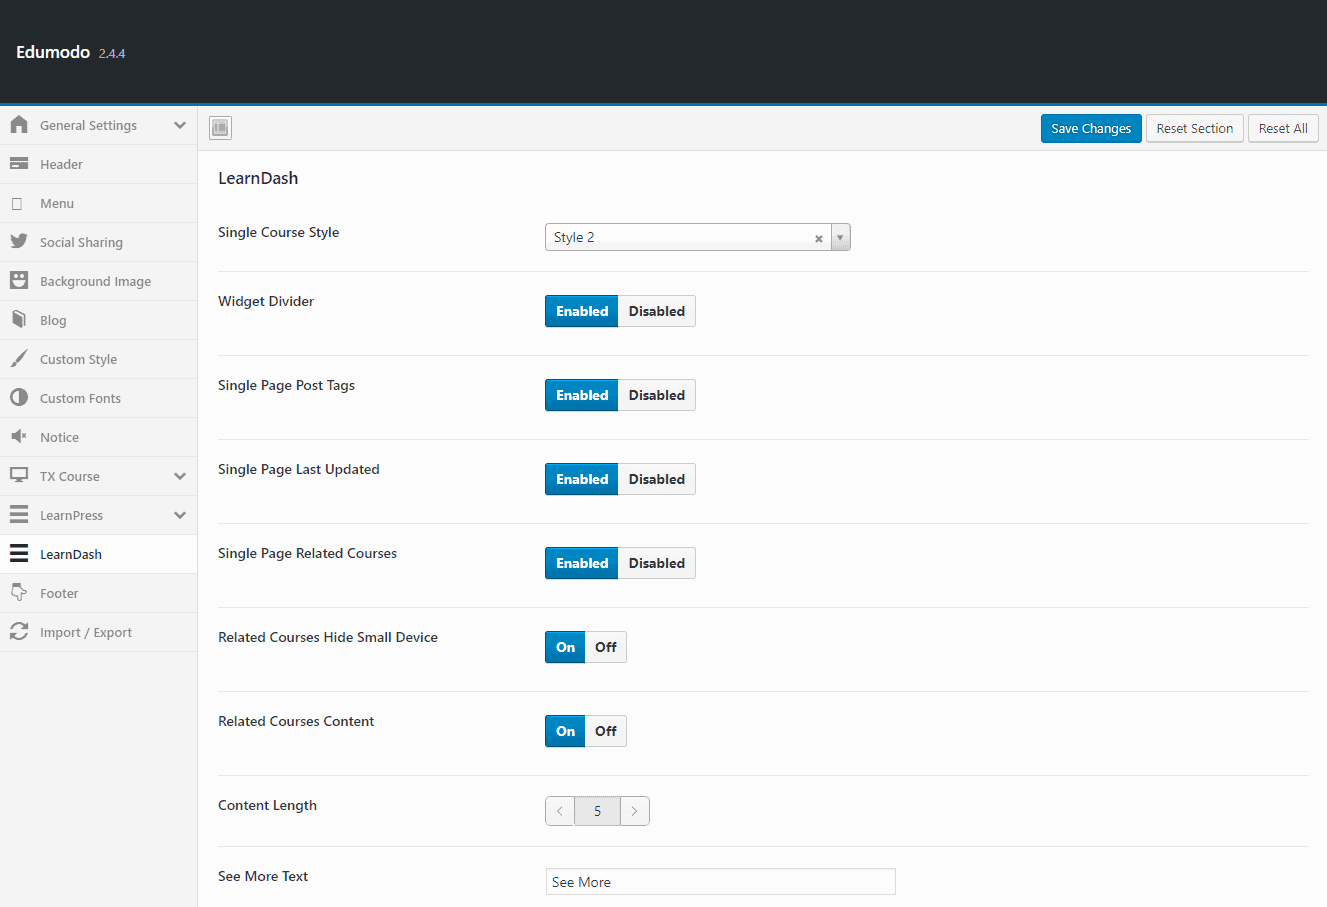
- Single Course Style : Choose the course layout style for the learndash lms from here.
- Widget Divider : This option adds a divider in between your widgets.
- Single Page Post Tags : Show or hide the post tag on your course with this option.
- Single Page Last Updated : Show or hide the date of last update with this option.
- Single Page Related Courses : Show or hide related courses on your course.
- Related Courses Hide Small Device : If you want to hide related courses on small device screens, than enable this option. After enabling this option, your viewers won’t be able to see any related courses on their small device.
- Related Courses Content : Enable this option if you want to show summary of your content in related courses.
- Content Length : Define the content length of related courses from here.
- See More Text : Write your text that you want to replace in the field of “See More Text”.
Footer
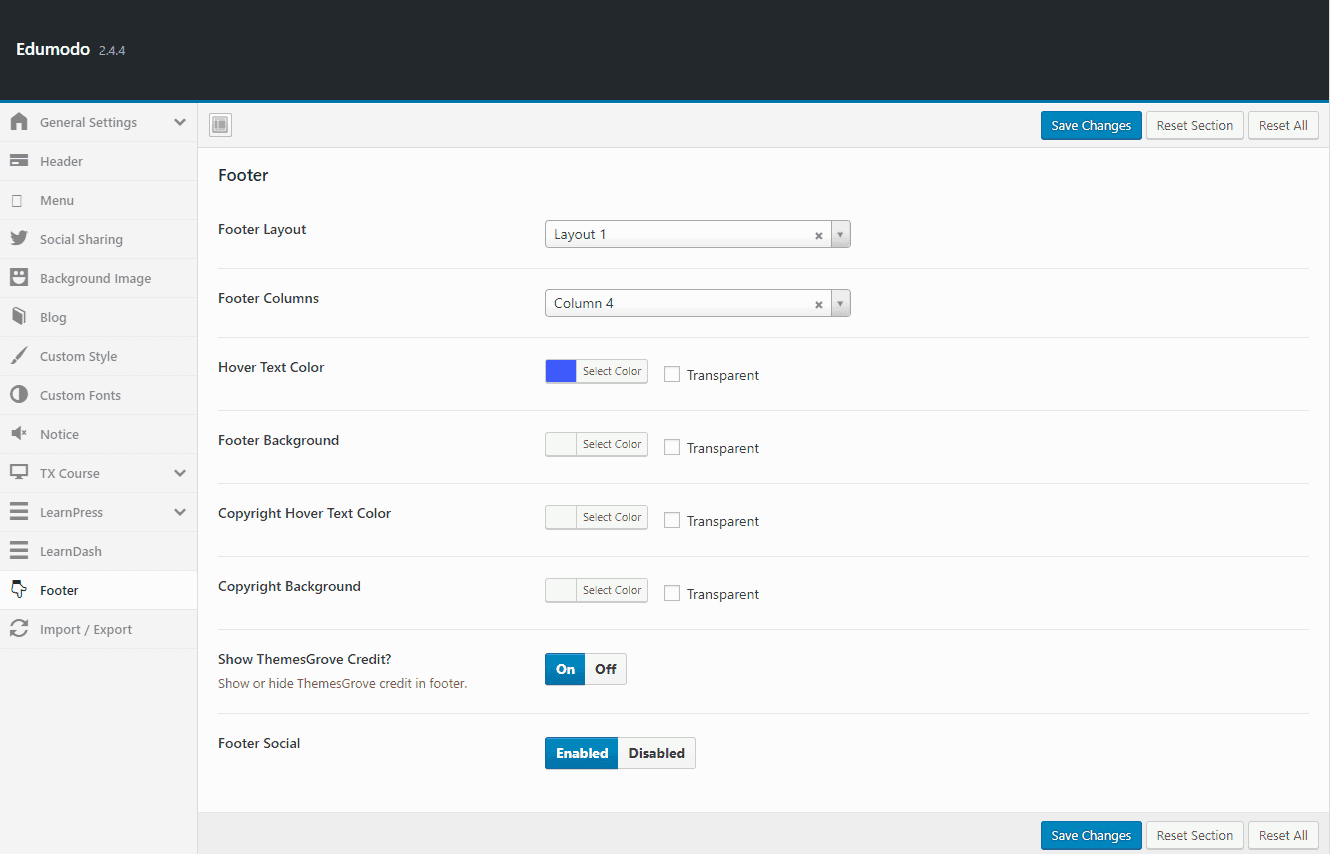
- Footer Layout : There are a total of 2 footer layouts available. Choose the one that suits best with your website.
- Footer Columns : Define the number of footer columns from here.
- Hover Text Color : Choose the text color when mouse is hovered. You can also make it transparent by ticking on transparent box.
- Footer Background : Select the color for footer background from here. If you wish you can make it transparent by ticking on transparent.
- Copyright Hover Text Color : Select the color that you want to see upon hovering on copyright text. If you wish you can make it transparent by ticking on transparent.
- Copyright Background : Select the color that you want to see on copyright background. If you wish you can make it transparent by ticking on transparent.
- Show ThemesGrove Credit? : By enabling or disabling this option you can show or hide ThemesGrove credit.
- Footer Social : Toggle this option to disable or enable social options on footer.
Import / Export
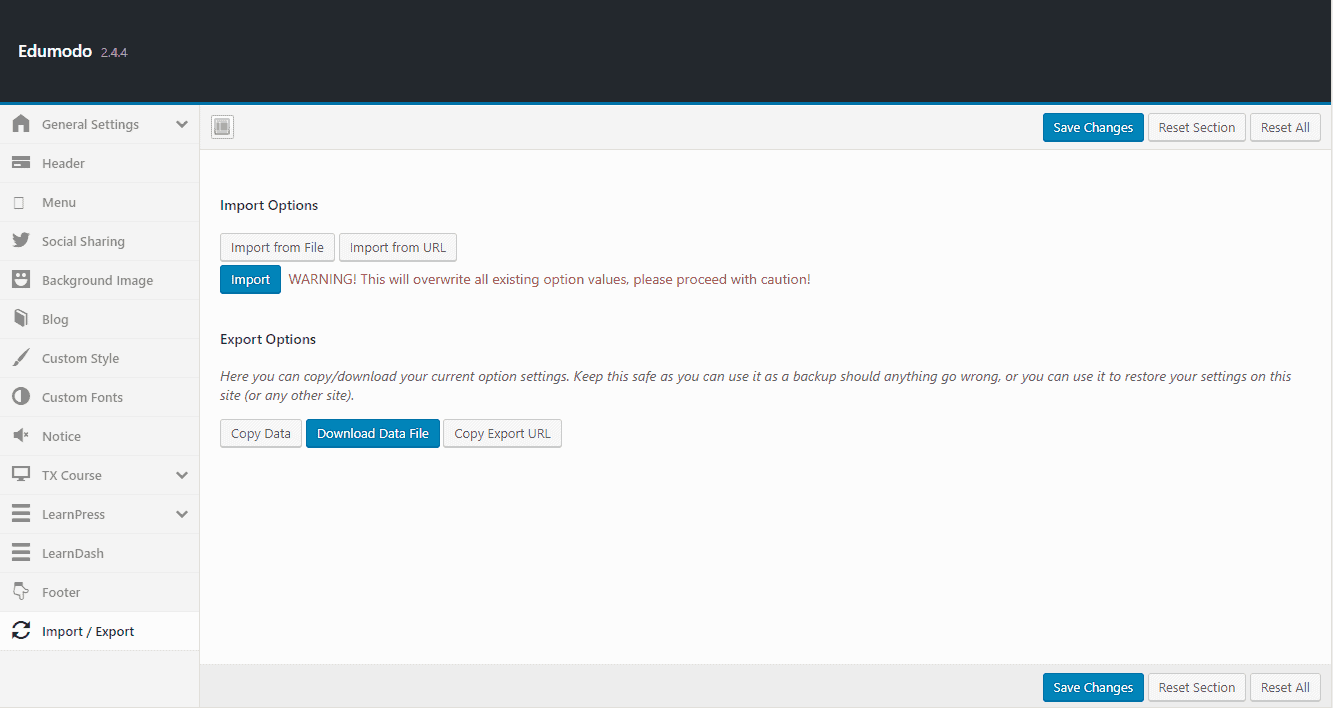
- Import from file : This button allows you to import your custom theme settings if you have preserved any.
- Import from URL : This button allows you to import your custom theme settings from URL.
- Download Data File : This button allows you to download the theme options as a .json file for further use in any other wp-themes. You just have to import that .json file using the Import button then.

Grow rapidly with our Joomla SEO service done by the veterans
With over 12 years of business and a vast array of Joomla templates and extensions, we know Joomla SEO better than anyone you could possiblly hire.
Improve my ranking