Digicom Release
Download
Visit our website, go to DigiCom’s Addons Page, head over to your desired addon and use the download button to download your preferred one.
Installation
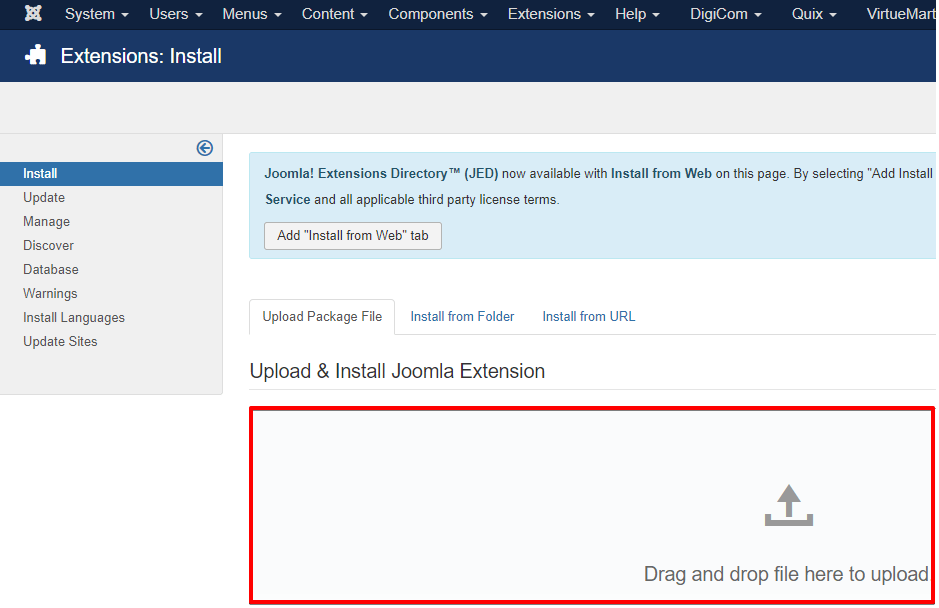
Installing plg_digicom_release.zip plugin is pretty simple. To do so,
- Go to
Extension> Manage> Installand under Install from Folder tab, select your downloaded plg_digicom_release.zip file and click Check and Install button. It will show you a successful installation message as soon as it installed successfully. Else, you can drop your downloaded file under the Upload Package File tab, and it will automatically upload your addon.
Configuration
For configuring it, you don’t have to worry. You just need to enable the add-on and that's all. You can find it on the plugin list. What you need to do to enable it is-
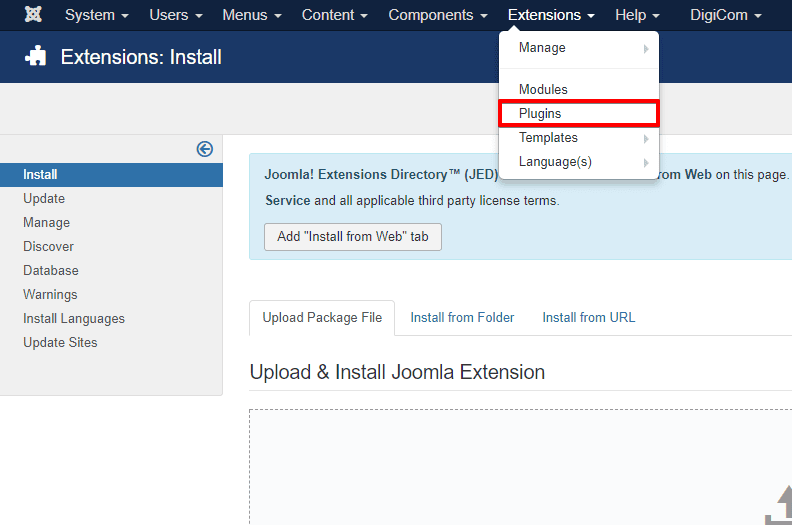
- Go to
Extensions> Plugins
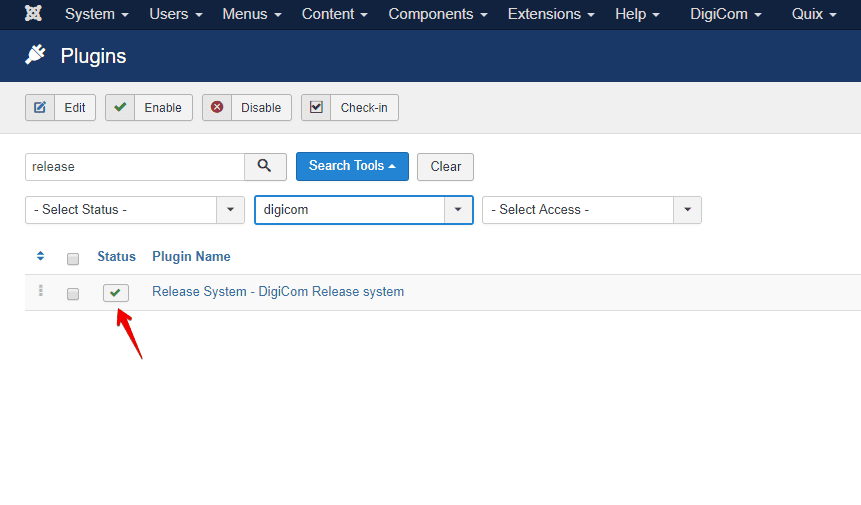
- Find the plugin from the list. You can use the search box to find it quickly. Just write
releaseon the Ajax search box, and you’ll find it on the top of the module. After you find it, enable it just by clicking on the pointed area shown in the screenshot below.
After enabling this plugin,you will find a new menu on your DigiCom dashboard, named Release
Making New Release
To make a new release, follow the instruction below.
- Go to
DigiCom> Release
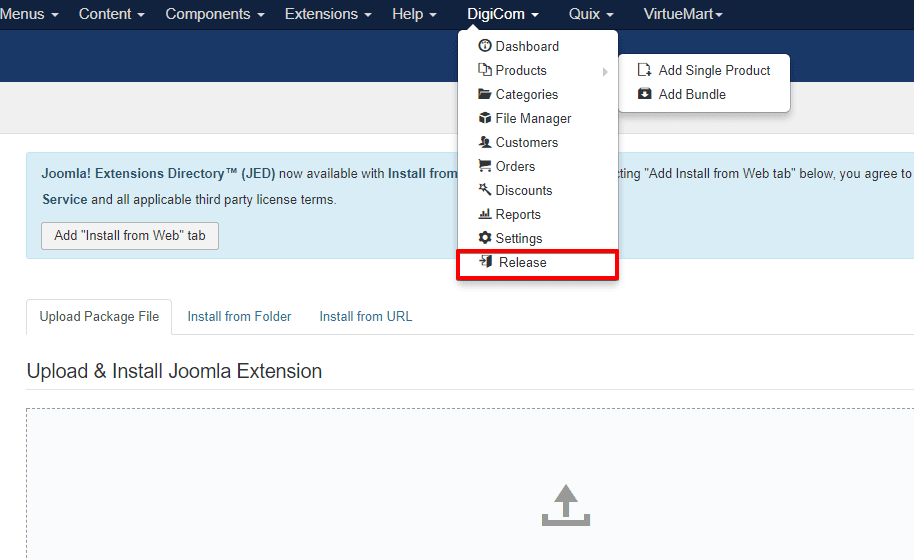
- Click on New Release from the top-right of the module.
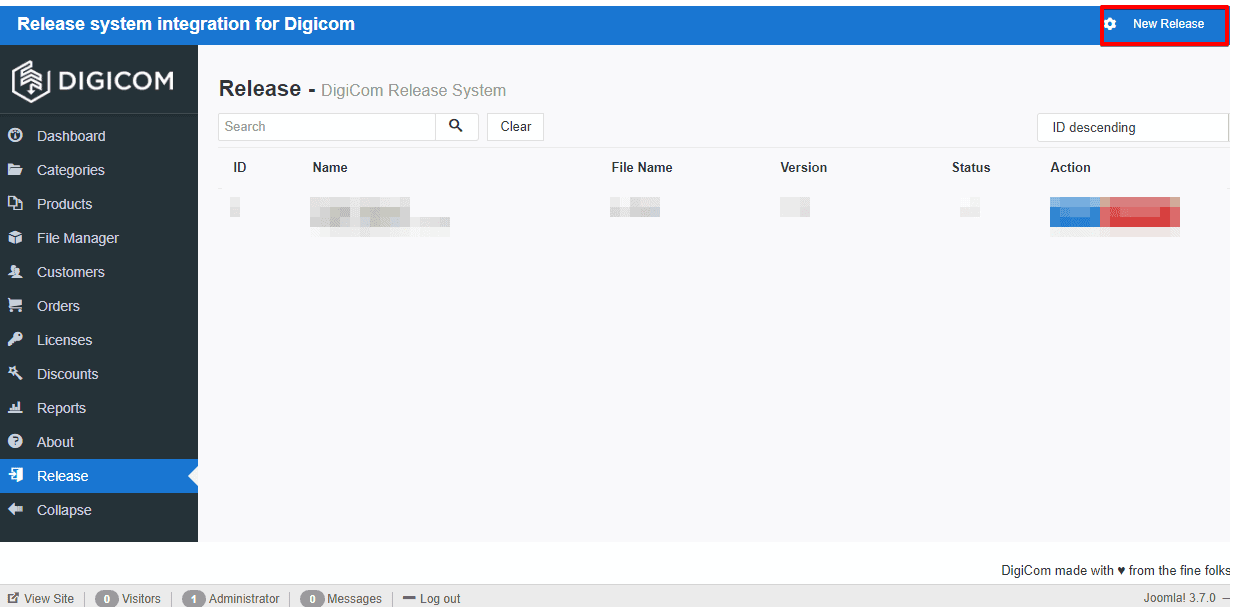
- Now, fill-up all the fields according to your product details.
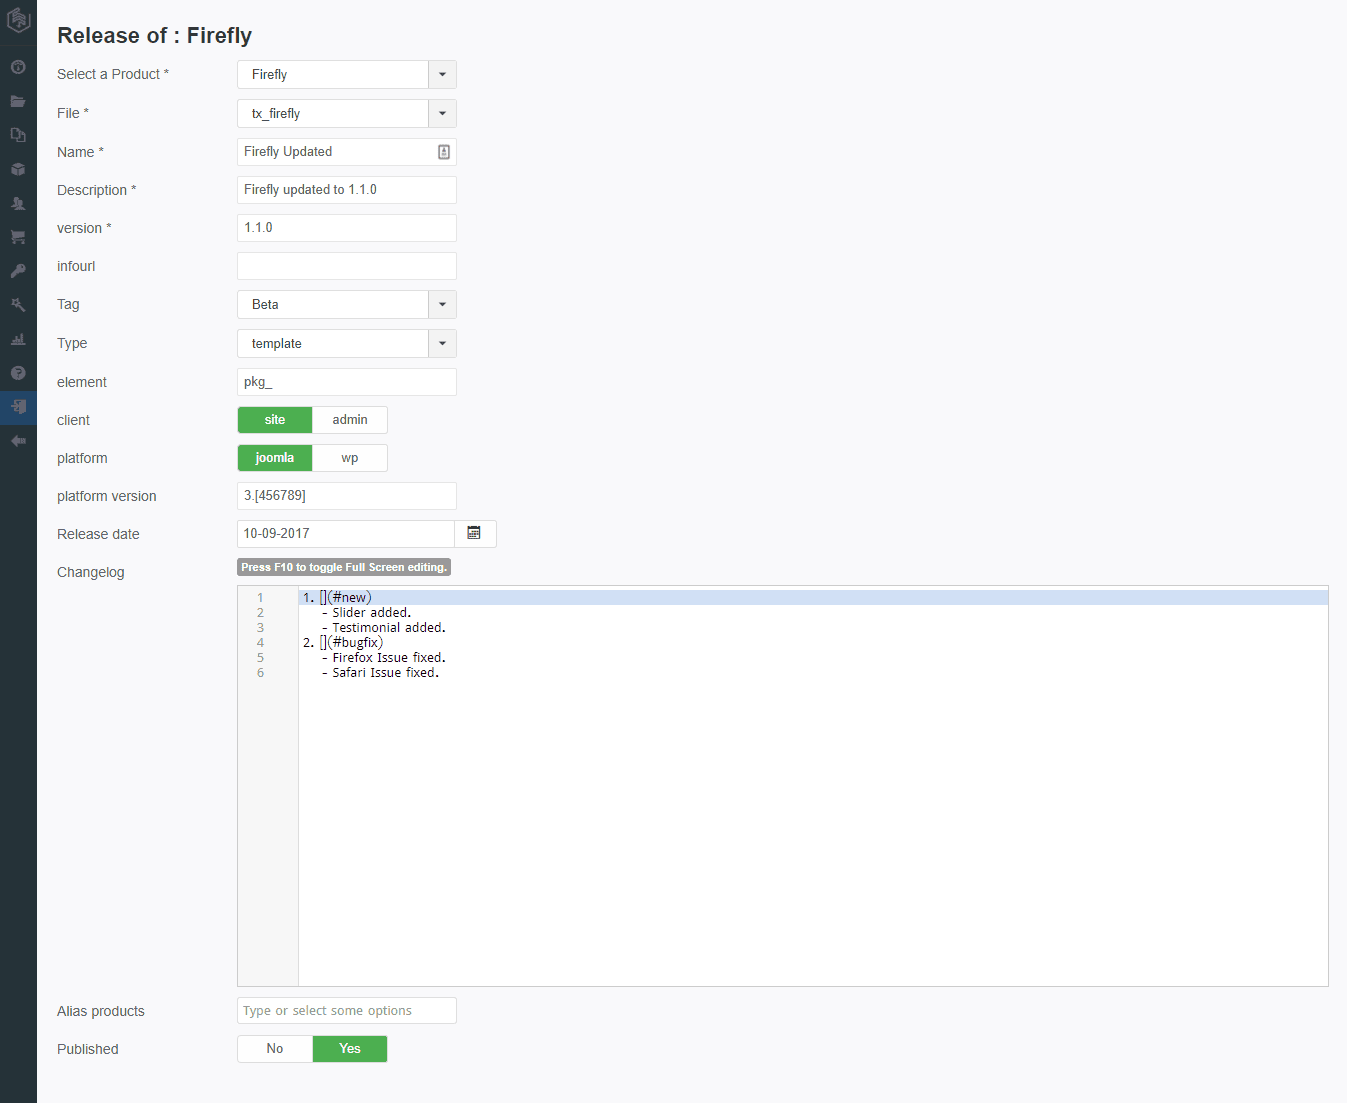
- Select a product : Choose the product from the drop-down that you are releasing.
- File : Select the product’s file from the drop-down.
- Name : Put the name of the product.
- Description : Put the description text of that product.
- Version : Define the version of the product you are releasing.
- InfoURL (optional) : Put the url if the product does have any announcement blog post or so.
- Tag : Select the product tag for this release.
- Type : Define the type of the product.
- Element : Put the element tag correctly.

- Client : Specify the client for your product.
- Platform : Define the platform of which your product is belongs to. (Either Wordpress (wp) or Joomla)
- Platform Version : Define the platform version.
- Release Date : Put the releasing date.
- Changelog : List out which things have been changed or modified in this current version or specify this as initial release.
- Alias Products :
-
Published : Choose Yes to confirm publishing.
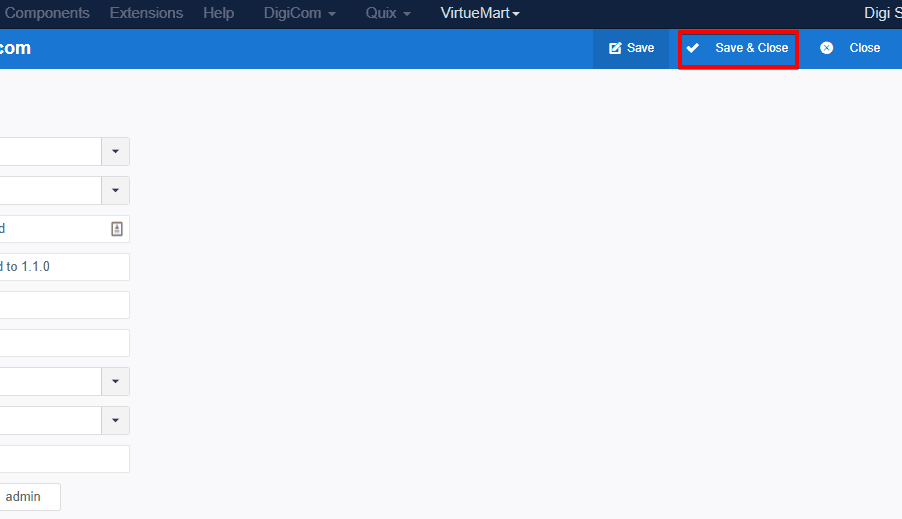
- Now click on Save & Close button to successfully make the release.
Front-end appearance:

Your site update URL
Find your site update URL below.
<updateservers>

    <server type="extension" priority="1" name="New Release"><![CDATA[https://www.themexpert.com/index.php?option=com_digicom&task=responses&source=release&format=xml&provider=joomla&pid=1]]></server>

</updateservers>
