Do you know, your work will speak for you?Showing off your work in a stylish portfolio can be more effective than any other marketing strategy to get more assignments.If you’re serious about attracting new clients and claiming to be a professional and creative person, then you need a professional-looking, creative portfolio, right?>The good news is Quix has a stunning element of the portfolio that allows you to build a beautiful showcase for your work. This element is beginner-friendly and comes with enough customization options to make your portfolio your own.Today, I am going to show you the easiest way to create a filterable Portfolio with Quix.Let's do it!## How to make a Filterable Portfolio with Quix?Step 1: Add a new "Section", a new "Row" in the section and then add a "Column" into the row.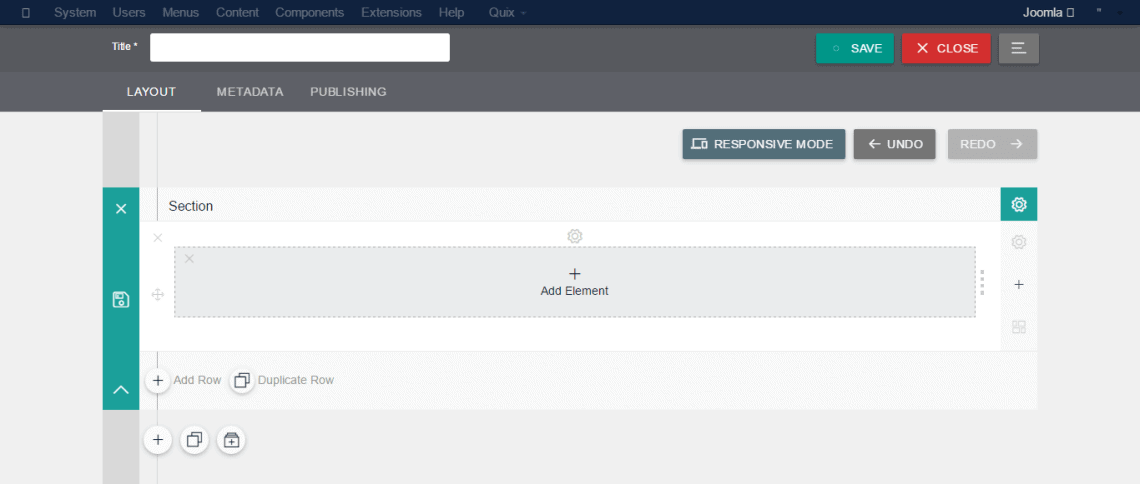 Step 2: Add a "Filterable Gallery" element from the Quix elements list.
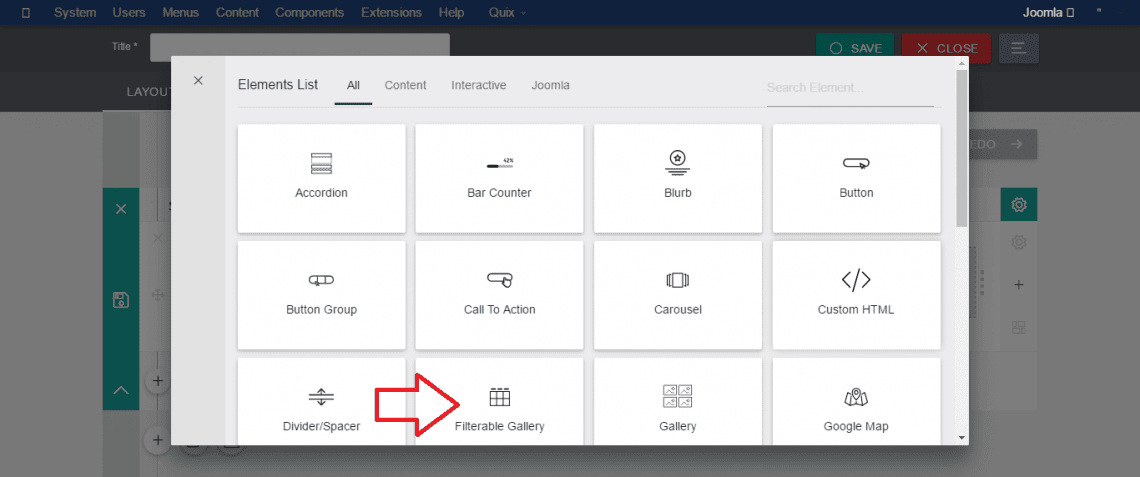 Step 3: Configure "General Settings". You will see the following options under general settings panel.
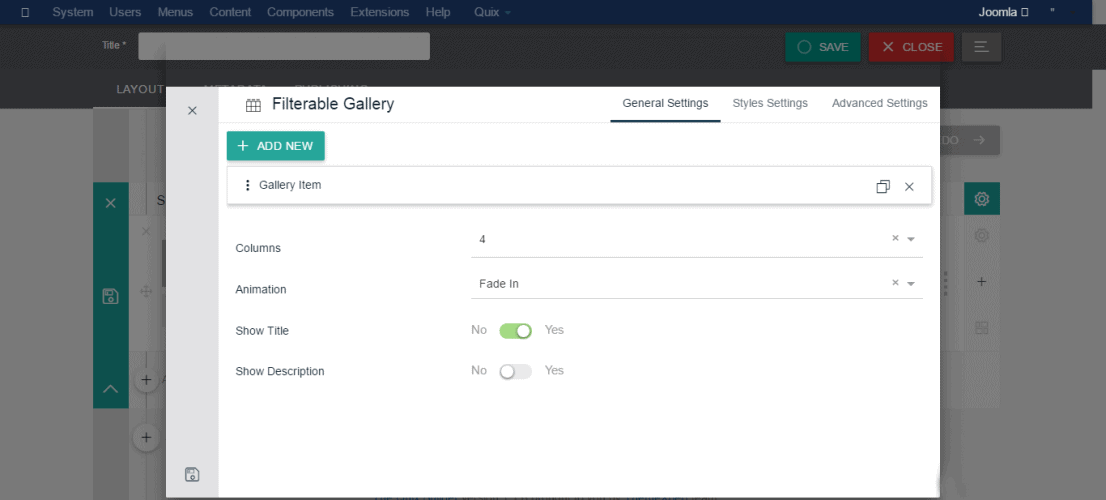 Add New: Use this button to add a new item to your portfolio list. Columns: Fixed the column number in this field that implies how many items you want to show in a single row. Animation: Quix Filterable Gallery element comes with total six animations. These are: Fade In, Zoom In, Left to Right, Right to Left, Bottom to Top & Top to Bottom. Choice one among them to fetch an animated style in your portfolio objects. Show Title: If you want to show the title with portfolio turn this setting to "Yes". Show Description: Same as the title, If you want to demonstrate the story with portfolio turn this setting to "Yes".Step 4: Moving on to the next point. Settings of the new item. Click on an item; the settings will come in front of you from the accordion.Here you will see the following configuration. Title: Keep the portfolio title here. Image: Insert the image of the portfolio from your directory. Description: The story behind the portfolio item goes in this field. You may fetch some styles in the text using the TinyMCE editor. Link: If you want to assign your visitors to an external link just keep that link in this field. Tags: Keep the focused keyword here that implies the specialty of your task. This tags will generate a category automatically at the topmost.Step 5: Configure "Style Settings". You will see the following options under style settings panel.
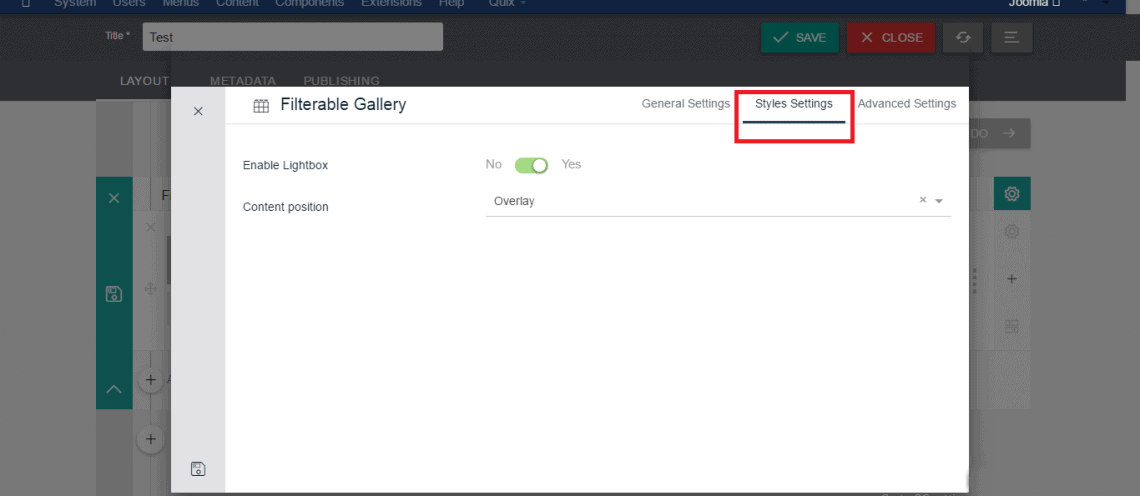 Enable Lightbox: Keep this setting "Yes" if you want to enable lightbox. The lightbox will display the images with a front view look means when user will click on an image it will come forward with a larger size. Content Position: You can display your contents in two ways. Bottom of Image & Overlay.1. Bottom of Image: Choose this setting if you want to show the contents in the lower part of the portfolio.2. Overlay: Choose this setting if you want to show the contents at the middle and over the portfolio only when the mouse hovers over it.Step 6: Configure "Advanced Settings". You will see the following options under advanced settings panel: Label, ID & Class.
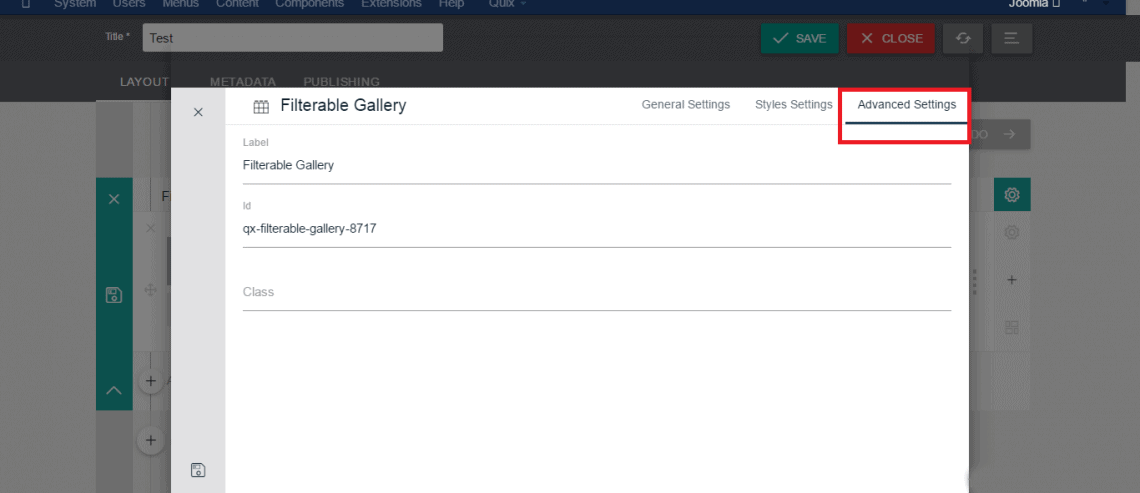 You don't need to configure first two fields; these fields will generate automatically. But you can configure or fetch your own style using the Class field.## How to add a CSS class in Quix advanced settings?Step 1: Just go to the following directory: YOUR_ROOT_DIRECTORY/templates/YOUR_TEMPLATE/css/template.cssStep 2: Open the template.css file using any editor.Step 3: Add your code at bottommost of the CSS file
.quix-new-class{/*Your CSS code goes here*/}Just add the CSS attributes that you want to fetch in your style. Step 4: After that, just add the class "quix-new-class" on the CSS field of advanced settings panel.Now, I would like to show you an example that indicates how much beautiful portfolio gallery you can build using Quix without any stress.Look at the image below. I have collected it from one of our Best Joomla Template - Biznes, where we have used Quix page builder to build template pages.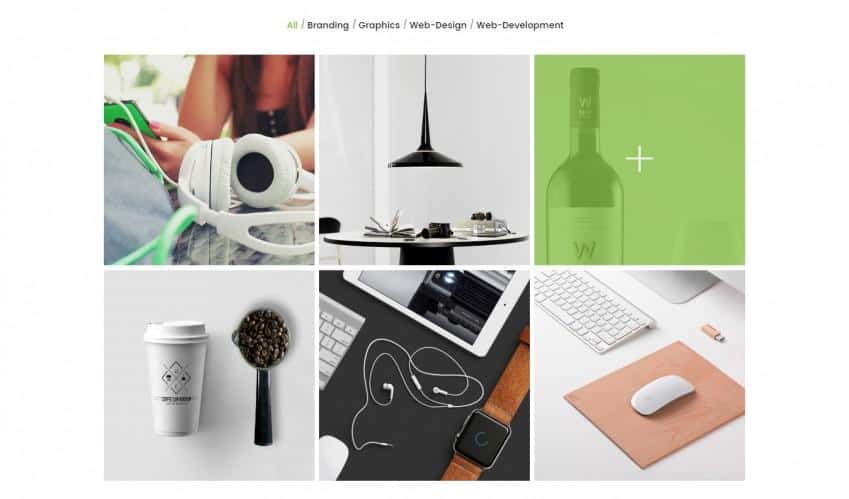 Live Demo## Last Lines:The method you will use to display your work will say almost everything about you as the work itself. So, show it off with confident, pride and in a smart and professional way.Let us know about your query if any through the comment section in below. We will love to hear from you.
Do you know, your work will speak for you?
Showing off your work in a stylish portfolio can be more effective than any other marketing strategy to get more assignments.
If you’re serious about attracting new clients and claiming to be a professional and creative person, then you need a professional-looking, creative portfolio, right?
The good news is Quix has a stunning element of the portfolio that allows you to build a beautiful showcase for your work. This element is beginner-friendly and comes with enough customization options to make your portfolio your own.
Today, I am going to show you the easiest way to create a filterable Portfolio with Quix.
Let's do it!
How to make a Filterable Portfolio with Quix?
Step 1: Add a new "Section", a new "Row" in the section and then add a "Column" into the row.
Step 2: Add a "Filterable Gallery" element from the Quix elements list.
Step 3: Configure "General Settings". You will see the following options under general settings panel.
- Add New: Use this button to add a new item to your portfolio list.
- Columns: Fixed the column number in this field that implies how many items you want to show in a single row.
- Animation: Quix Filterable Gallery element comes with total six animations. These are: Fade In, Zoom In, Left to Right, Right to Left, Bottom to Top & Top to Bottom. Choice one among them to fetch an animated style in your portfolio objects.
- Show Title: If you want to show the title with portfolio turn this setting to "Yes".
- Show Description: Same as the title, If you want to demonstrate the story with portfolio turn this setting to "Yes".
Step 4: Moving on to the next point. Settings of the new item. Click on an item; the settings will come in front of you from the accordion.
Here you will see the following configuration.
- Title: Keep the portfolio title here.
- Image: Insert the image of the portfolio from your directory.
- Description: The story behind the portfolio item goes in this field. You may fetch some styles in the text using the TinyMCE editor.
- Link: If you want to assign your visitors to an external link just keep that link in this field.
- Tags: Keep the focused keyword here that implies the specialty of your task. This tags will generate a category automatically at the topmost.
Step 5: Configure "Style Settings". You will see the following options under style settings panel.
- Enable Lightbox: Keep this setting "Yes" if you want to enable lightbox. The lightbox will display the images with a front view look means when user will click on an image it will come forward with a larger size.
- Content Position: You can display your contents in two ways. Bottom of Image & Overlay.
- Bottom of Image: Choose this setting if you want to show the contents in the lower part of the portfolio.
- Overlay: Choose this setting if you want to show the contents at the middle and over the portfolio only when the mouse hovers over it.
Step 6: Configure "Advanced Settings". You will see the following options under advanced settings panel: Label, ID & Class.
You don't need to configure first two fields; these fields will generate automatically. But you can configure or fetch your own style using the Class field.
How to add a CSS class in Quix advanced settings?
Step 1: Just go to the following directory: YOUR_ROOT_DIRECTORY/templates/YOUR_TEMPLATE/css/template.css
Step 2: Open the template.css file using any editor.
Step 3: Add your code at bottommost of the CSS file
.quix-new-class{ /* Your CSS code goes here */ }
Just add the CSS attributes that you want to fetch in your style.
Step 4: After that, just add the class "quix-new-class" on the CSS field of advanced settings panel.
Now, I would like to show you an example that indicates how much beautiful portfolio gallery you can build using Quix without any stress.
Look at the image below. I have collected it from one of our Best Joomla Template - Biznes, where we have used Quix page builder to build template pages.
Last Lines:
The method you will use to display your work will say almost everything about you as the work itself. So, show it off with confident, pride and in a smart and professional way.
Let us know about your query if any through the comment section in below. We will love to hear from you.