
Accepting payments online sounds easy until the payment needs context.
A basic payment link may collect money, but it may not collect enough information. If you only need to accept payment for one product, campaign, or service, a full online store may be more than you need. A marketplace can generate traffic, but it’s also going to have platform rules, competing listings, and fees. A custom checkout can work, but it takes time, technical knowledge, and maintenance.
That gap is where a form-based checkout fits.
It gives you a structured way to accept payments online while collecting the exact details needed to complete the transaction.
In this guide, we will look at what form-based checkout is, why it is one of the easiest ways to accept payments online, when to use it, and how PaymentForm.io supports different payment use cases through one module-based system.
What Is a Form-Based Checkout and How Does It Work?
A form-based checkout lets customers provide the information related to a payment and complete the transaction through one focused process. There is no separate cart page or extra “Proceed to checkout” step.
It’s somewhere in between a basic payment link, a generic form builder, and a complete e-commerce platform.
The payment gateway (like Stripe or PayPal) processes the payment and may gather some basic info about the person paying.
General form builders like Google Forms can collect information, but they don’t have the payment and order logic built in.
Also, e-commerce platforms include functionality for more general store activities, including product catalogs, inventory, shipping, customer accounts, and so on.
A form-based checkout combines the elements needed for a focused transaction. You get fields matched to the payment use case, a connected payment gateway, and a form that can be shared through a direct link or embedded on a website.
Form-Based Checkout vs Other Ways to Accept Payments Online
There are many options to accept payment online. What you choose depends on what the payment is for, what you need to know from the payer, and what should happen after the transaction. The table below shows where each of these options fits best.
below shows where each of these options fits best.
| Method | Best suited for | Main consideration |
|---|---|---|
| Form-based checkout | Product sales, service payments, donations, fundraising, events, memberships, contracts, and other structured payments | May not replace a full store or specialized system for very complex operations |
| Payment link | Simple payments where little additional information is required | May offer less flexibility when the payment requires more options |
| General form builder | Surveys, applications, registrations, lead collection, and simple payment forms | Payment or order-management features may require add-ons or extra integrations |
| Custom checkout | Businesses with complex or highly specific payment requirements | Requires development, testing, security management, and ongoing maintenance |
| Full online store | Businesses with a growing or large product catalog | Requires more setup and management than a focused payment process |
What Should You Look for in a Form-Based Checkout Tool?
Choosing a form-based checkout tool may seem simple at first. But once you consider the full payment journey, more requirements often appear.
Before choosing a platform, check whether it supports:
- The payment use cases you need
- Payment gateways available to your audience
- One-time and recurring payments
- Custom fields and conditional logic
- Multiple sharing options, including direct links, website embeds, and QR codes
- Customizable confirmation emails and invoices
- Payment and submission records
- Mobile-friendly checkout
- Clear pricing and platform fees
- Secure payment handling
Actually, a tool does not need every advanced feature. It should support the complete process required for your specific payment use case.
How a Form-Based Checkout Tool Can Simplify Different Payment Needs
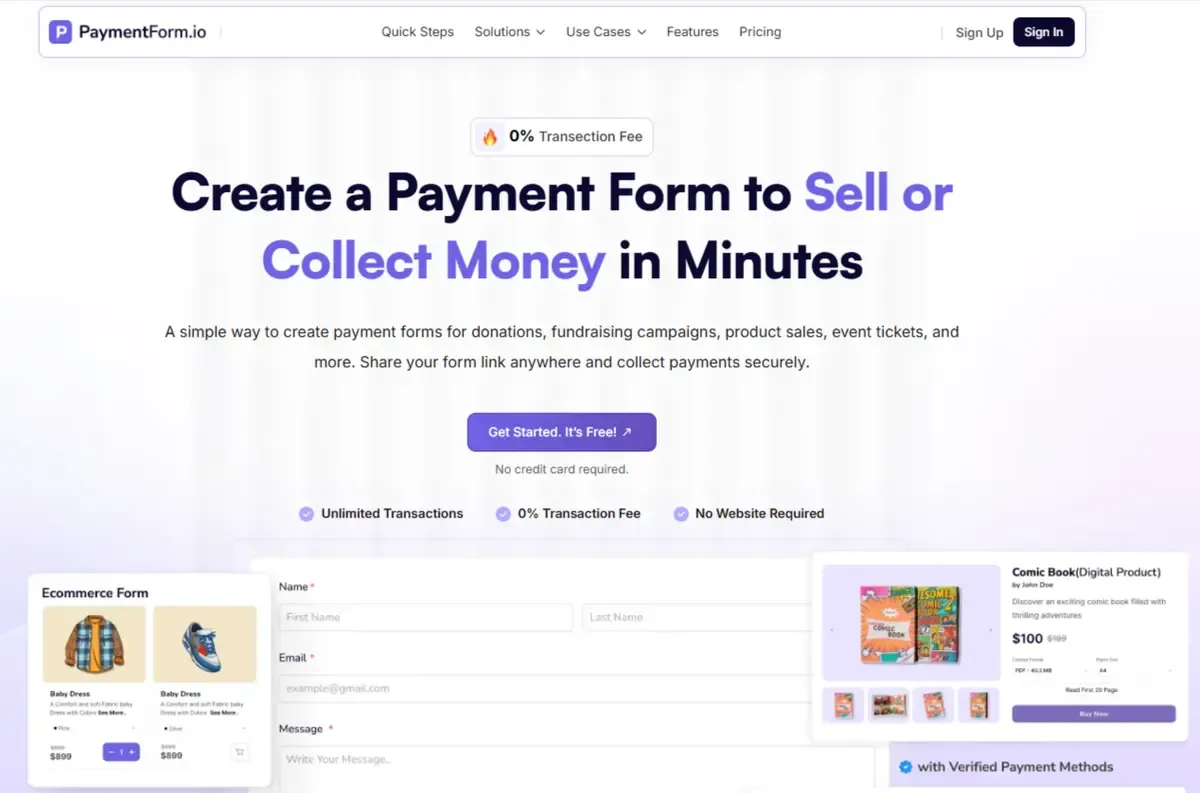
To see how this works, let’s use PaymentForm.io as an example. It is a no-code form-based checkout tool. Its current modules cover physical and digital product sales, donations, fundraising, event tickets, memberships, contracts, and other payment use cases.
Using a separate platform for every payment activity can quickly become expensive and difficult to manage. One tool may charge a monthly subscription, another may add a platform fee to each transaction, while the connected payment gateway still charges its own processing fee.
Your customer details, payment records, and reports may also remain spread across several dashboards.
PaymentForm.io approaches this by organizing form-based checkout around dedicated use cases. That means you don’t have to use separate tools for each use case.
Now, let’s look at how each module supports a different payment use case and what you can create with it.
Sell Physical Products Through a Simple Checkout Form

The physical product module lets you take orders and payments for physical products without having to build out a full online store. It’s a good fit for single or multiple items, small catalogs, limited-time collections, handmade goods, merchandise, meal packages, sportswear, and pre-order campaigns.
This can include product images, description, categories, options like size or color, price, quantity available, shipping charges, taxes, discount codes, and customer fields. Buyers choose what they want, and enter their delivery details and payment through a dedicated checkout.
Donation and Fundraising Forms for Online Giving
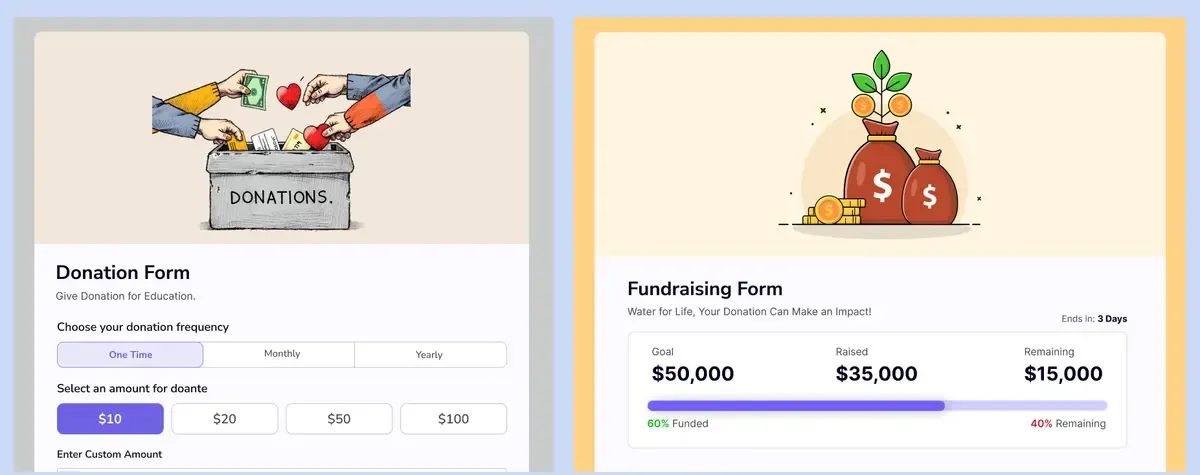
PaymentForm.io has separate modules for general donations and goal-based fundraising campaigns.
The Donation module is a great option for nonprofits, schools, churches, creators, charities, and community groups who want to accept one-time or recurring donations. You can set suggested donation amounts, allow for custom donations, set a minimum amount, collect donor details, and send confirmation emails or receipts.
The Fundraising module is better suited for campaigns built around a specific cause, target, or deadline. As well as fundraising goals, campaign progress, end date, and what visitors see when the campaign closes, you can also offer donation options and donor fields.
Event Registration and Ticket Forms
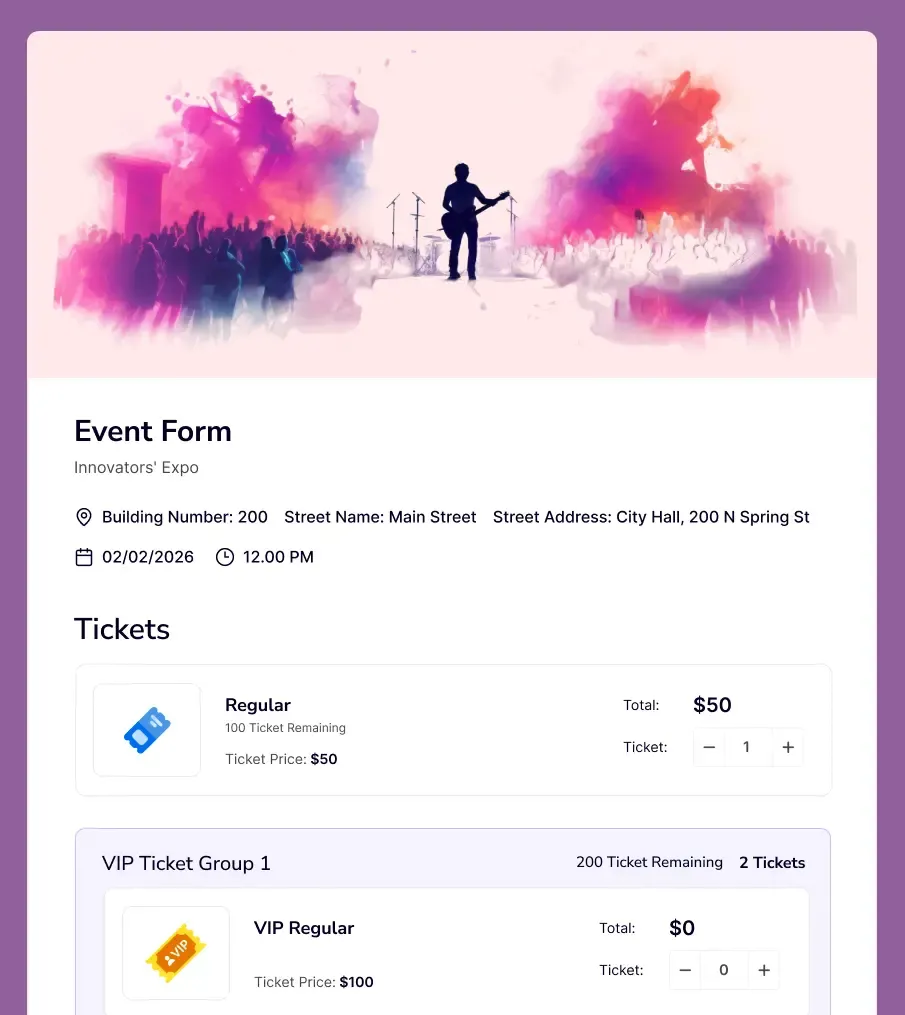
The Event Ticket module allows organizers to manage ticket sales and attendee registration via a single checkout form.
It’s suitable for workshops, webinars, training sessions, school programs, conferences, concerts, meetups and community events.
You can create different types of tickets, set prices and availability limits, collect details of attendees, apply coupon codes, send confirmation emails and use QR codes for event check-in.
It keeps the registration information and payment records together and makes it easier to manage before and during the event.
Digital Product Checkout Forms
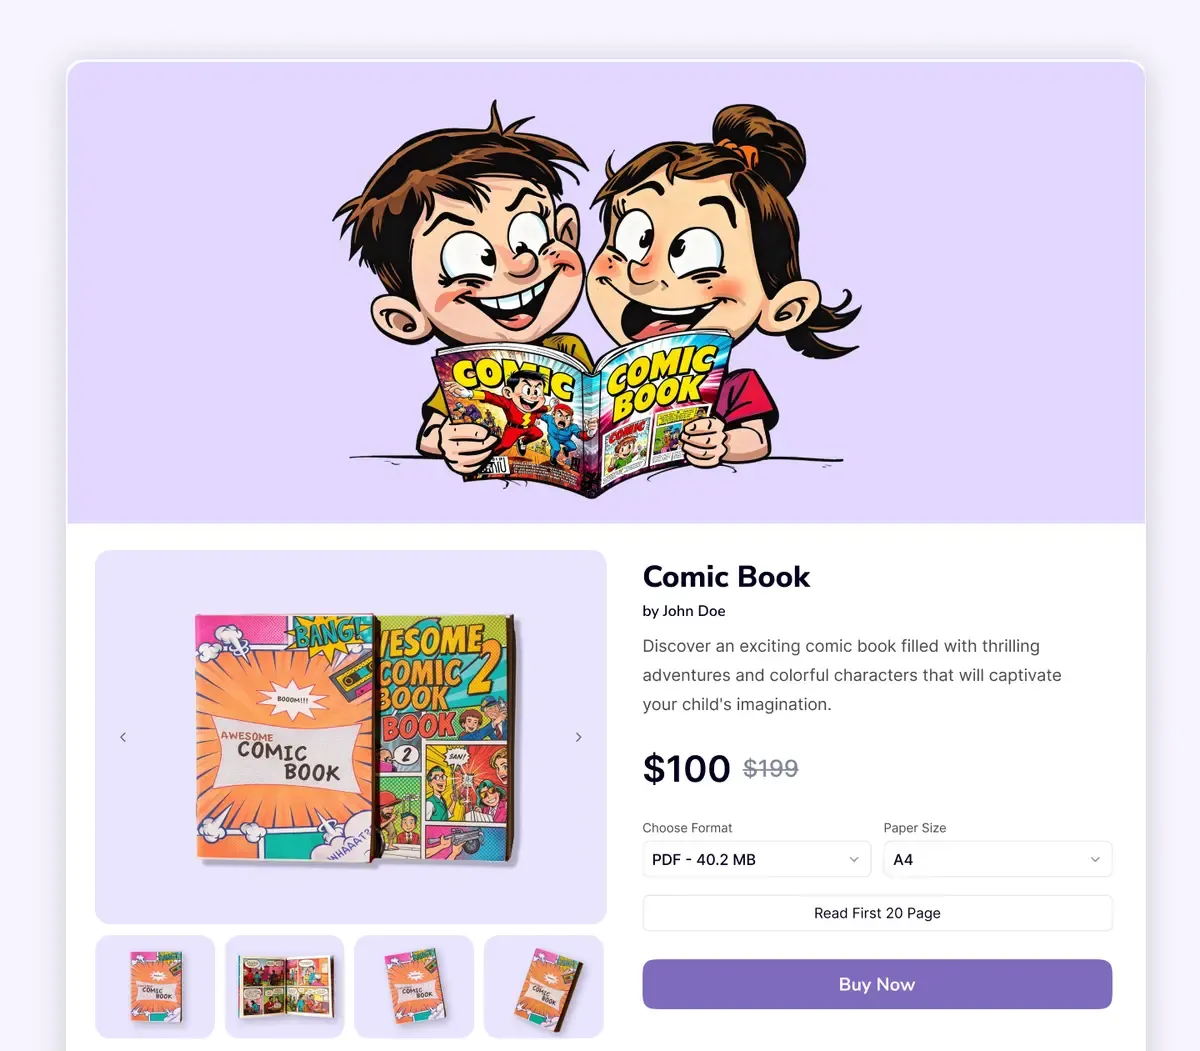
Digital Product module allows creators to sell downloadable content and automatically deliver files after payment.
It is very suitable for eBooks, templates, online course material, software, scripts, design assets, worksheets, digital art, and other downloadable products.
You can display product details, gather buyer information, process the payment, send confirmation emails, and provide customers with access to the file after a successful transaction.
This reduces manual work and removes the need to verify payments and send every file individually.
Membership and Contract Payment Forms
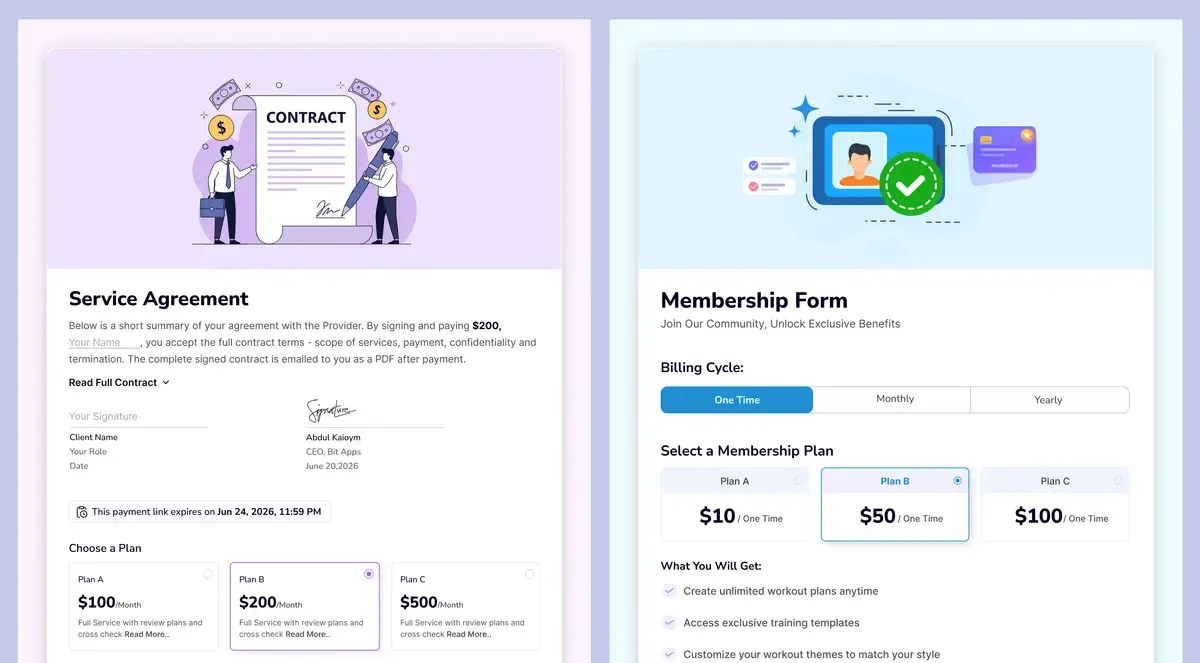
It also supports payment processes that involve continuous access or formal agreements.
The Membership module helps clubs, communities, associations, creators, coaching groups, and organizations to collect one-time or recurring membership fees.
You can create different plans, define billing frequencies, collect member information, apply coupons, send confirmation emails, track payments, and offer member portal access.
The Contract module is for agreement-based workflows such as service contracts, client approvals, custom projects, and business arrangements.
It allows for the collection of participant details, contract information, terms, consent, digital signatures, payments, and submission records within one structured process.
How to Set Up a Form-Based Checkout Step by Step
Now that you know what each module can do, let’s walk through the process of setting up and publishing a form-based checkout step by step.
Step 01: Create an Account and Choose a Module
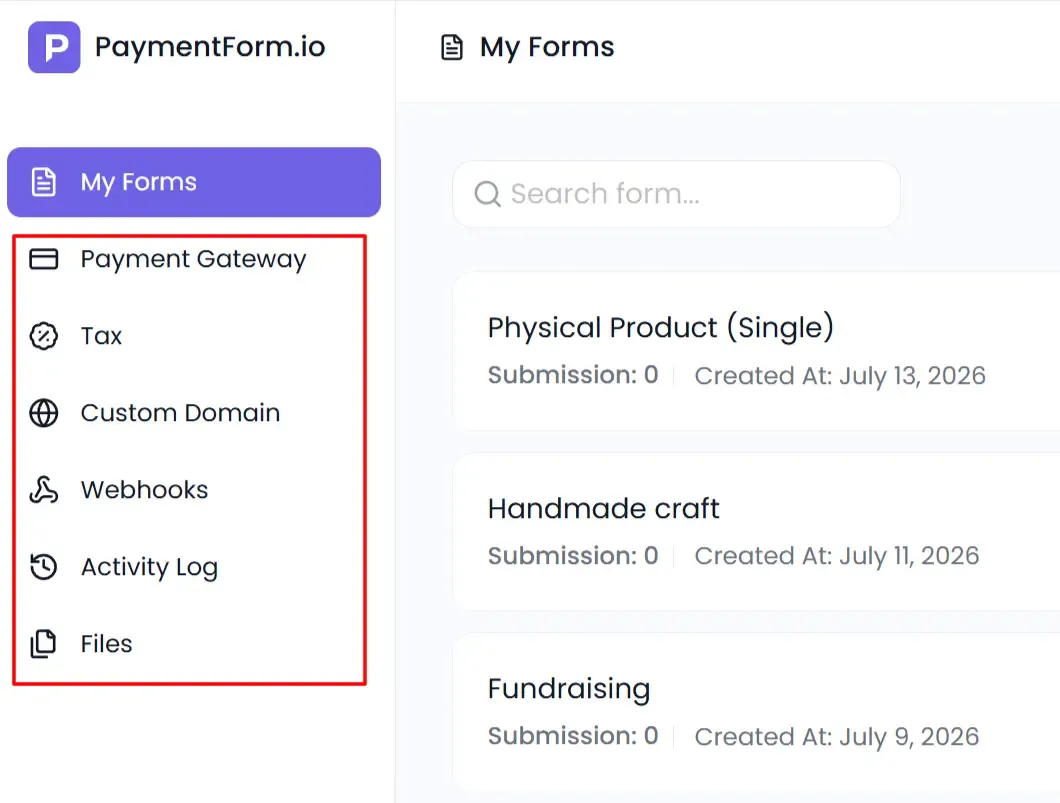
Create your PaymentForm.io account and sign in to the dashboard. From there, click on “create form” and select the module that best matches the type of payment you want to collect. As PaymentForm.io is module-based, you do not need to build every payment form from scratch.
Step 02: Add the Required Fields
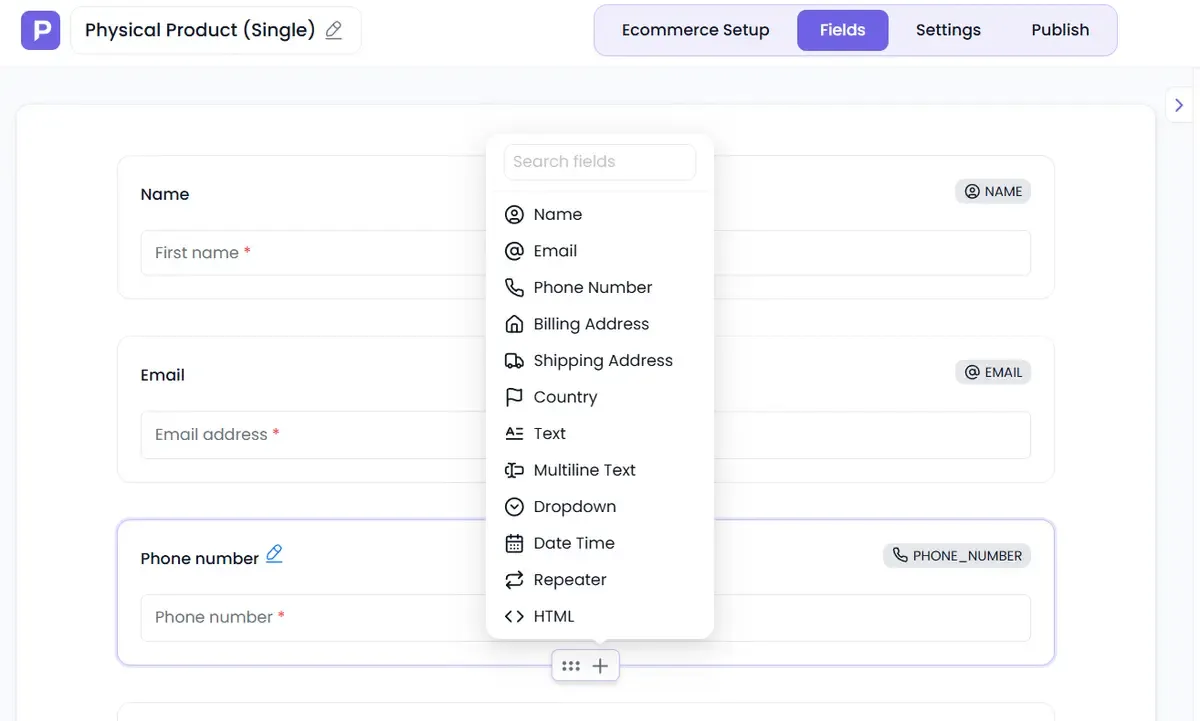
Go to the Fields tab and select from 10+ field types to gather the information you need from the payer.
Step 03: Configure the Checkout Experience
Once you’ve set up all your fields, go to the Settings tab to control the appearance of your form and what happens during and after payment.
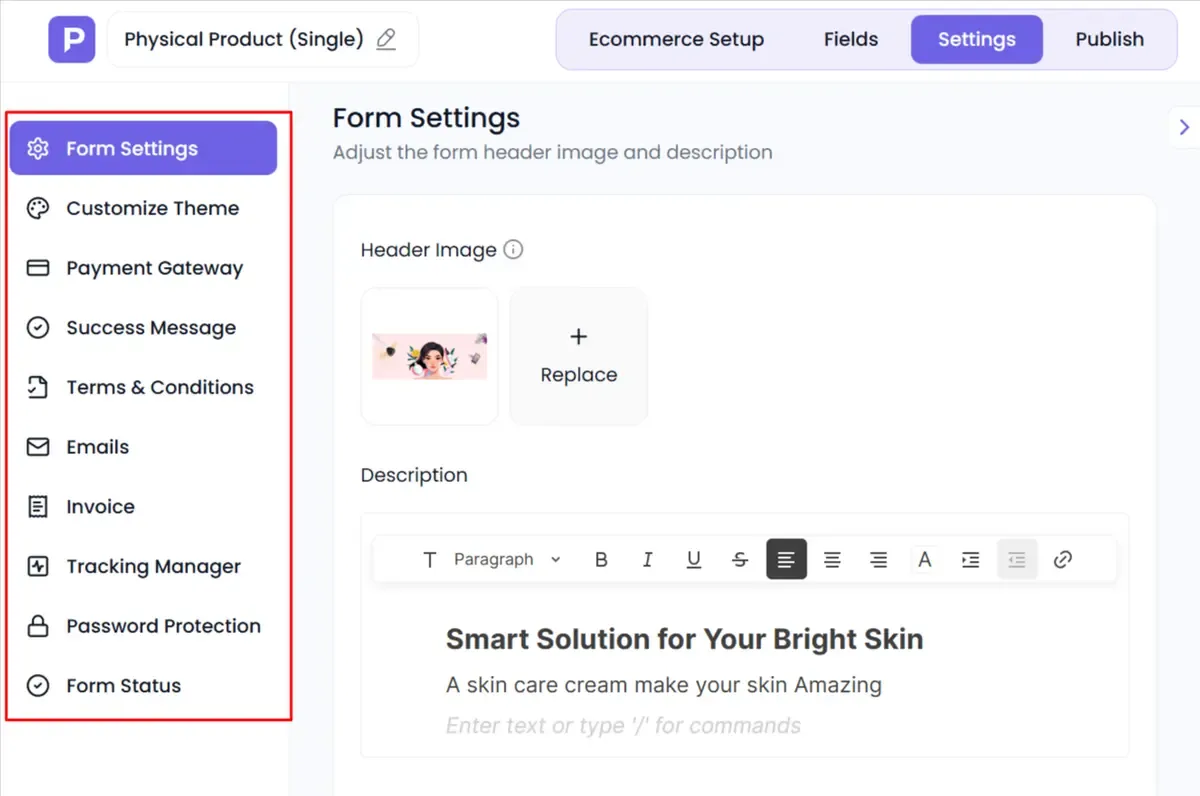
You can add a header image, write the form title and description, change the theme, and integrate one or more payment gateways like Stripe, PayPal, Razorpay, Mollie, Square, Cash, and more. You can set the success message, add terms and conditions, customize email notifications and invoices, configure tracking, enable password protection, and manage the form status.
Custom domains, webhooks, tax settings, and more can be set from the global settings.
Step 04: Build a Page Around the Form
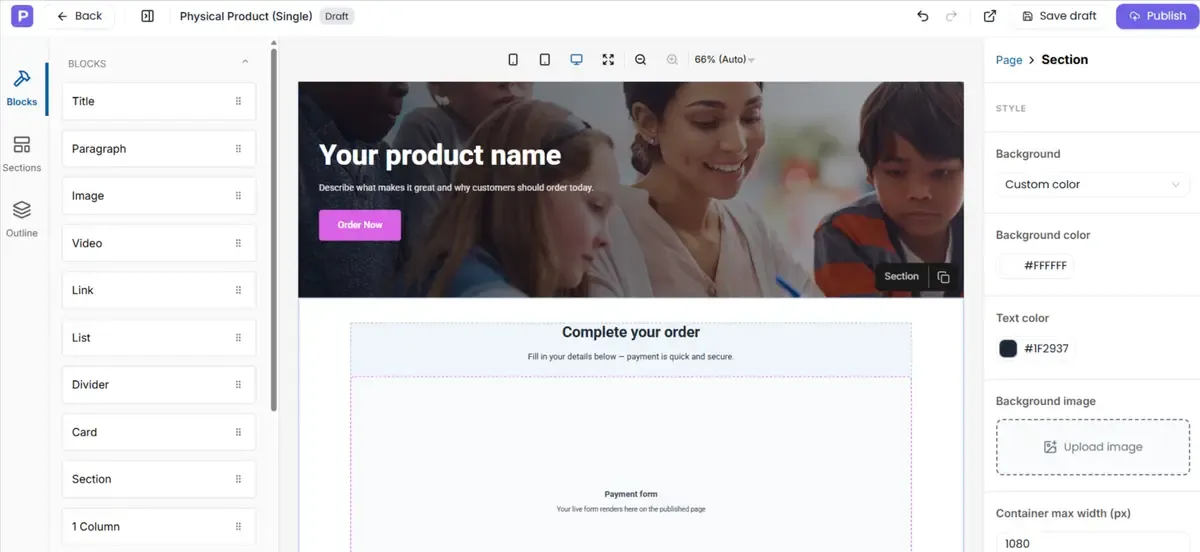
Enhance your payment page with content around your form using the optional Page Builder. Add text, images, videos, lists and cards, custom HTML, or use pre-designed sections for hero banners, benefits, testimonials, trust badges, galleries, FAQs, and calls to action.
You can also change the layout, colors, and spacing and then see what the page looks like on desktop and mobile.
Step 05: Publish and Share
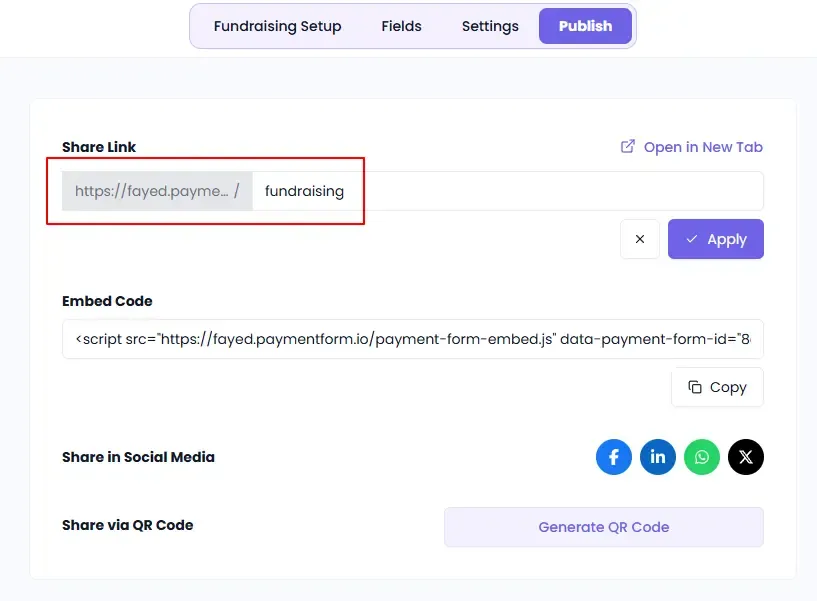
When you have your form or payment page ready, preview it on desktop and mobile, then publish it. Share a direct link, post on social media, embed in a website, or share via QR code.
You can also change the URL slug, making the link shorter, cleaner, and easier to remember.
What Happens After the Payment Is Completed?
After the form is published, people can open it and give the required information and pay via the connected payment gateway. PaymentForm.io keeps the related records organized so you do not have to match payments and form entries manually.
Submissions: Each form submission is saved in the dashboard with the payer’s information, submitted information and payment status. You can see the records all in one place and export the data when you need to.
Built-in Analytics: Monitor form views, completed submissions, total payments and other performance data to see how the checkout is being used.
Customer Portal: A portal dedicated to your customers to view their order, payment or recurring billing details without having to ask for the same via support.
Conclusion
Accepting online payments doesn’t have to be difficult. Many businesses, creators, nonprofits, sellers, and event organizers can quickly start accepting payments with a form-based checkout.
If you’re still sending invoices by hand, confirming payments through DMs, or running a full online store just to sell a few products, try a form-based checkout for your next sale.
It could reduce unnecessary steps and create a better payment experience for both you and your customers.