Next
This documentation will flip you through the step by step how to install and setup the incredible Next WordPress theme. Next is an responsive news and magazine theme for WordPress lovers, those who are looking for a indispensable media to share their discoveries and latest news.
The beautiful news WordPress theme is neat and clean, well-equipped with innumerous technologies Like Bootstrap 3, Less, Newskit, tabbar, and a lot more
Our Recommended Plugins
- W3 Total Cache by Frederick Townes
- WordPress Importer by wordpressdotorg
- WP Smush by WPMU DEV
- WordPress SEO by Yoast by Team Yoast
Installation
Follow our installation guideline if you are having problem to install the theme.
Homepage Settings (Without Installing Demo Data)
Step 01
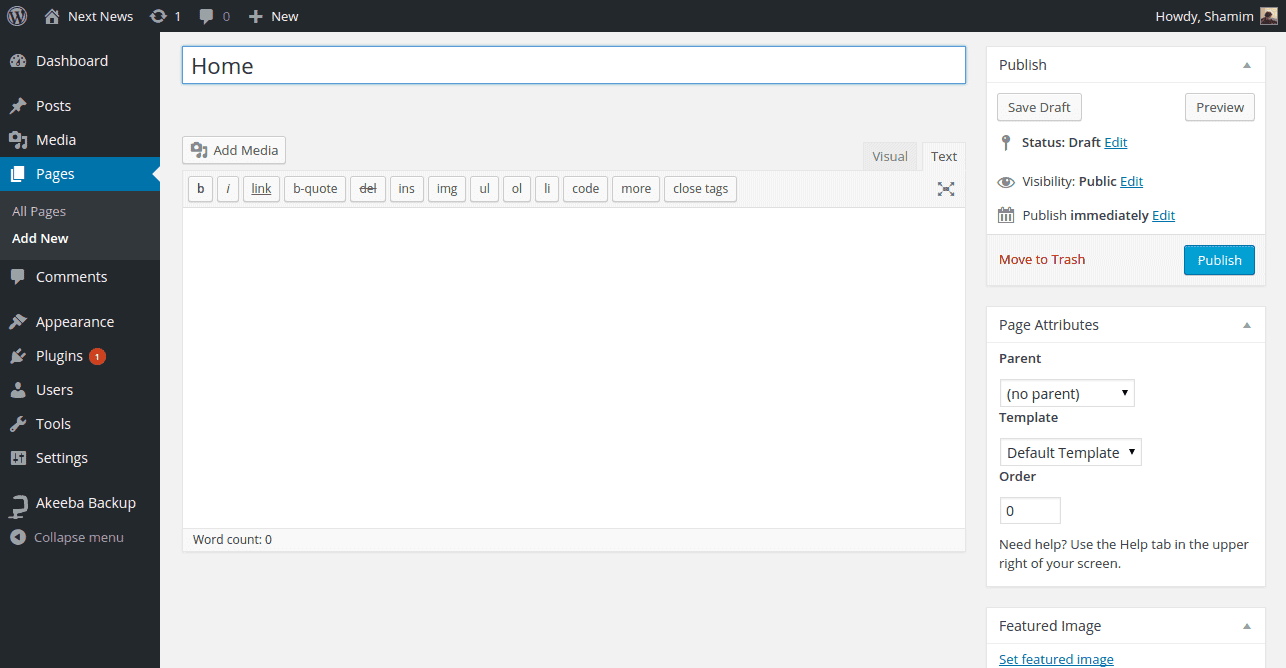
If you want to install Tx Next theme in your website except demo data, you have to first create a page from Admin Panel >> Pagers >> Add New Page. You can see in the image below I have created page called “Home”.
Step 02
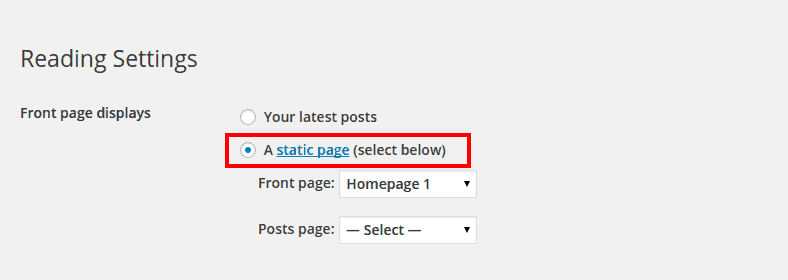
When you have created your page, now its time change the page reading for Tx News. To change the page reading for newly created page head to the Admin Panel >> Settings >> Reading. Check the box next to A static page (select below) under Front Pager display. and select your page in which you display Tx Next content. In my turn Its Home.
Homepage Settings (After Installing Demo Data)
After finishing all installation process, the very first setting, we recommend to define is Home Page. To have Homepage the same as Tx Next demo, change the following setting:
- Head over to Admin Panel >> Settings >> Reading
- Check the box next to A static page (select below) under Front Pager display. Select Homagepage 1 under the Front Page title. Flip through the image below.
Available Widget
All available widgets can be configured from Admin Panel > Appearance > Widgets. There are many of widgets are available but I am going to describe those are used in the theme. They are NewsKit, Tx Tabber, Tx Twitter Widget.
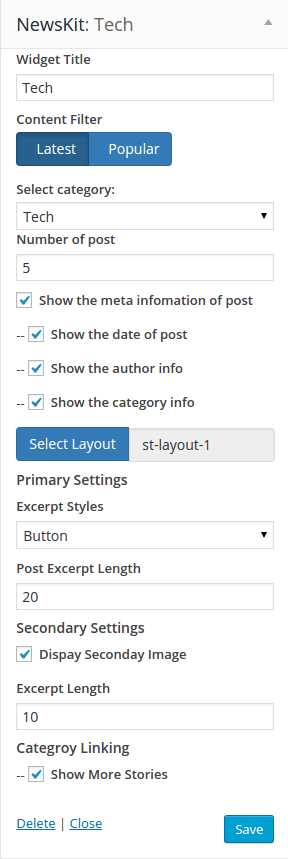
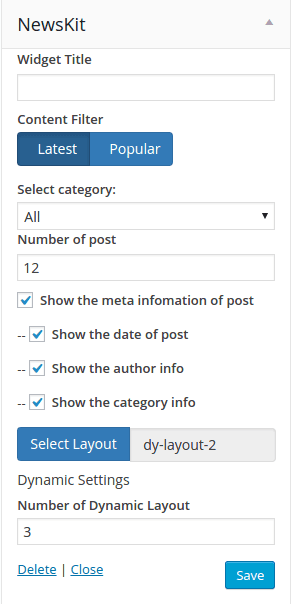
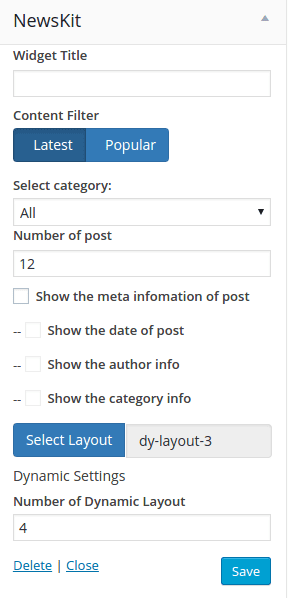
01.NewsKit
Newskit is the specialized plugin for WordPress news website, we crafted it for the artistic and coherent presentation of news. We’ve developed the mighty widget Newskit specially for Tx Next, so that You will have soothing relaxation running your site online. Let me explain you first, how powerful and timesaver plugin the Newskit is and how awesome it looks in the backend.
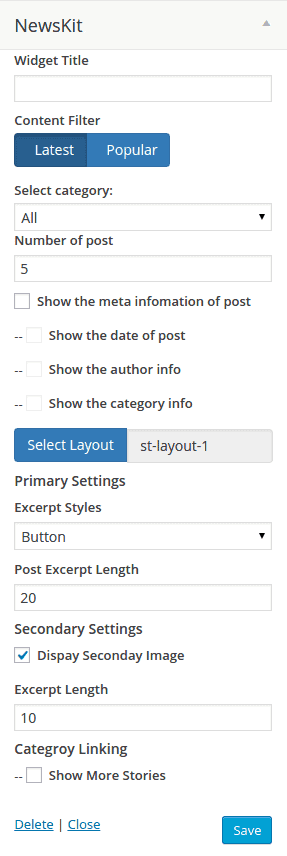
Content Filter
The incredible and indispensable benefit of the Newskit widget is the instant switching between latest and popular post filter, that allow you to present news based either on its popularity or newness. Latest filer fetch the latest news, and Popular filter fetch the popular news.

Layout
The main motto of Newskit WIdget plugin is present news in innumerous layouts. The layout in Newskit is divided in static and dynamic category. Static layout has been bottled with 4 layout variation, and dynamic with 5. Even every layout comes with the individual settings of individual layout variation.
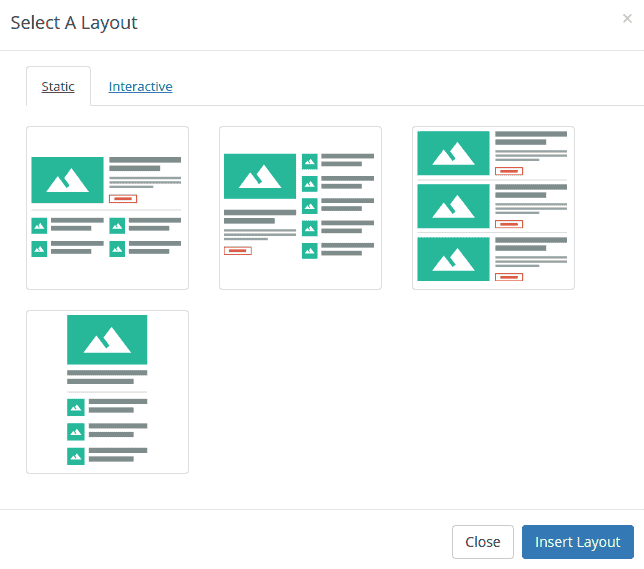
When you click on Select Layout, It will open up modal window to select the static layout and dynamic layout with numerous variation. Have a look on them.

Static Layout Variations
Dynamic Layout Variations 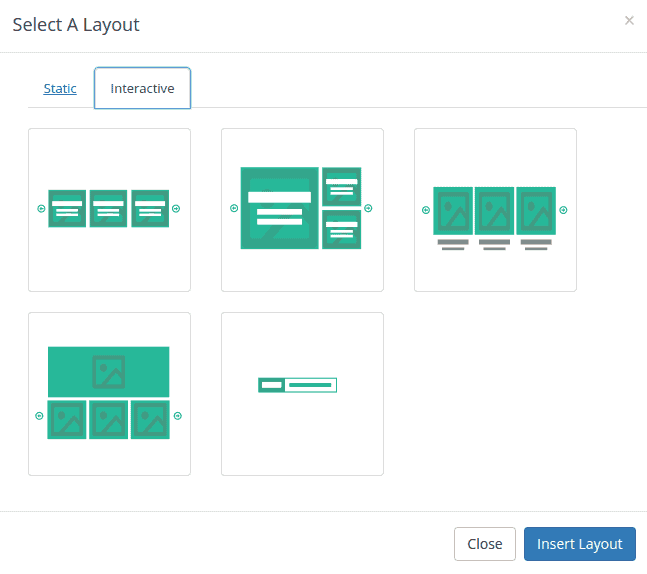
So, If you have sound knowledge of PHP and WordPress plugins convention, you can add as much as layout you want. Now walk-through the layout variation both static and dynamic layout. Now it’s time to describe how those layout are presenting news in Tx next.
1.1 Newskit: Static Layout 01
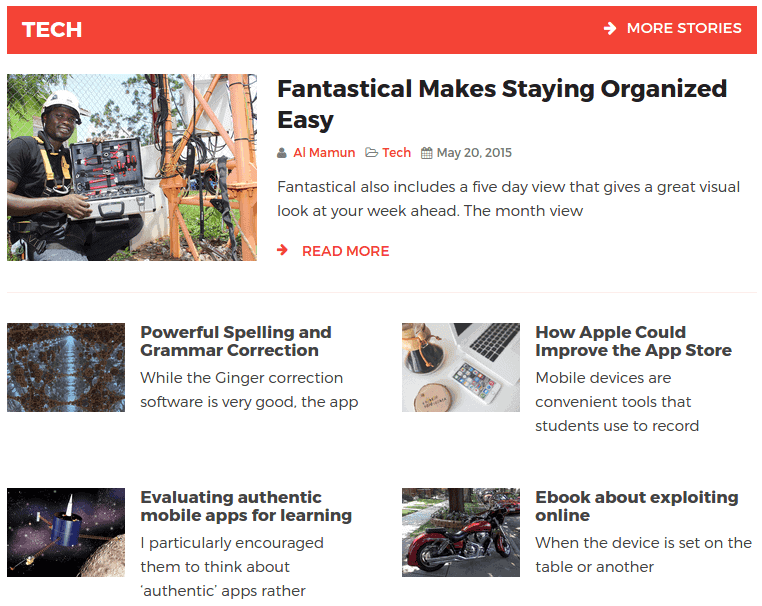
Newskit: Static Layout 01 is used to display news first child persisting in presiting in full-width, and others are chunked in 50% and 50% columns.
Backend View
Frontend View
1.2 Newskit: Static Layout 02
Newskit: Static Layout 02 display news in two column. The very first column shows the first child of the post, the subsequent column displays the assigned entire post.
Backend View
Frontend View

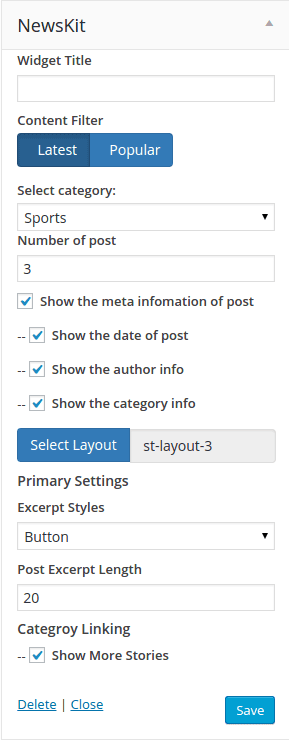
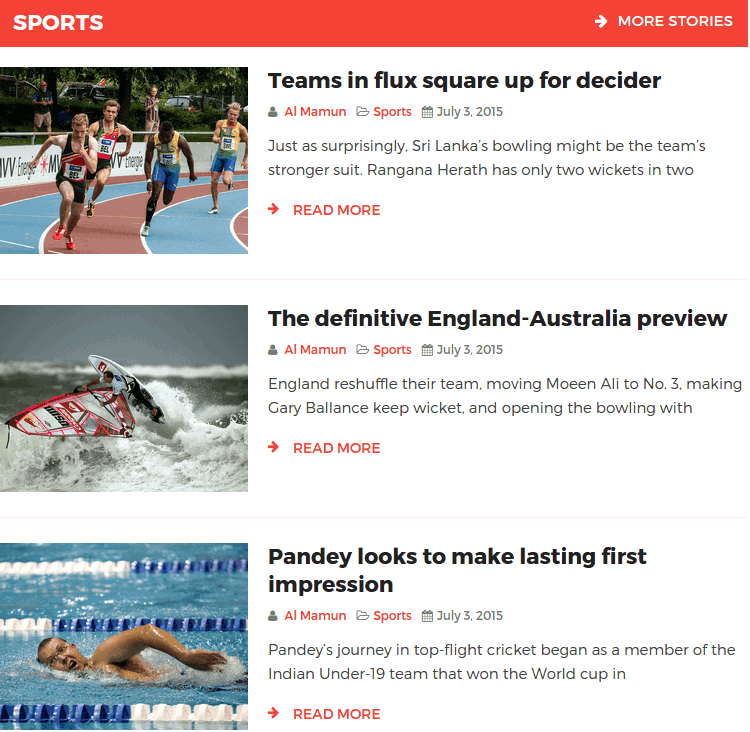
1.3 Newskit: Static Layout 03
The list style shows the all assigned news in the list style. How many you assign the number of post, the same number of post will be visible in frontend.
Backend View
Frontend View
1.4 Newskit: Static Layout 04
The list style shows the all assigned news in the single row. The very first post will show in largely in the first and other as thumbnail.
Backend View
Frontend View
1.5 Newskit: Dynamic Layout 02 (Main Slider above the fold)
The dynamic layout shows the dynamic content in slider, This slider shows contents in two grids. first grid shows larger content other shows contents depends on its assigned all value.
Backend View
Frontend View

1.6 Newskit: Dynamic Layout 03
This dynamic layout show content in grid layout, that slide the content vertically in slideshow.
Backend View
Frontend View
1.7 Newskit: Dynamic Layout 05 (News Ticker)
This dynamic layout is great way to showing latest and the most prioritized content just like latest news.
Backend View
Frontend View

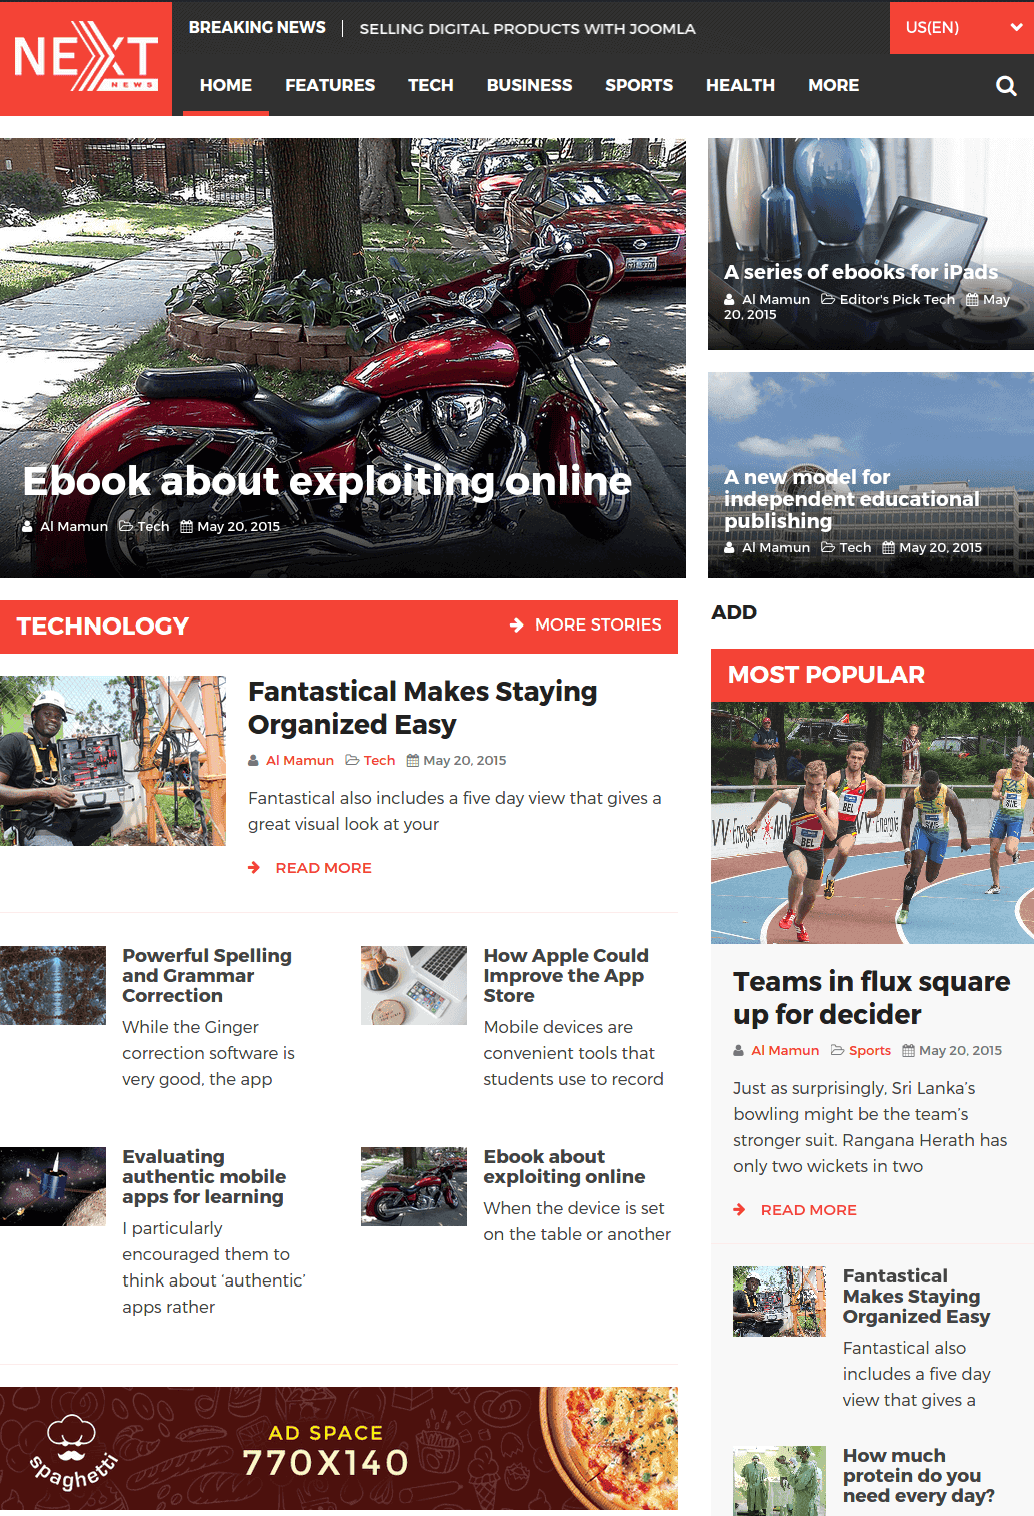
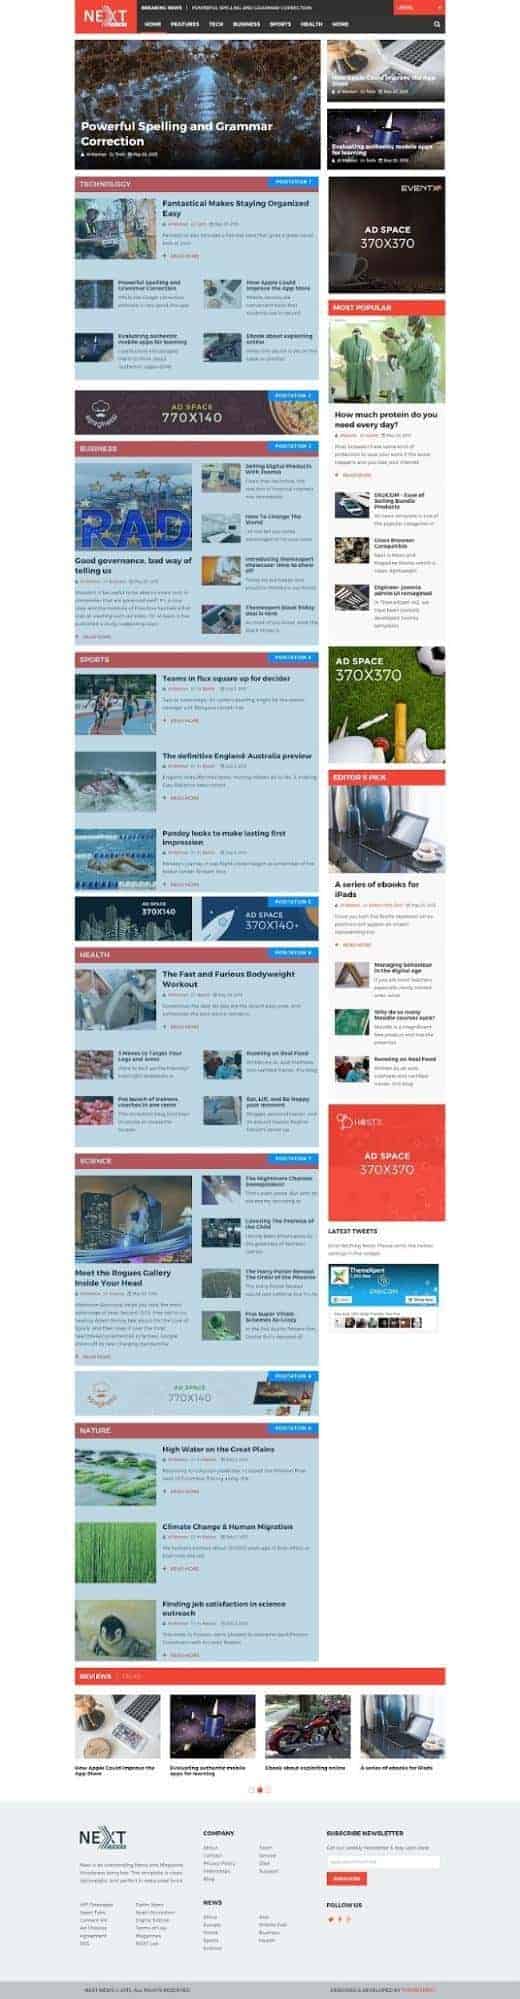
Layout Structure
This screenshot will give a quick overview of the layout structure of Tx Next WordPress theme.
Header Settings
The headers contains a couple of widget. To set the header as the Demo looks, please flip through the instruction carefully:
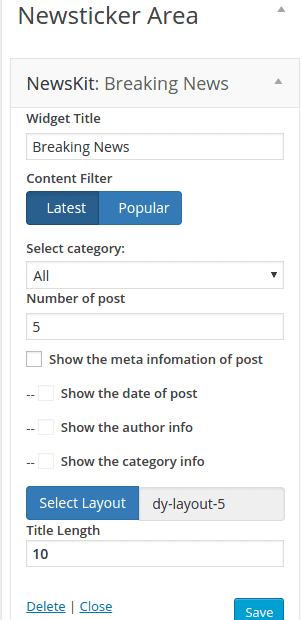
Newsticker Settings
Navigate to Dashboard >> Appearance >> Widgets >> Newsticker Area, Found the couple of settings, Widget Title, Select Category, Number of Post, Title length should be filled with the data shown in the Backend Setting Image. If you want to configure Tx Next with your own setting, you can change the following settings
Backend View
Frontend View
Primary Menu Settings
Navigate to Dashboard >> Appearance >> Menus and create the primary menu. The primary Menu Look like the following.
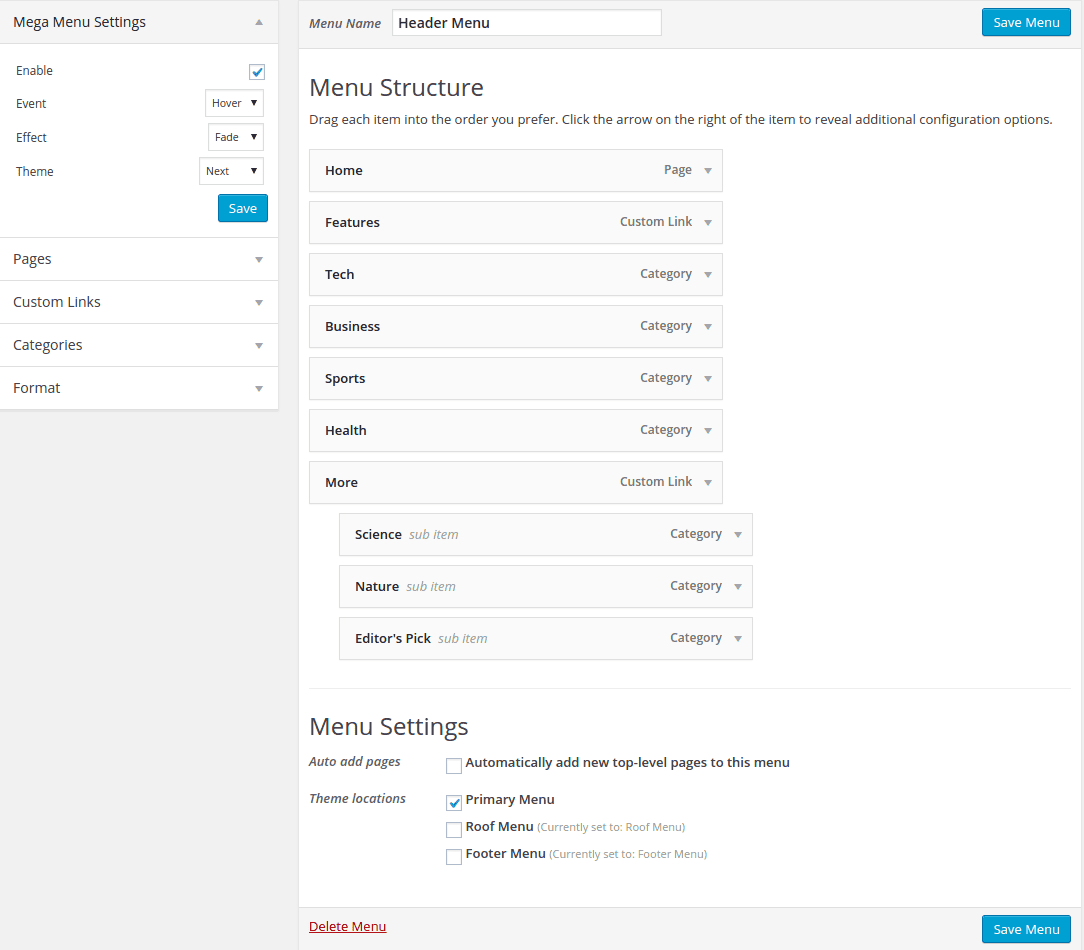
Frontend View

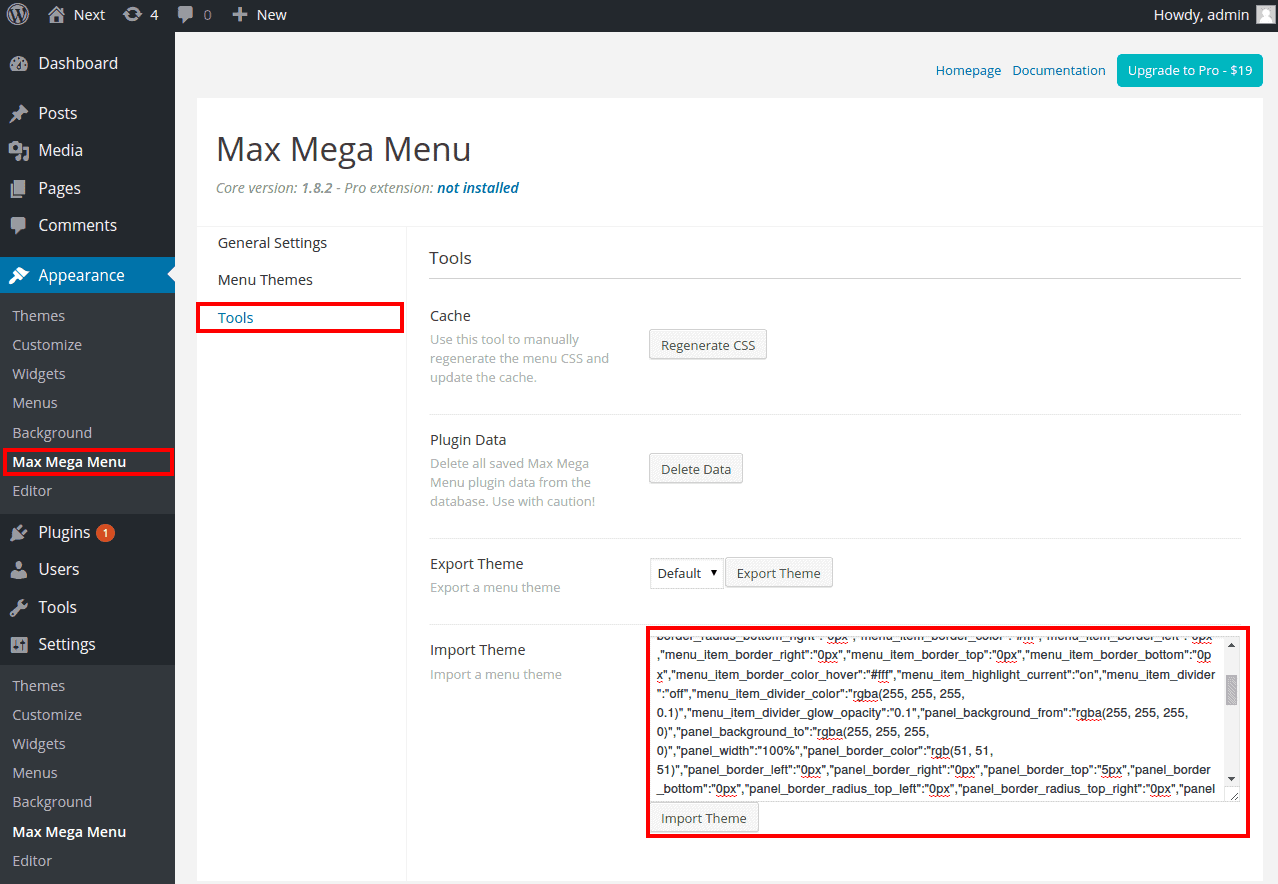
Max Mega Menu Theme Import
Primary menu is using Max Mega Menu theme to give engaging megamenu. If you want to have menu like our Demo theme. Head over to Dashboad >> Appearance >> Max Mega Menu >> Tools. Open up max-megamenu.txt from Themes to dummy-data folder. Copy the entire code of max-megamenu.txt and paste it in Import Theme text field.
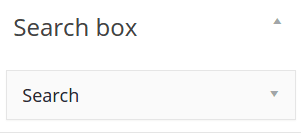
Search box Settings
Navigate to Dashboard >> Appearance >> Widgets and place the Search widget into Search box widget area.
Frontend View

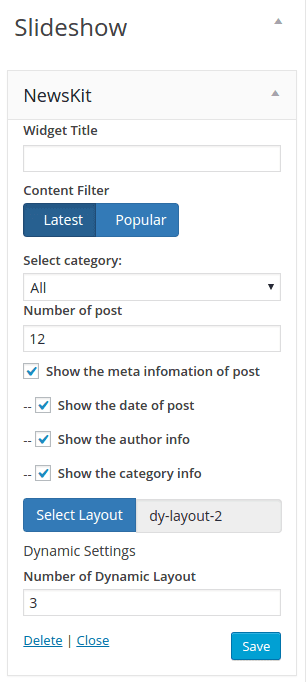
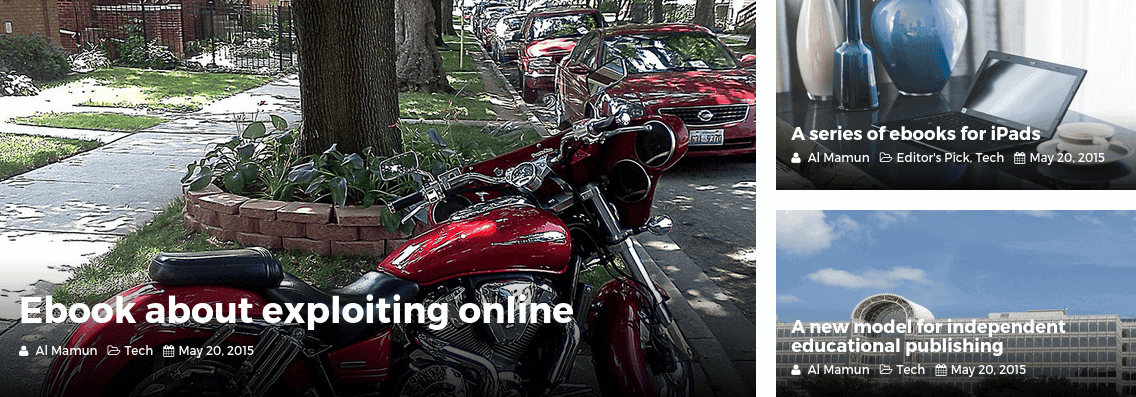
Slideshow Settings
Slide show is another interactive layout of Newskit. Just navigate to Dashboard >> Appearance >> Widgets >> Slideshow, then drag & drop Newskit into Slideshow as shown below:
Frontend View
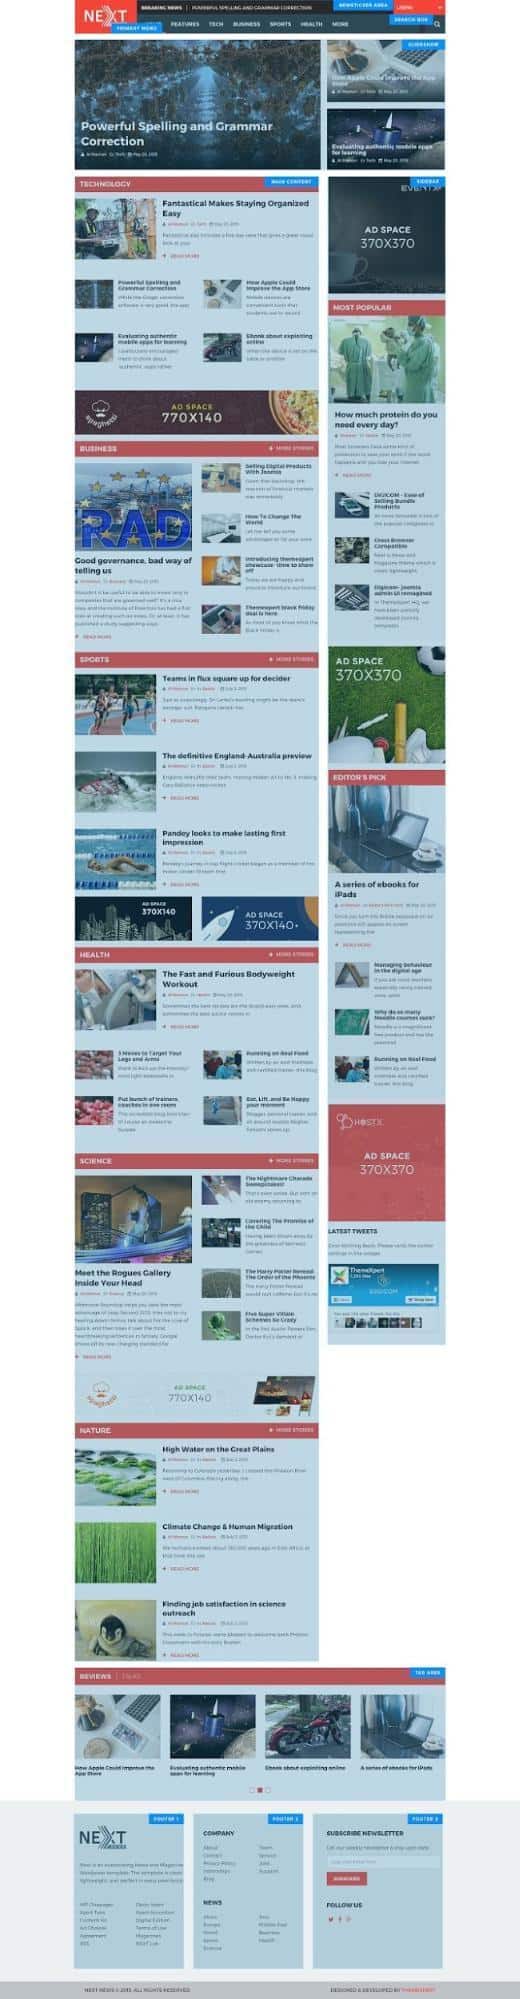
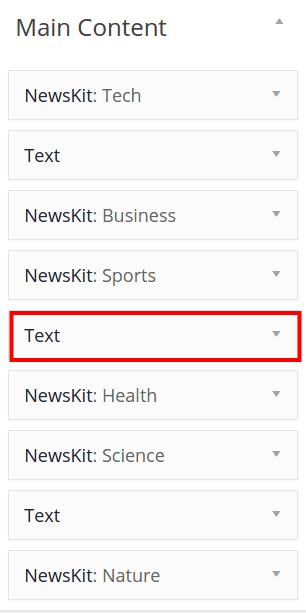
Main Content Settings
This the screenshot of position division of Main content one the Homepage.
Main Content – Newskit - Static Layout 1 ( Position 1, 6)
Navigate to Dashboard >> Appearance >> Widgets >> Main Content, drag & drop Newskit into Main Content.
To show many Newskit( Static Layout 1) at the same time, Just drag & drop, Have a look on the image below we adjust ours.
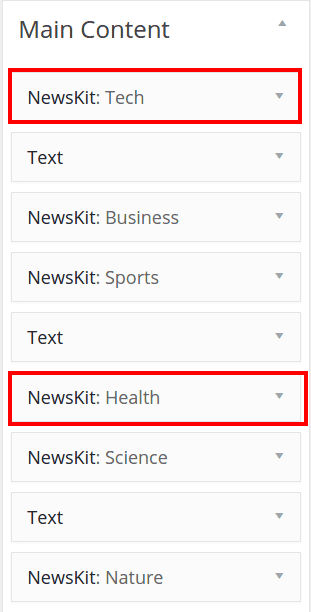
Frontend View
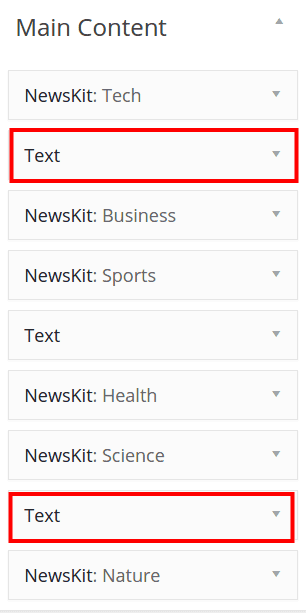
Main Content – Ads Banner (Position 2, 8)
Step 01
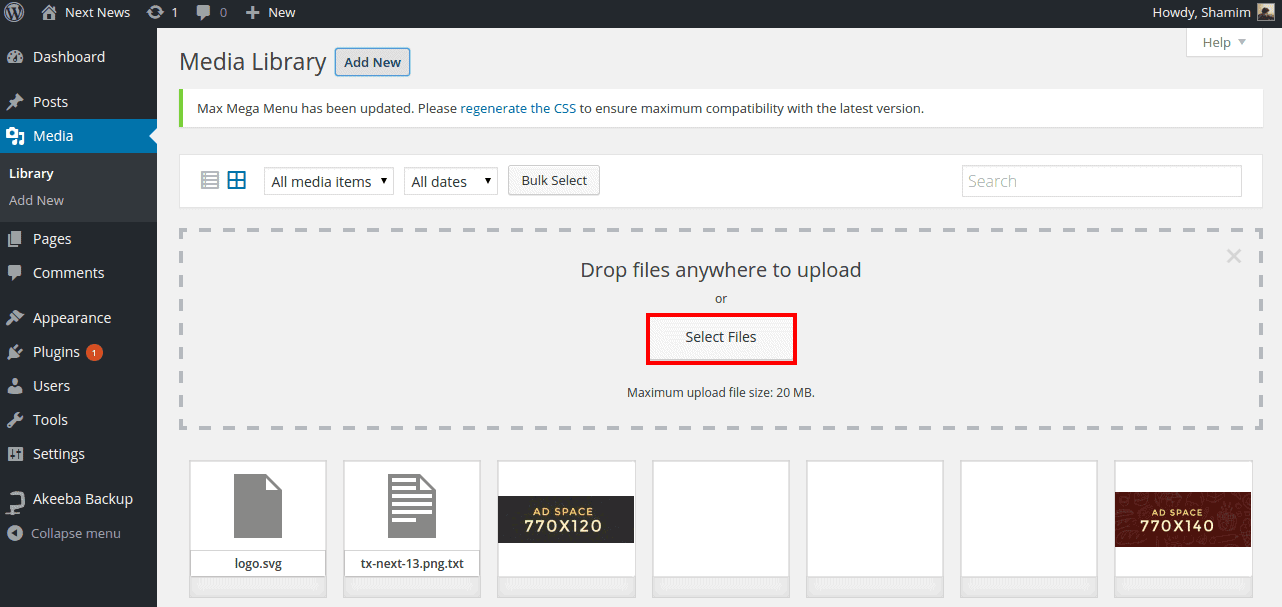
Go to Dashboard >> Media >> Add New
Back-end Settings
- Upload Image or select existing image
- Copy the link of the image
Step 02
Head over WordPress Administration >> Appearance >> Widgets
- Click and drag Text Widget to Main Content
After that use the HTML code below , paste them into Text widget to display the image and the recommend size for the image on the ads banner is 770 x 140
<a href="https://www.themexpert.com/joomla-templates/spaghetti" target="_blank"><img src="/Your_Image_source_goes_here" /></a>Backend Settings
Frontend View

Main Content – Ads Banner (Position 5)
Step 01
Go to Dashboard >> Media >> Add New
Back-end Settings
- Upload Image or select existing image
- Copy the link of the image
Step 02
Head over WordPress Administration >> Appearance >> Widgets
- Click and drag Text Widget to Main Content
After that use the HTML code below , paste them into Text widget to display the image and the recommend size for the image on the ads banner is 370 x 140
<div class="row hidden-xs">
    <div class="col-md-6 col-sm-6 col-xs-6">
        <a href="https://www.themexpert.com/joomla-templates/bizcorp" target="_blank">
            <img src="/Your_Image_source_goes_here" />
        </a>
    </div>
    <div class="col-md-6 col-sm-6 col-xs-6">
        <a href="#">
            <img src="/Your_Image_source_goes_here" />
        </a>
    </div>
</div>
Backend Settings
Frontend View

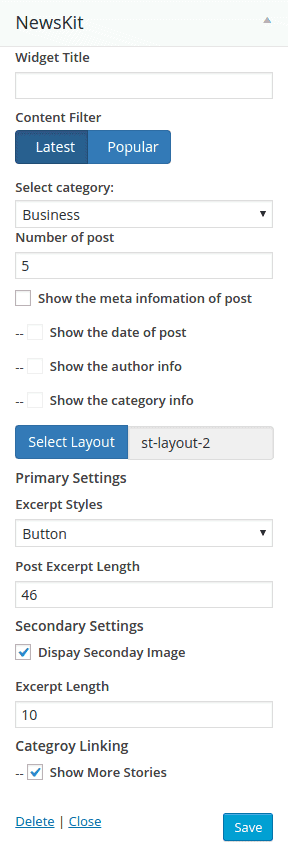
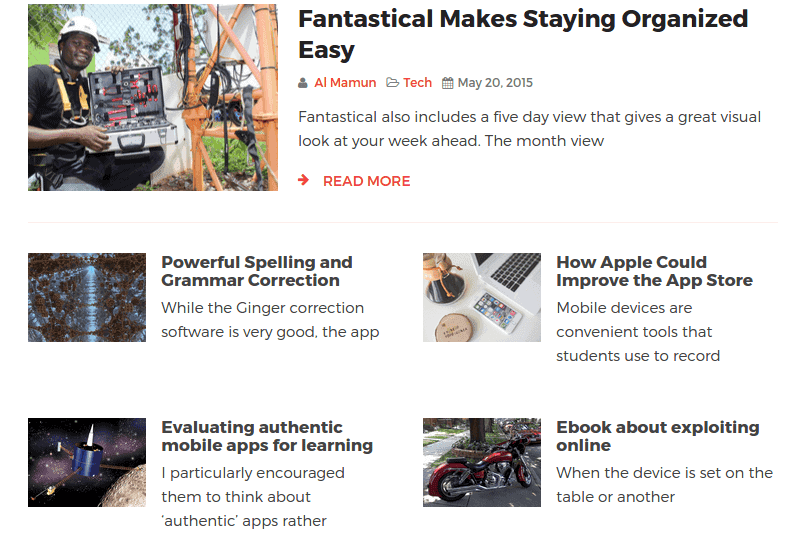
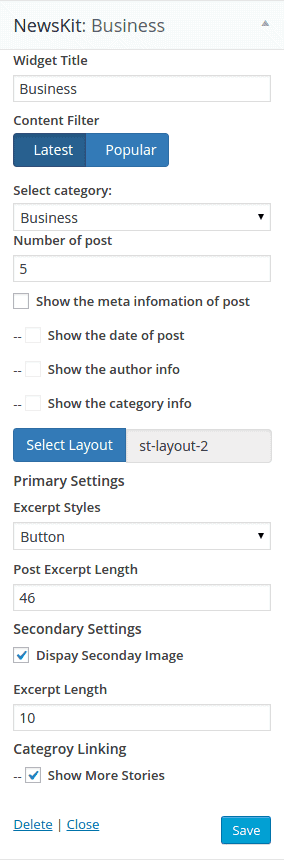
Main Content – Newskit - Static Layout 3 ( Position 4,9)
Navigate to Dashboard >> Appearance >> Widgets > Main Content, drag & drop Newskit into Main Content.
Frontend View
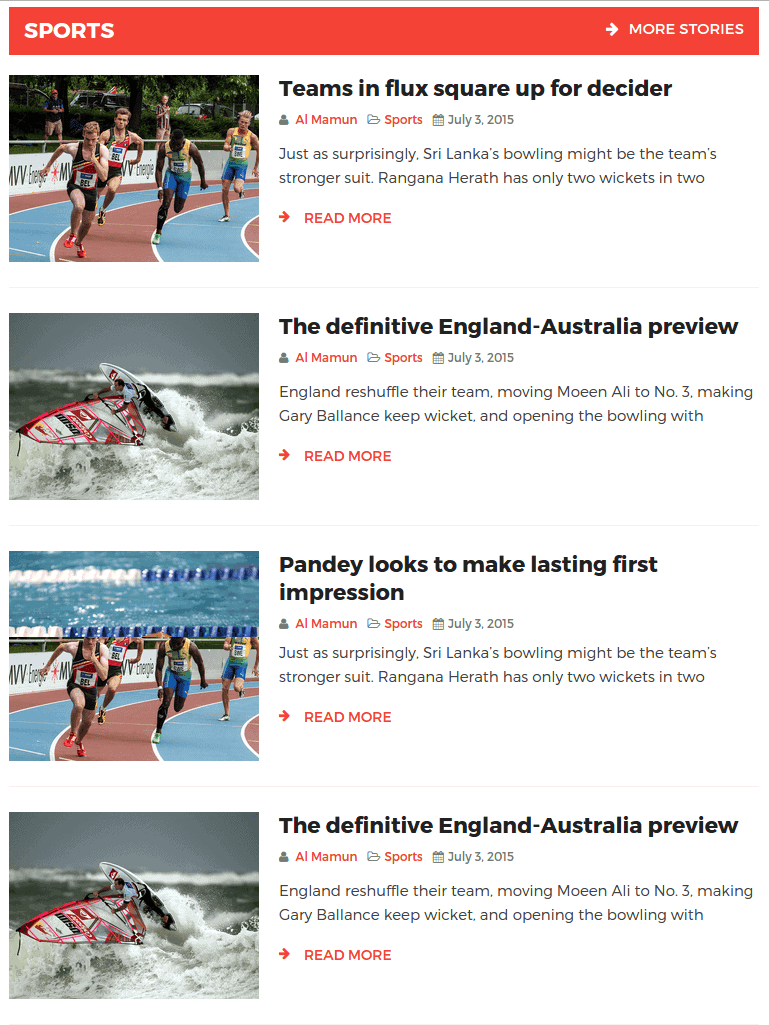
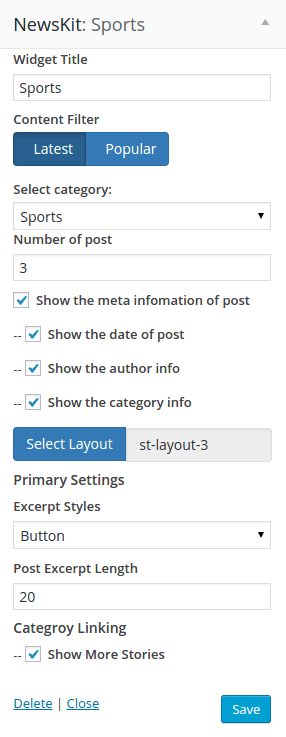
Main Content – Newskit - Static Layout 2 ( Position 3,7)
Navigate to Dashboard >> Appearance >> Widgets > Main Content, drag & drop Newskit into Main Content.
Frontend View
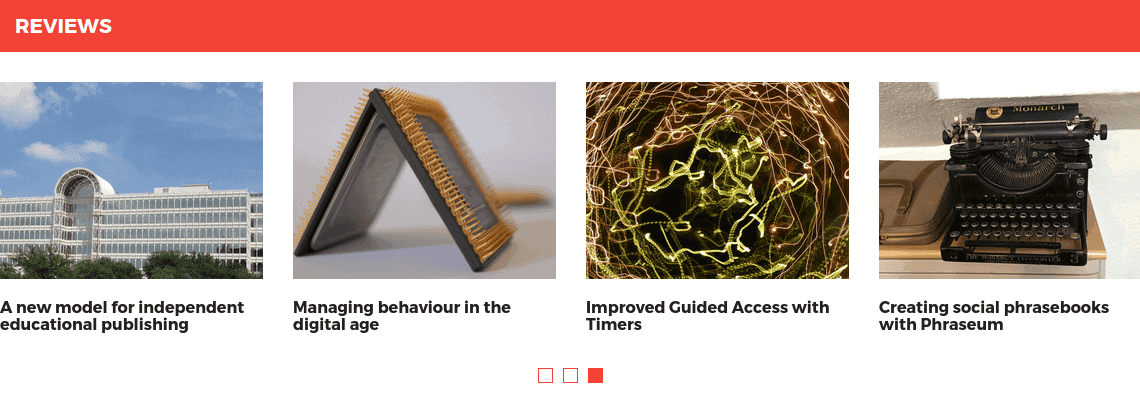
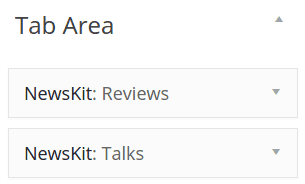
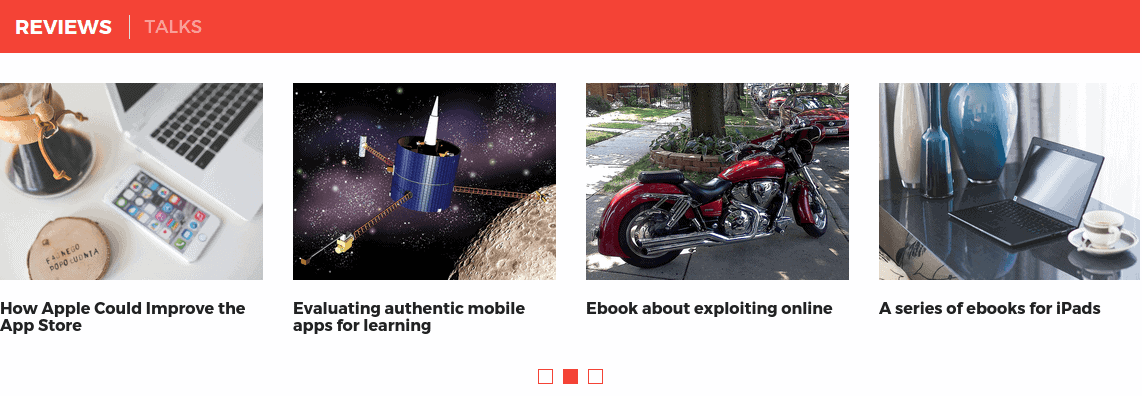
Tx Tabber
Tx Tabbar allow you to group other widget in a beautiful tabs, In this section we inserted Newskit: Reviews, Newskit: Talks in the Tx Tabbar.
Drag and drop both the widget into Tx Tabbar section as show below:
Frontend View
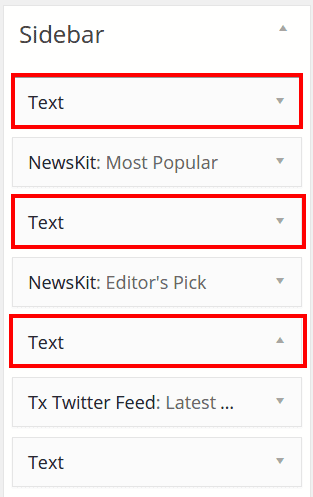
Sidebar Setting
The sidebar areas are used to display the widgets in the secondary column. Check the following screenshot how sidebar awesome alone.
To get the image sidebar like our demo site, please add the following widget with content and setting, I am going to describe you.
Sidebar– Ads Banner (Position 1,3,5)
Step 01
Go to Dashboard >> Media >> Add New
Back-end Settings
- Upload Image or select existing One
- Copy the link of the image
Step 02
Head over WordPress Administration >> Appearance >> Widgets Click and drag Text Widget to Sidebar.
After that use the HTML code below , paste them into Text widget to display the image and the recommend size for the image on the ads banner is 370 x 370
<a href="#"><img src="/Your_Image_source_goes_here" /></a>Backend Settings
Frontend View

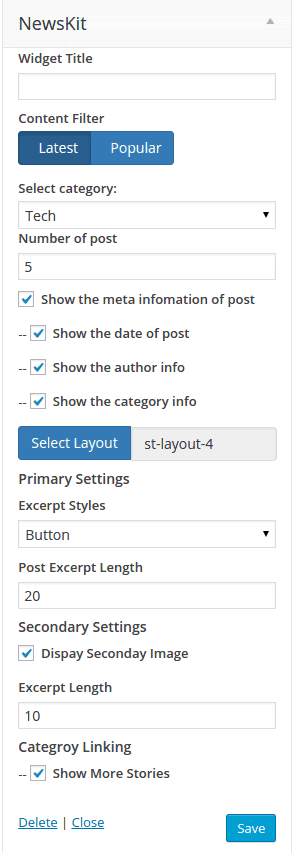
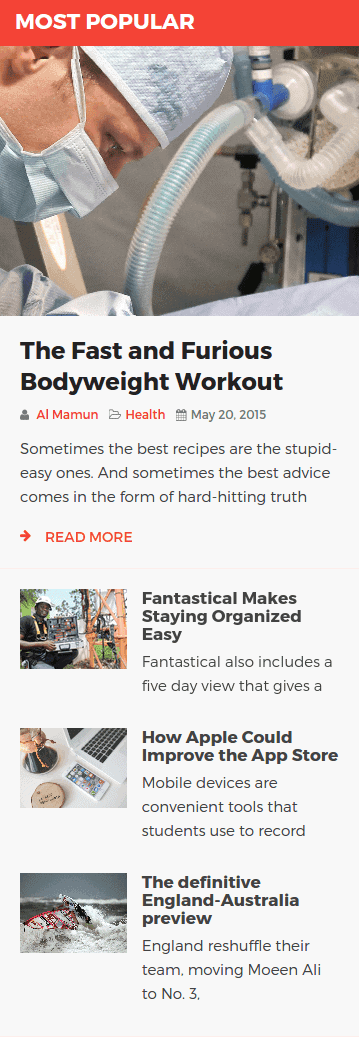
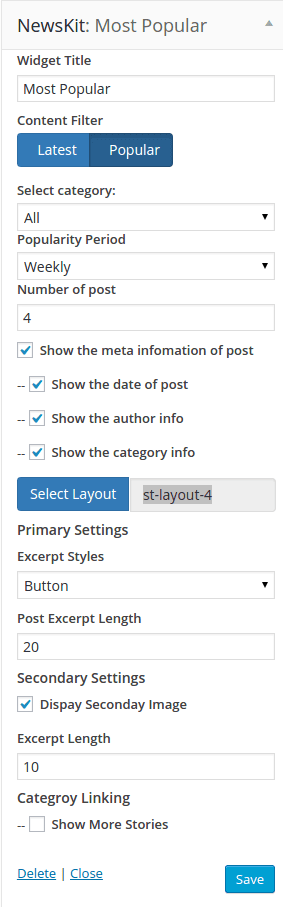
Sidebar – Newskit: Most Popular ( Static Layout 4 - Position 2, 3 )
Navigate to Dashboard >> Appearance >> Widgets >> Sidebar drag & drop Newskit into Sidebar.
Backend Settings
Frontend View
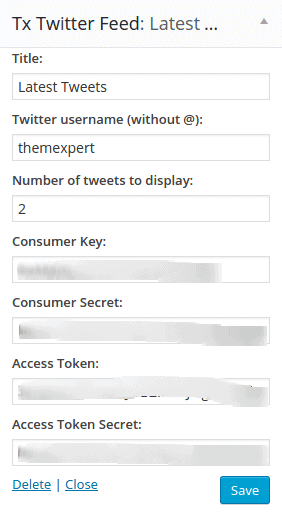
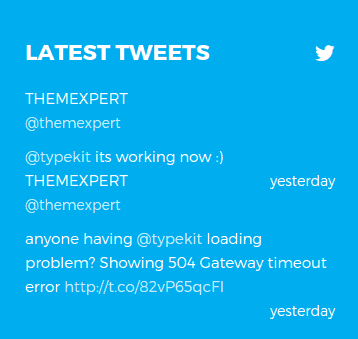
Sidebar – Latest Tweets: Latest Tweets ( Position 6 )
Navigate to Dashboard >> Appearance >> Widgets >> Sidebar drag & drop Tx Twitter Feed Widget into Sidebar. Make sure to input your Twitter Consumer key, Consumer Secret, Access Token, Access Token Secret in the blurred field. If you are thinking where to find those keys, just visit this link, Create your Twitter application, finally have your app codes.
Frontend View
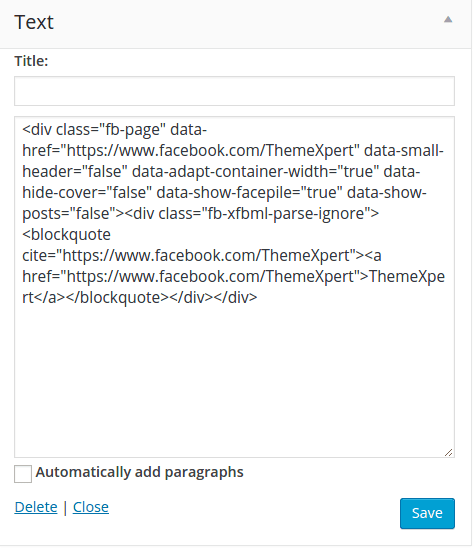
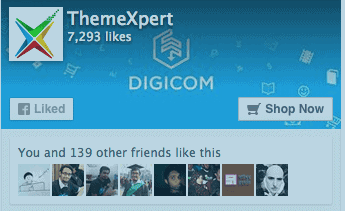
Sidebar – Text ( Position 7 )
Navigate to Dashboard >> Appearance >> Widgets >> Sidebar, drag & drop Text into Sidebar. This widget enable you a widget, that fetch your like page widget. To have your facebook page in your website, visit this link. Entry your essential parameters and generate your API code clicking on Get Code button. And paste in following text widget.
Frontend View
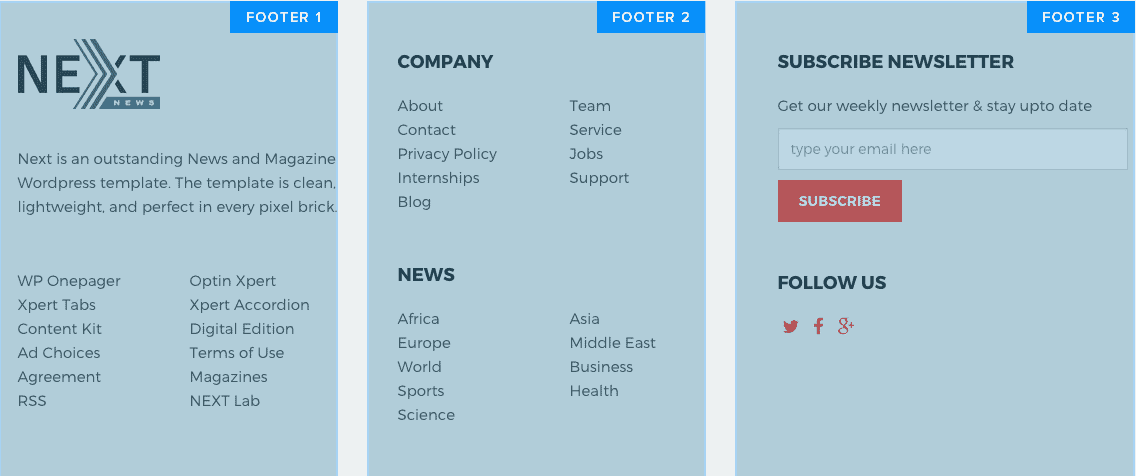
Footer Settings
Here is the total appearance of total footer
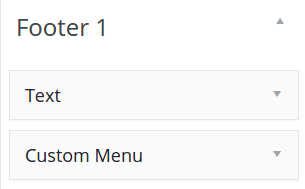
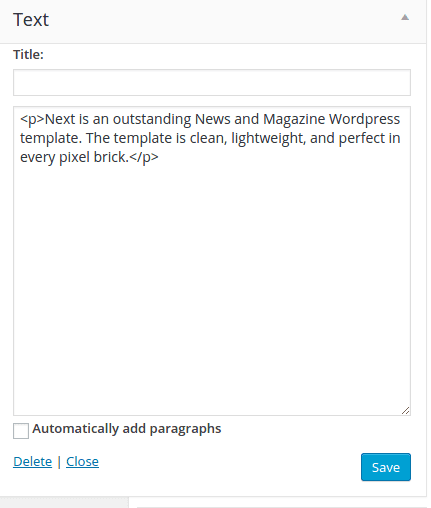
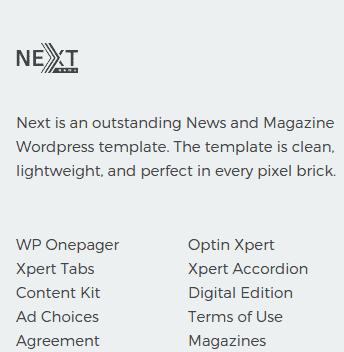
Footer 1
Head to Administrator >> Appearance >> Widgets >> Footer 1 Find Text and Custom Menu Widget from the list of the Widgets, click and drag it to Footer 1.
Backend View of Text Widget
Backend View of Custom Menu

Frontend View
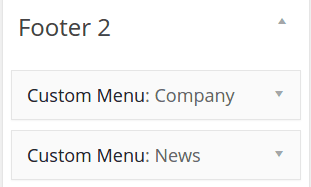
Footer 2
Head to Administrator >> Appearance >> Widgets >> Footer 2. Find Custom Menu Widget from the list of the Widgets, click and drag two sets of Custom Menu to Footer 2
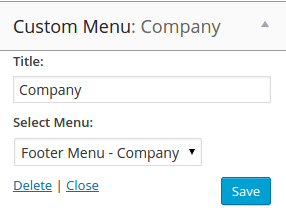
Backend View of Custom Menu:Company
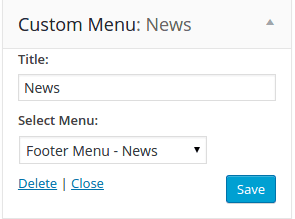
Backend View of Custom Menu: News
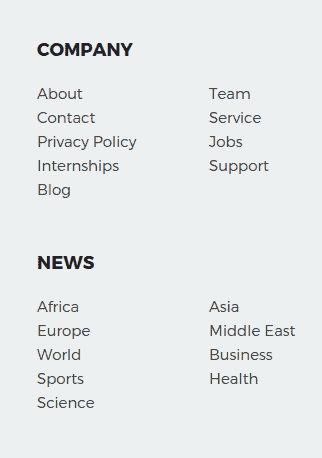
Frontend View
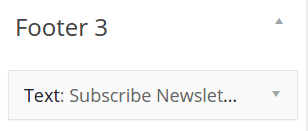
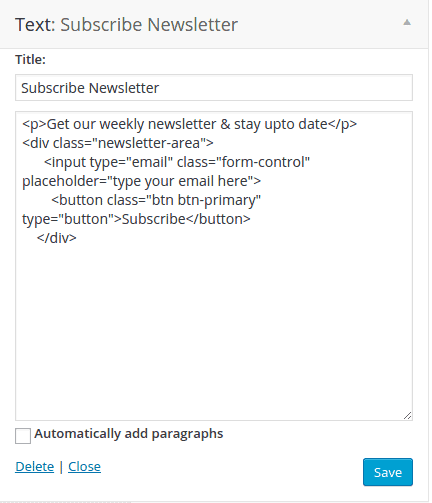
Footer 3
Head to Administrator >> Appearance >> Widgets >> Footer 3 Find Text Widget from the list of the Widgets, click and drag Text Widget to Footer 3
Backend View of Text: Subscribe Newsletter
Frontend View

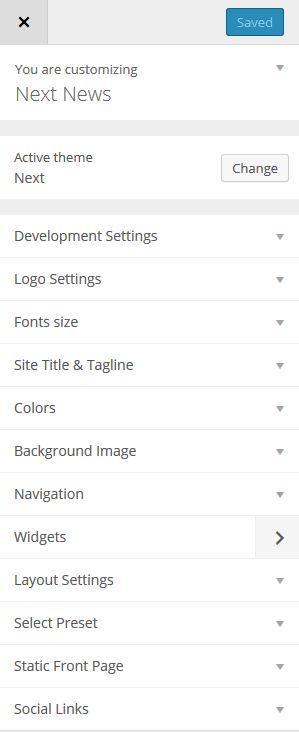
Customizer Settings
There are several customizing options in theme customizer like Logo settings, Presets, Social Links etc, to get those settings go to Administrator >> Appearance >> Customize

Grow rapidly with our Joomla SEO service done by the veterans
With over 12 years of business and a vast array of Joomla templates and extensions, we know Joomla SEO better than anyone you could possiblly hire.
Improve my ranking