DigiCom PAP
Download
Visit our website, go to DigiCom’s Addons Page, head over to your desired addon and use the download button to download your preferred one.
Installation
Installing pkg_digicom_pap.zip plugin is pretty simple. To do so,
- Go to
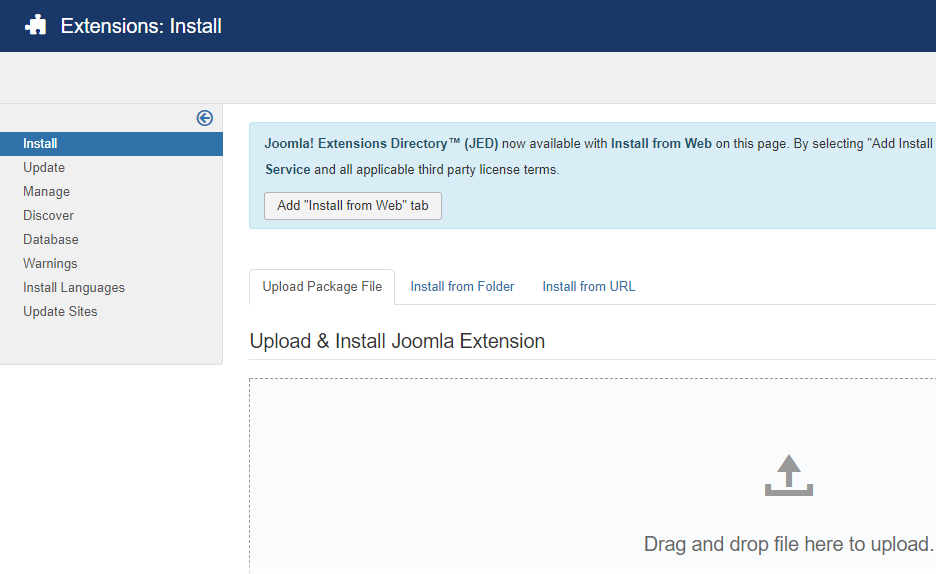
Extension> Manage> Installand under Install from Folder tab, select your downloaded pkg_digicom_pap.zip file and click Check and Install button. It will show you a successful installation message as soon as it installed successfully. Else, you can drop your downloaded file under the Upload Package File tab, and it will automatically upload your addon.
Configuration
To enable it you need to-
- Go to
Extensions> Plugins
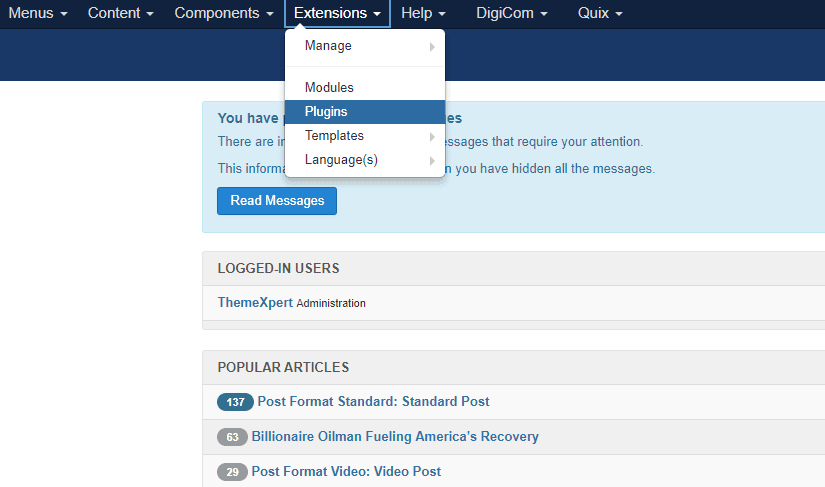
- Find the plugin from the list. You can use the search box to find it quickly. Just write
papon the Ajax search box, and you’ll find it on the top of the module. After you find it, enable it just by clicking on the pointed area shown in the screenshot below.
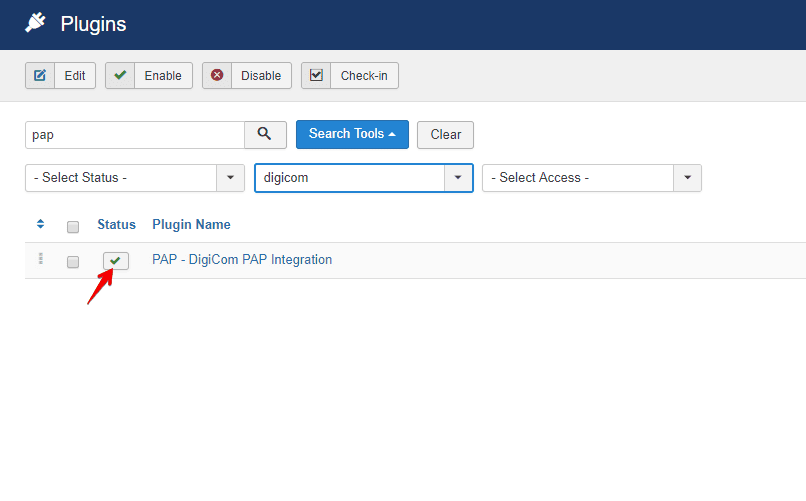
-
Click on the plugin name, and you’ll find another configuration module to define the integration levels of PAP (Post Affiliate Pro)
- Put your PAP full URL on the corresponding text box.
- Put your PAP account ID (optional). By default the value would be deafult1.
No need to change the URL parameter name for affiliate ID.
- Put the PAP script that you get from the PAP settings.
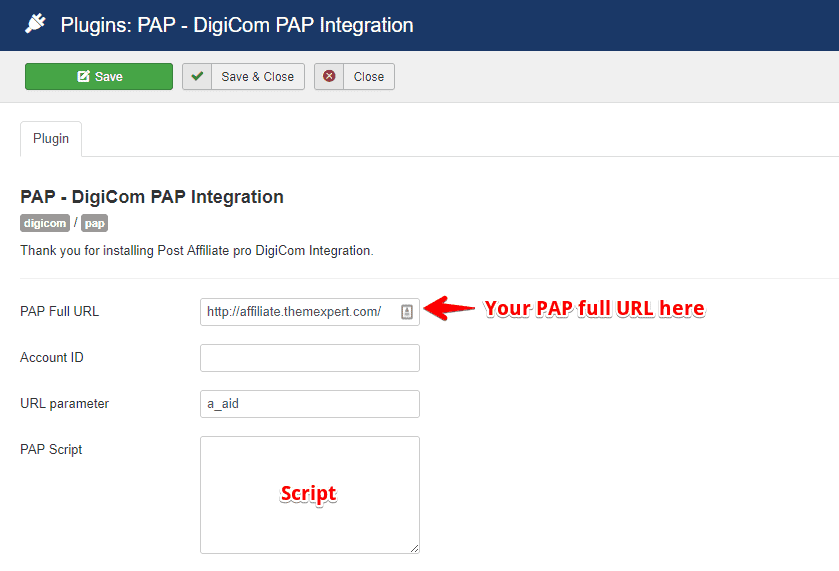
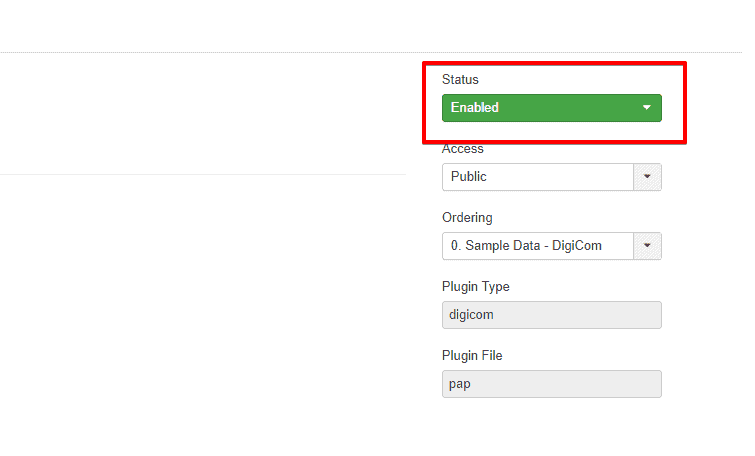
- Make sure that the Status is enabled.
