Xpert Event

Download
Head over to our download page. Click on the JOOMLA EXTENSIONS tab then click Explore Files button next to EXPERT EVENT. You will then find appearing a download button and by clicking on it, the download process will instantly begin.
Installation
To install Xpert_Event extension, simply follow the instruction below.
- Go to
Extensions> Manage> Install. - From
Upload Package FIletab, click on Choose File button and select the downloaded pkg_xpertevent.zip file from your local hard drive and then- - Click on Upload & Install.
It takes a few seconds to successfully install the extension to use. After the installation been successfully done, you can find a new extension named ExpertEvent under the Components tab from where you can configure, customize as well as manage your event related tasks without any hassle.
Dashboard
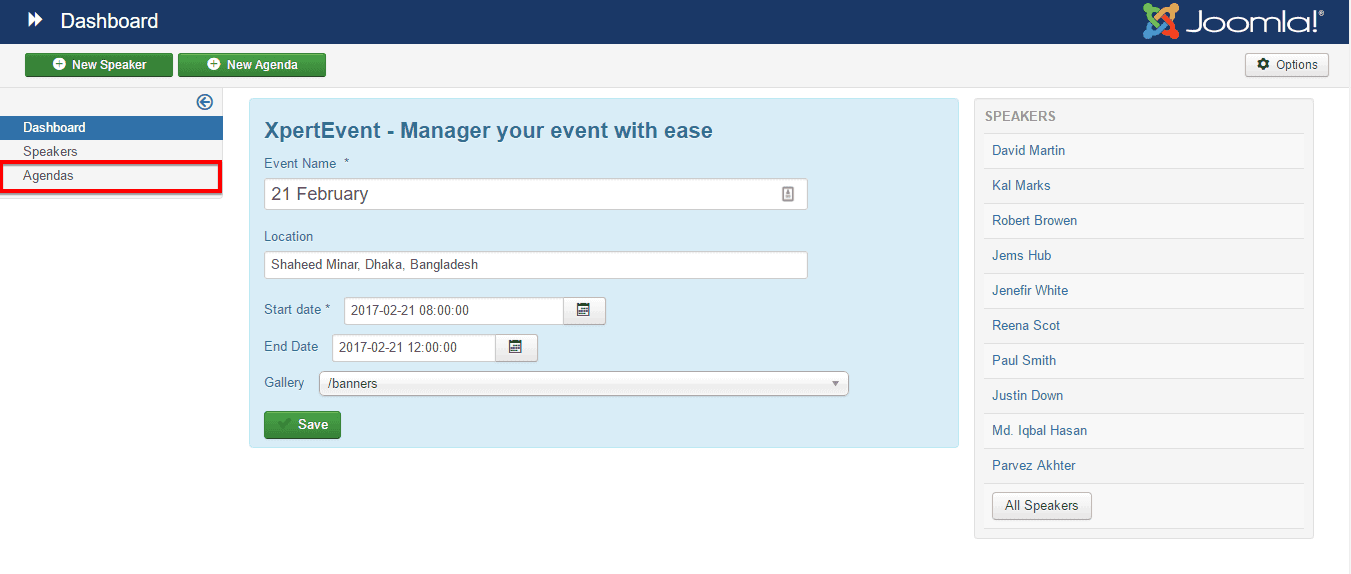
In Expert Event dashboard, there are three boxes of information you’ll notice.
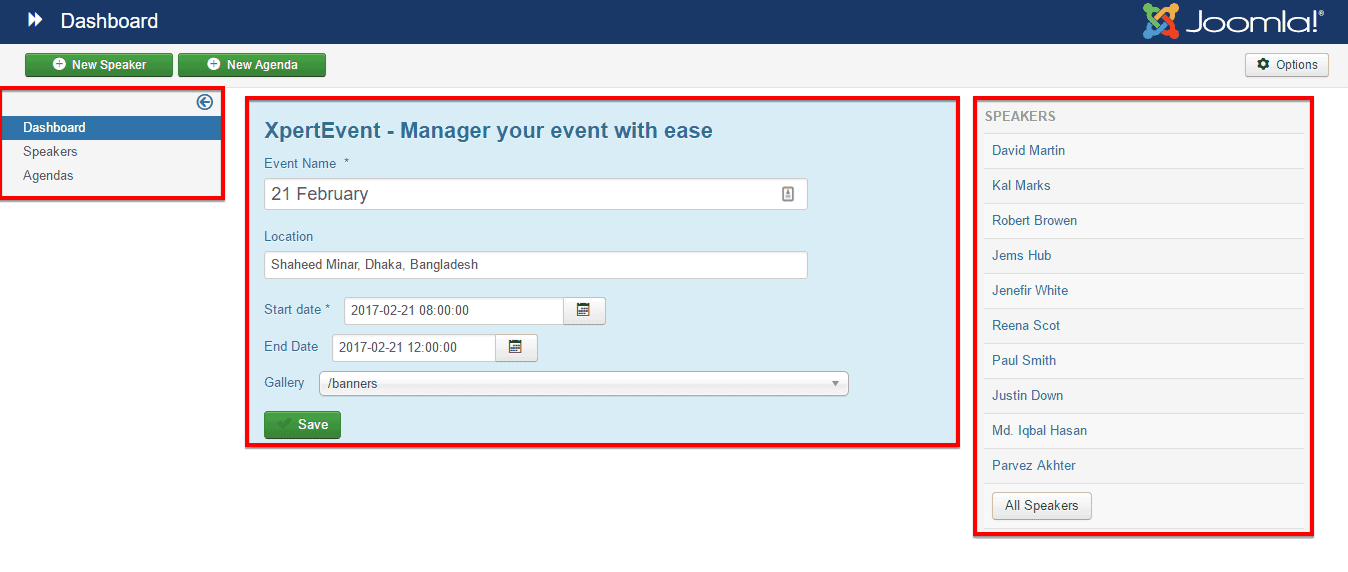
- At the left of the dashboard, there are two buttons Speakers, Agendas under dashboard tab to add new speakers and agendas as well.
- At the middle of the dashboard, there is the information about the last event you added or managed so far.
- At the right of the dashboard, there are the existing speakers name including a button at the bottom to see all speakers at a time.
How To’s
Add a Speaker
Adding a speaker is very easy with a few straightforward steps listed below.
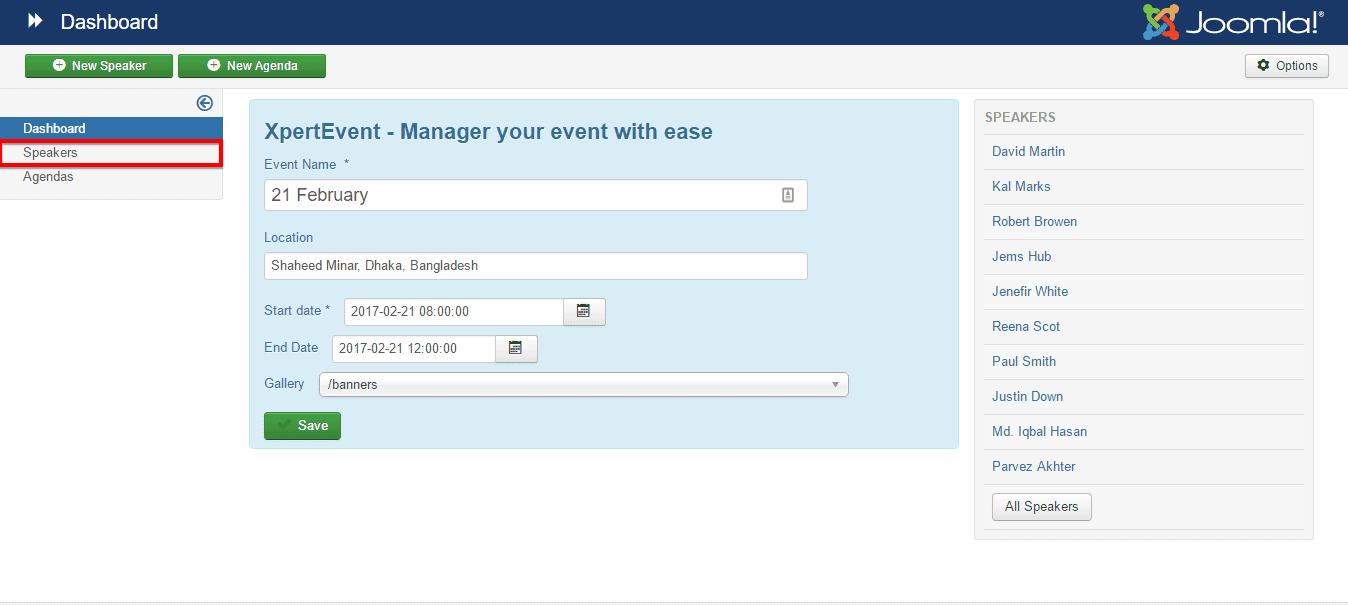
- Click on the Speakers button under the dashboard tab then click on green New button from the left-top of the module.
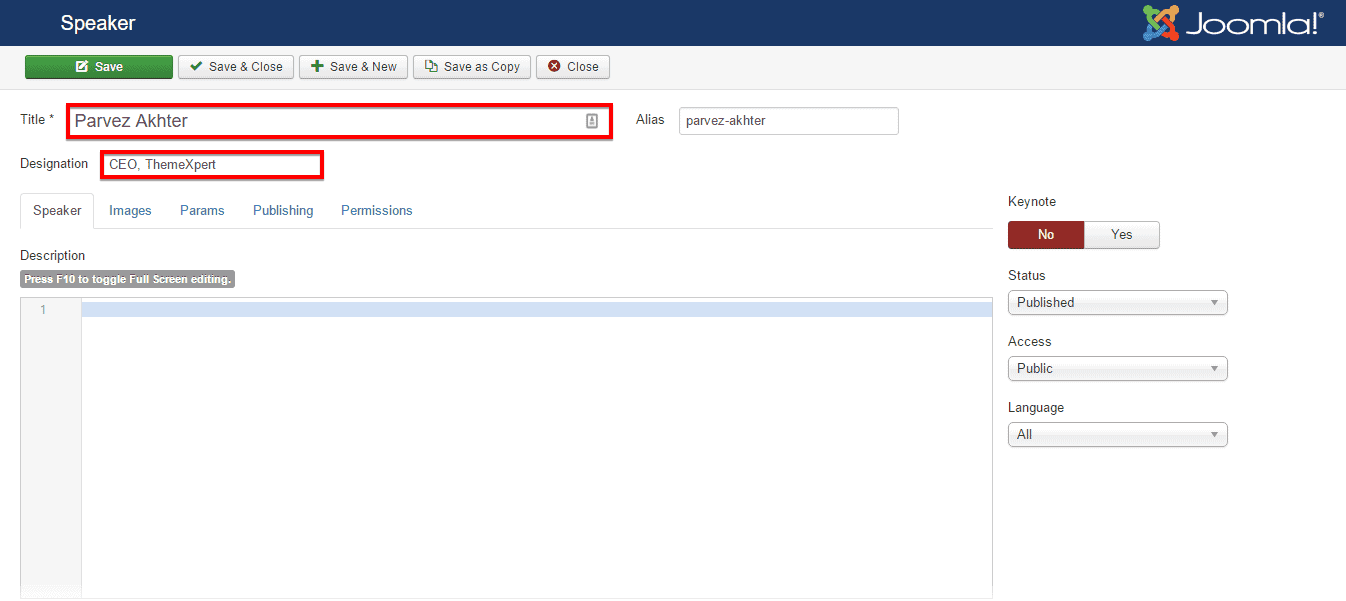
- Write the name of the speaker on the Title text box.
- Write his designation on the Designation text box.
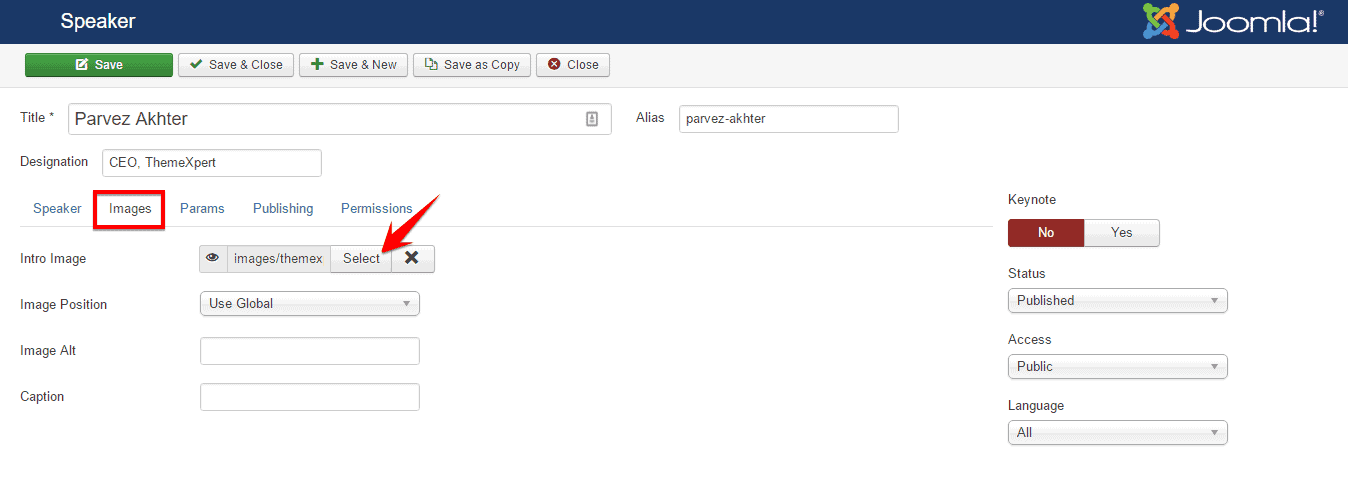
- On the Image tab, you can upload speaker’s intro image with option pointed on the screenshot below.
- On Params tab, you can add speaker’s multiple social profile with the green + button. Let’s see how! Give a social site name on the Title box, provide his profile link for the particular social site on the Links box and on Icons box, give a font-awesome icon name.

- Now, click on Save & Close button to save the settings and your are done adding a new speaker. You can find newly added speaker on the dashboard.
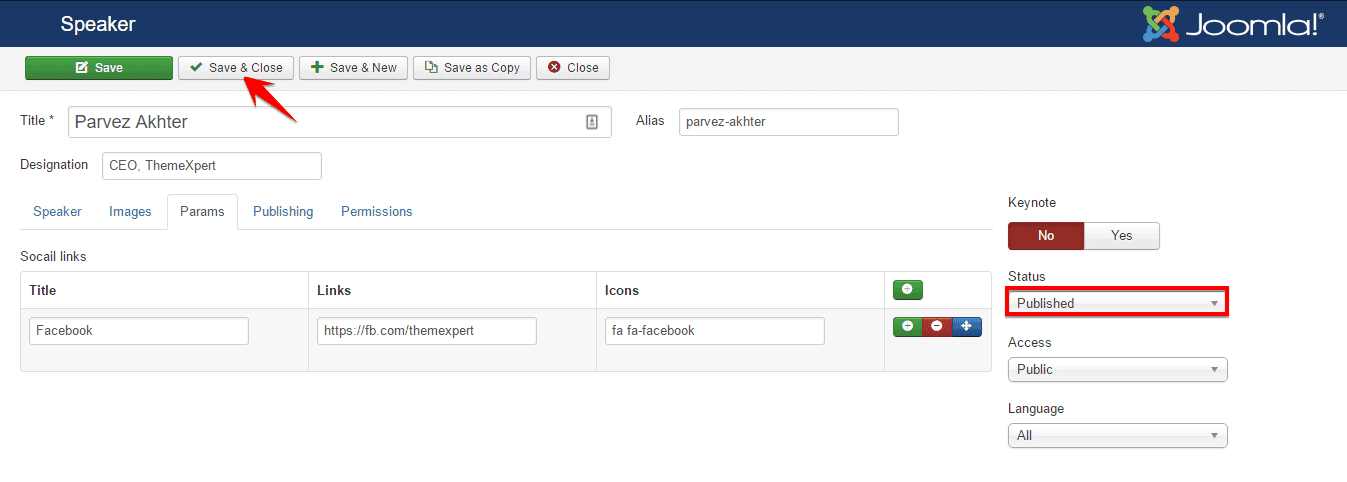
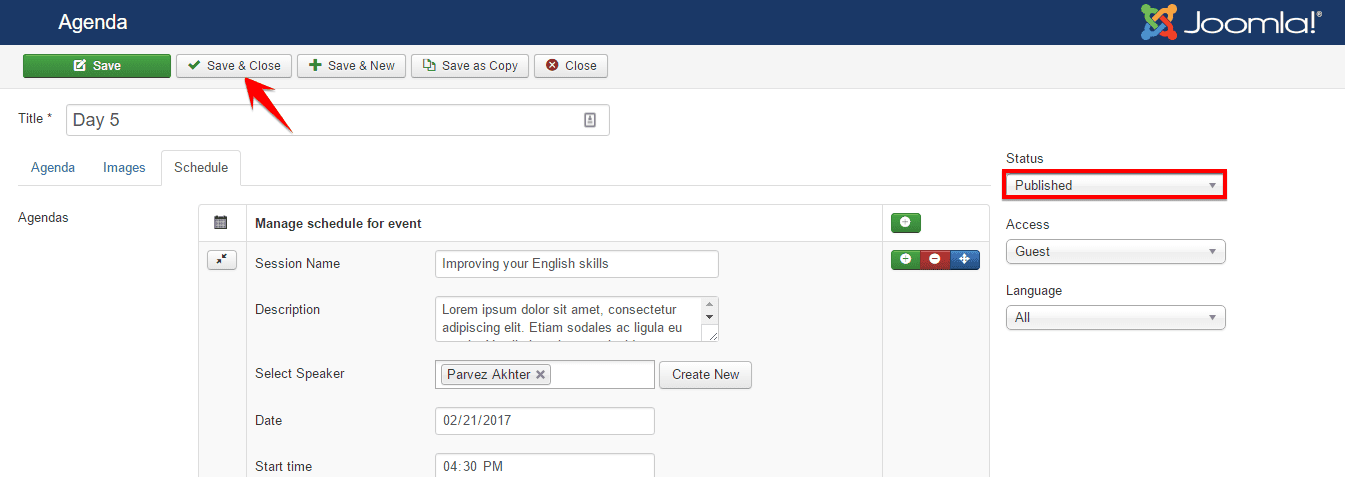
Make sure that Published is selected on the Status drop-down menu.
Add an Agenda
Adding an Agenda is quite simple as well with a few straightforward steps listed below.
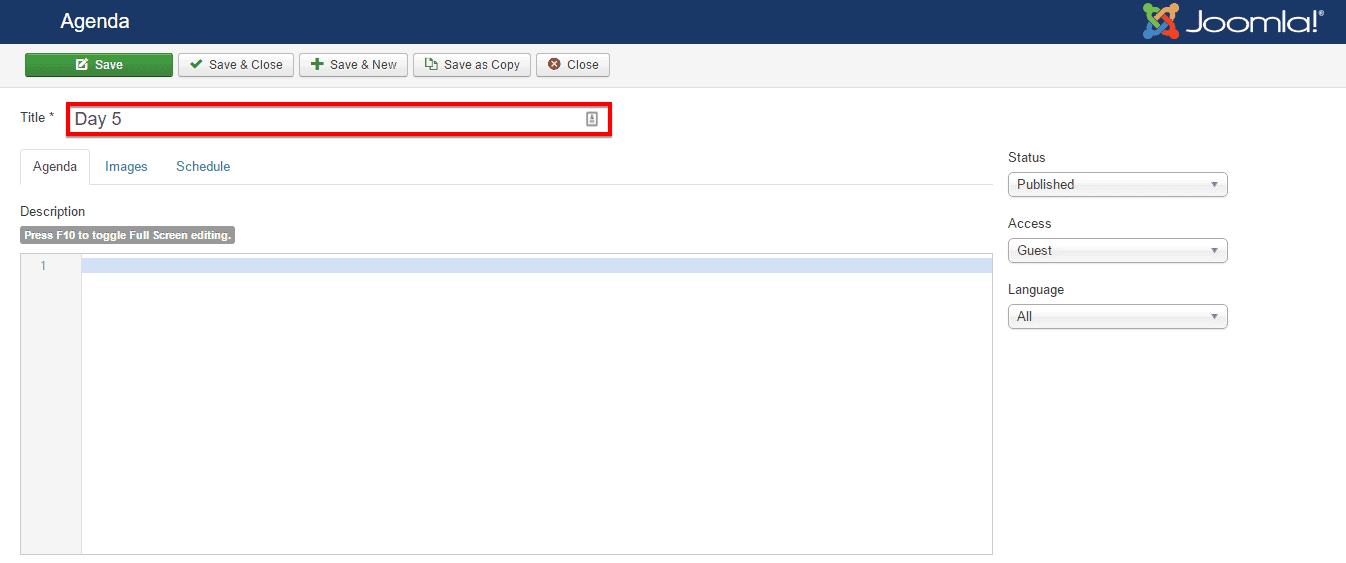
- Click on the Agendas button under the dashboard tab then click on green New button from the left-top of the module.
- Give the agenda title on the Title text box.
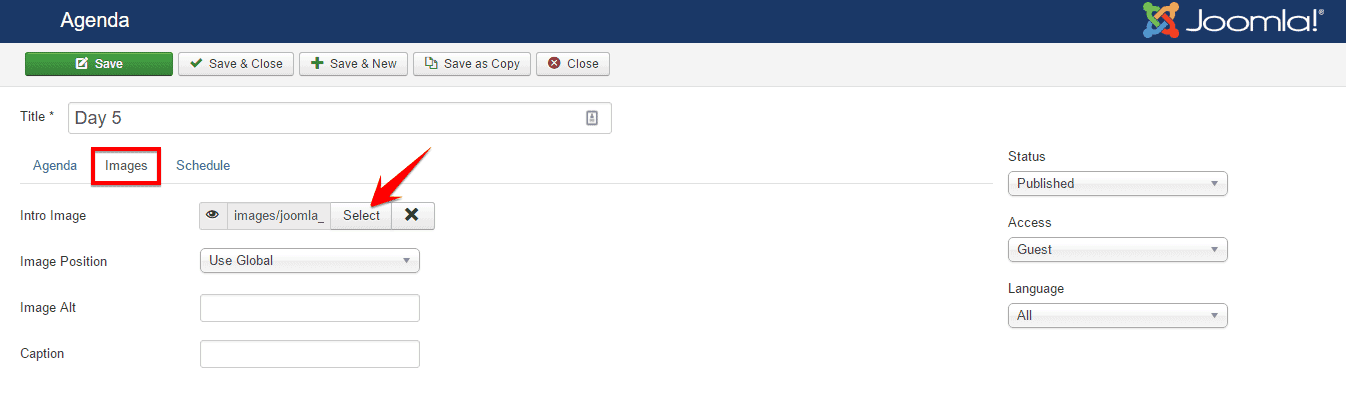
- Under the Image tab, there is an option to add intro image for the agenda.
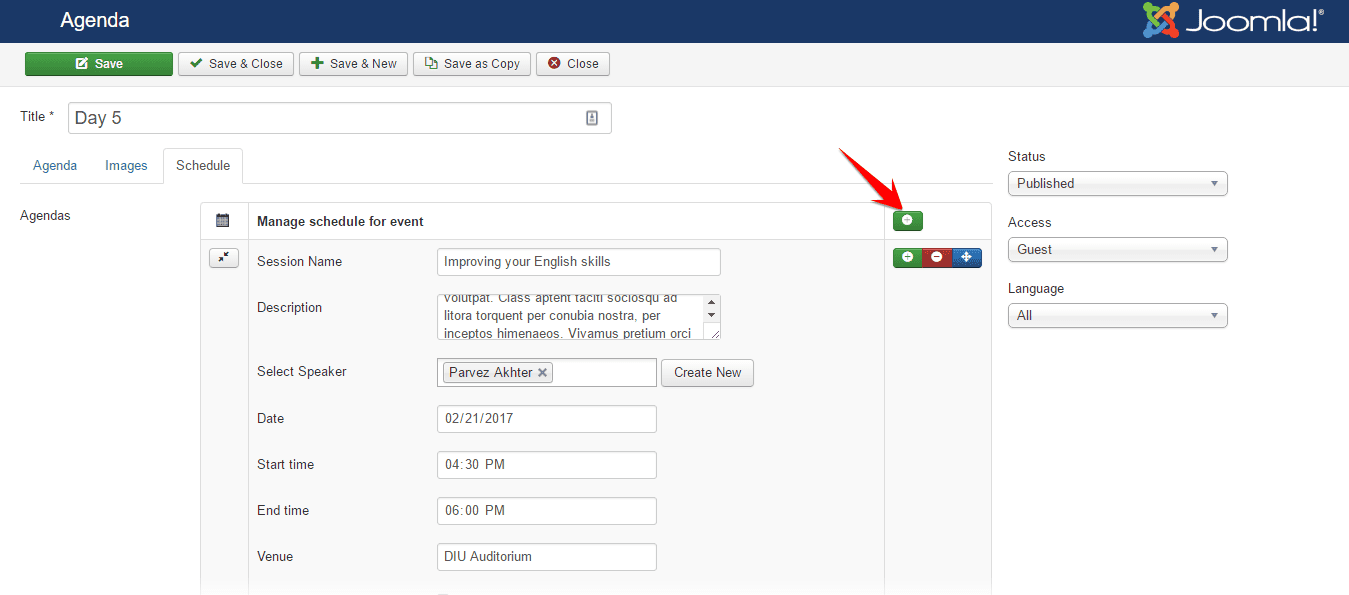
- Under Schedule tab, provide detail information about the agenda like Session name, Description, Select Speaker, Date, Start Time, End Time and Venue.
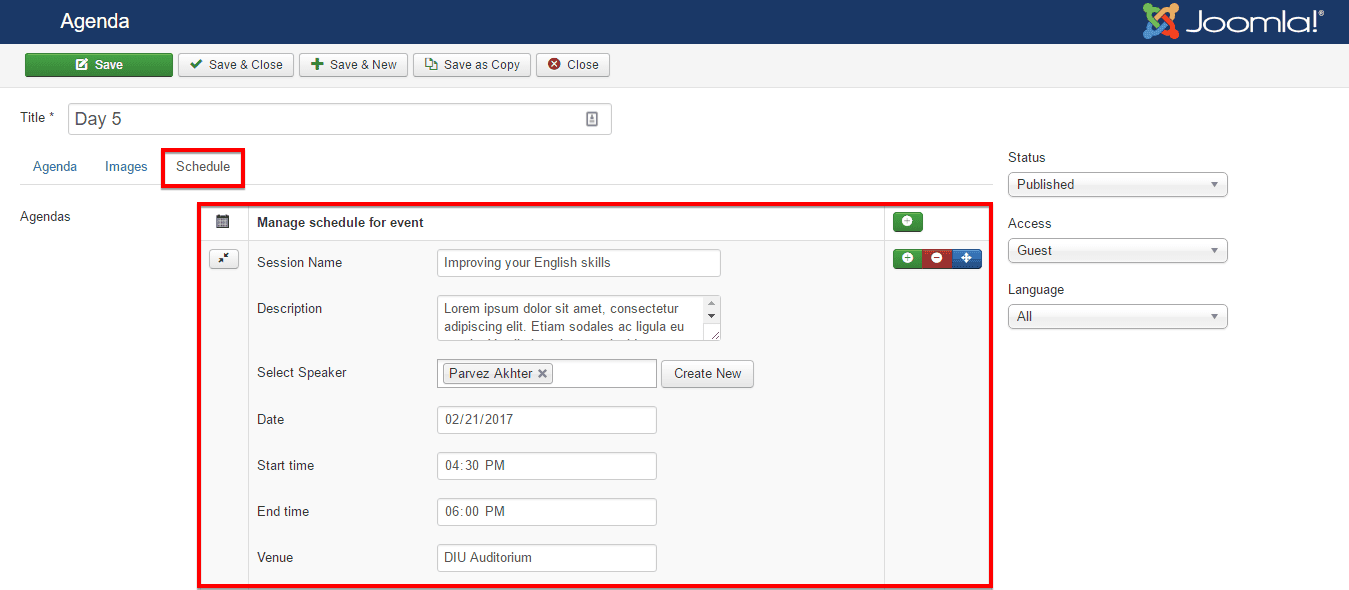
You can add multiple sessions in one agenda. You just need to add a new schedule and to do so, - Click on the green + button on the right-top side under the Schedule tab.
- Now, click on Save & Close button to save the settings and your are done adding a new agenda.
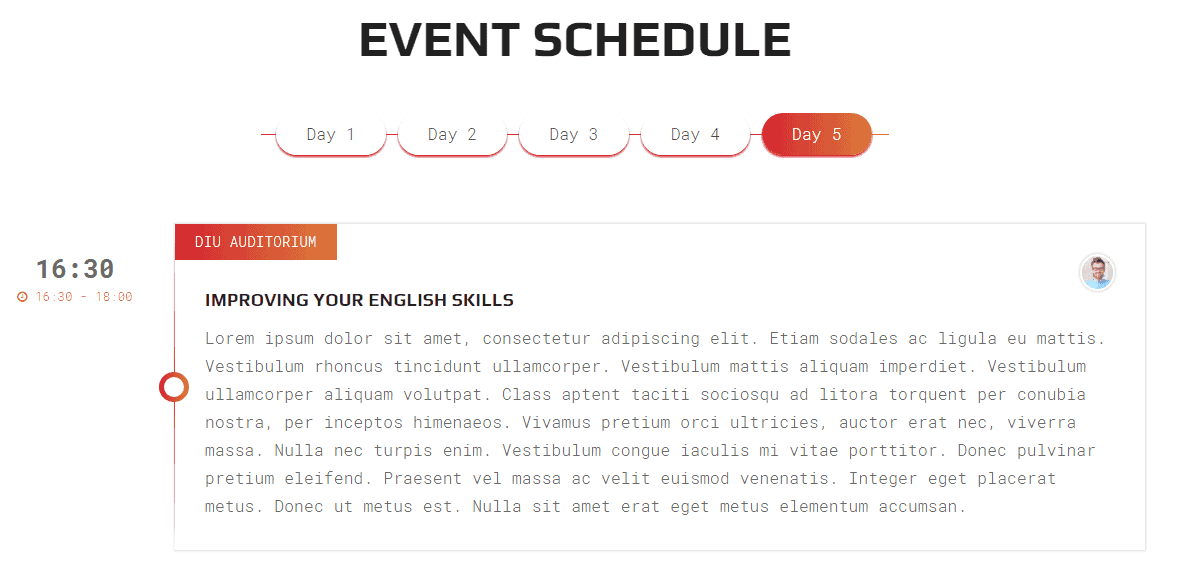
Finally, the front-end appearance should be look like below if you did everything according to the instructions.

Grow rapidly with our Joomla SEO service done by the veterans
With over 12 years of business and a vast array of Joomla templates and extensions, we know Joomla SEO better than anyone you could possiblly hire.
Improve my ranking