Access Control
Download
Visit our website, go to DigiCom’s Addons Page, head over to your desired addon and use the download button to download your preferred one.
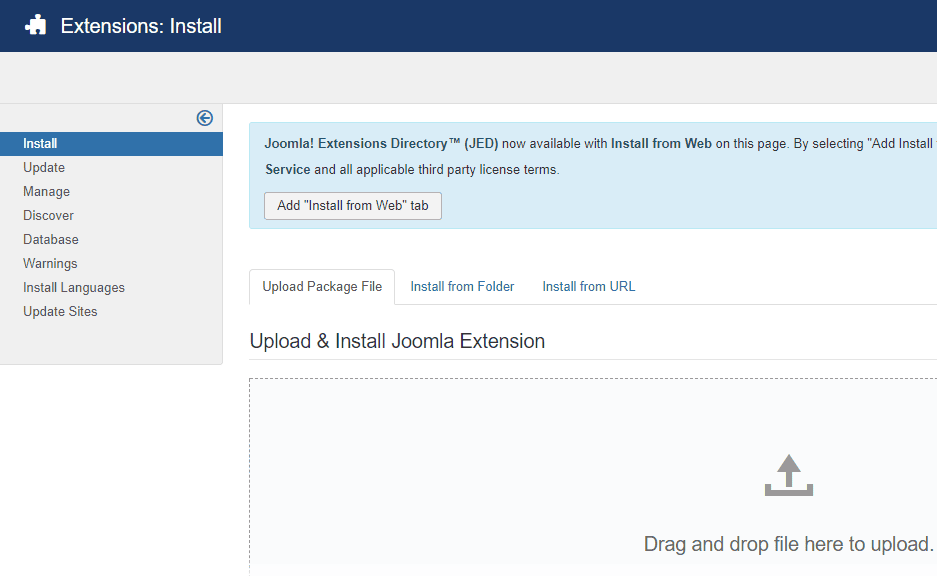
Installation
Installing pkg_digicom_accesscontrol.zip plugin is pretty simple. To do so,
- Go to
Extension> Manage> Installand under Install from Folder tab, select your downloaded pkg_digicom_accesscontrol.zip file and click Check and Install button. It will show you a successful installation message as soon as it installed successfully. Else, you can drop your downloaded file under the Upload Package File tab, and it will automatically upload your addon.
Configuration
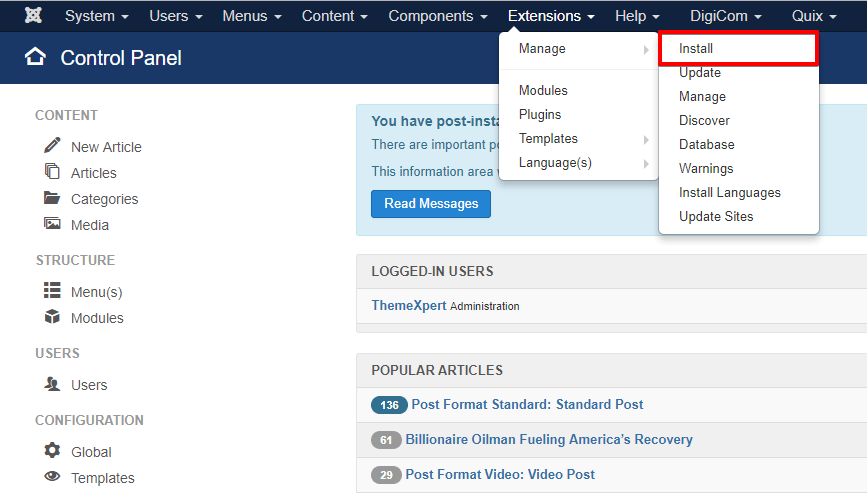
To enable it you need to-
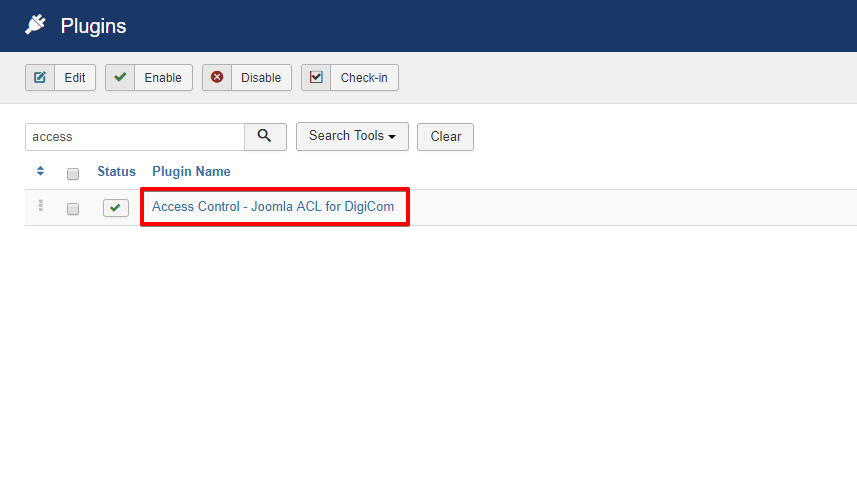
- Go to
Extensions> Plugins
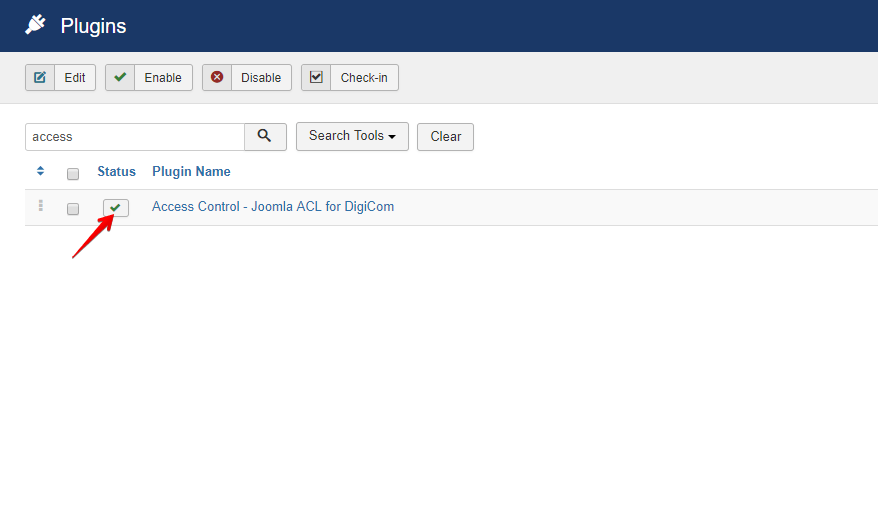
- Find the plugin from the list. You can use the search box to find it quickly. Just write
accesson the Ajax search box, and you’ll find it on the top of the module. After you find it, enable it just by clicking on the pointed area shown in the screenshot below.
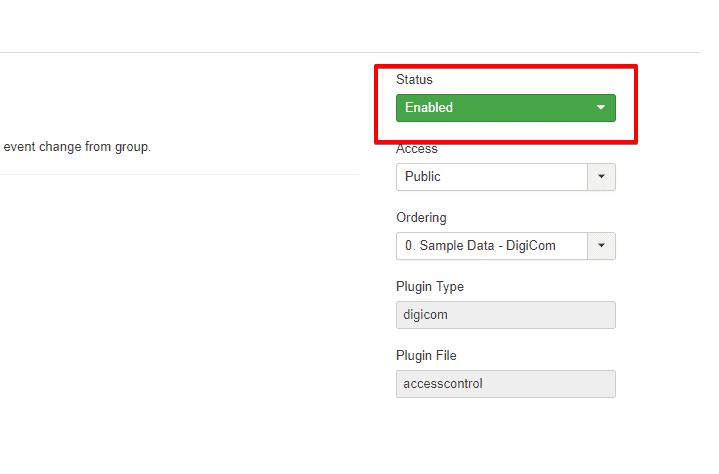
- Now, Click on it and make sure that Enabled is selected on the Status menu drop-down.
How To’s
Giving Access to Customers
First you need to make a User Group or you can use any of the existing one. Here, I’m showing you how to create a User Group.
- Go to User> Groups> Add New Group
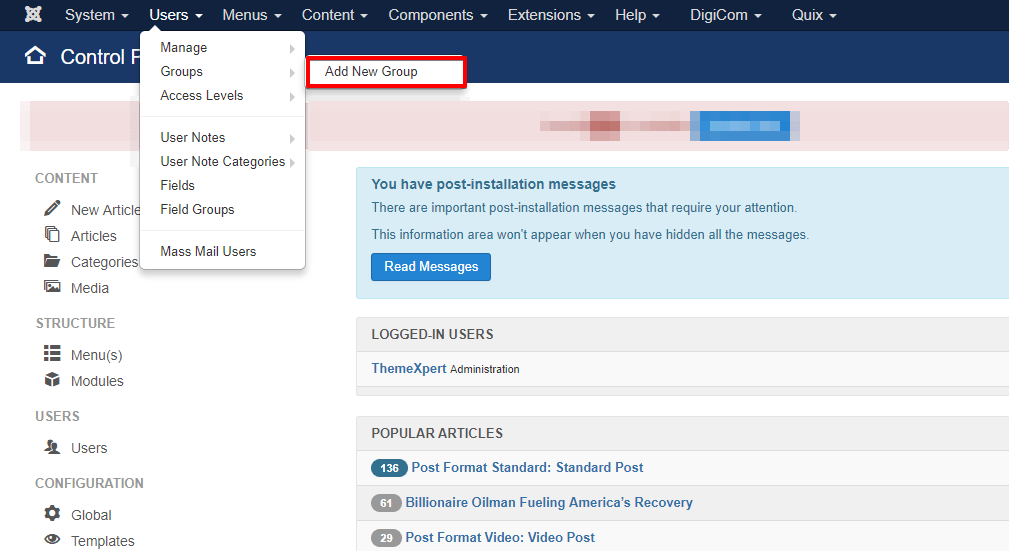
- Click on the new button from the top-left corner
- Give a Group Title and choose the group parent from the drop-down as pointed on the screenshot.

- Now, go to
Extensions> Pluginsand click on the ACL plugin.
- Choose the Customer Group where you want to put the customers in.
- Save it using the Save button at left-top.
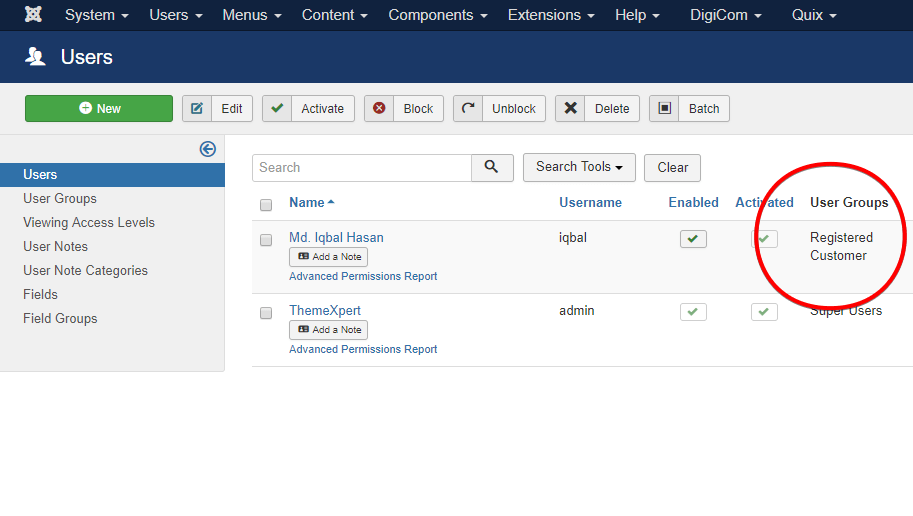
Now, if a customer at least buy one product using the particular payment method, he would be added to the Group that you have just set.
Front-end appearance:
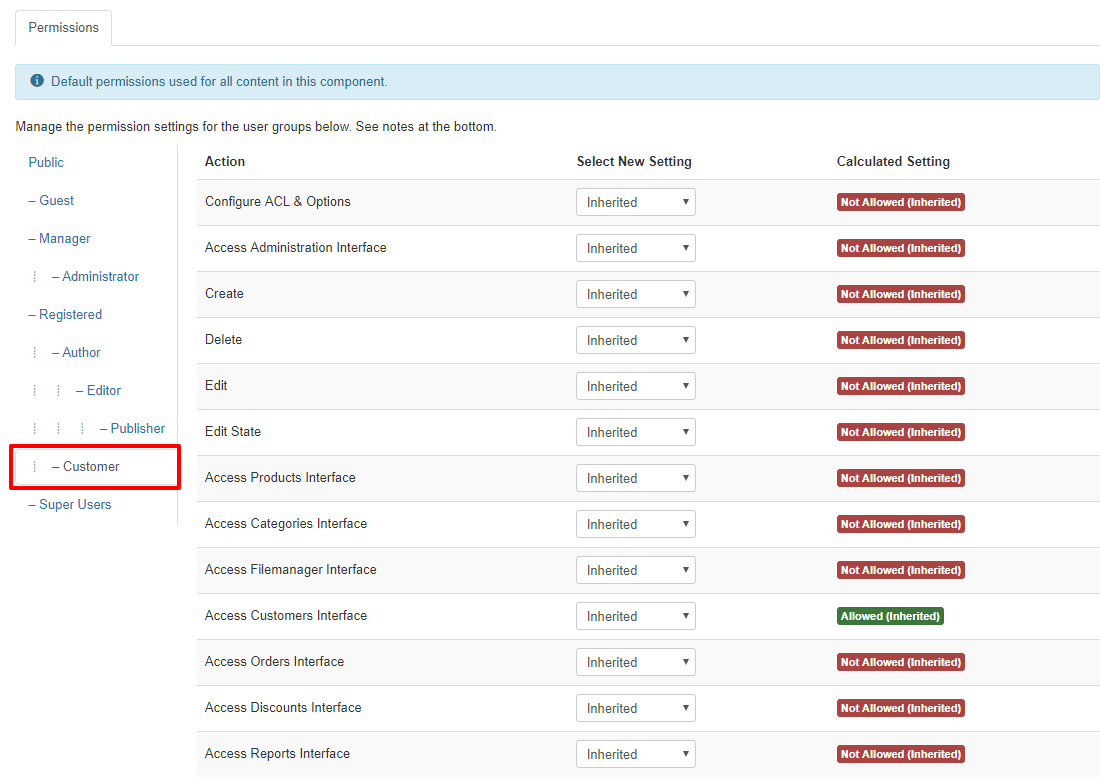
Modifying access for a User Group
You can easily modify the access for a User Group according to your wish.
- Go to DigiCom Dashboard and click on Options appearing on the right-top.
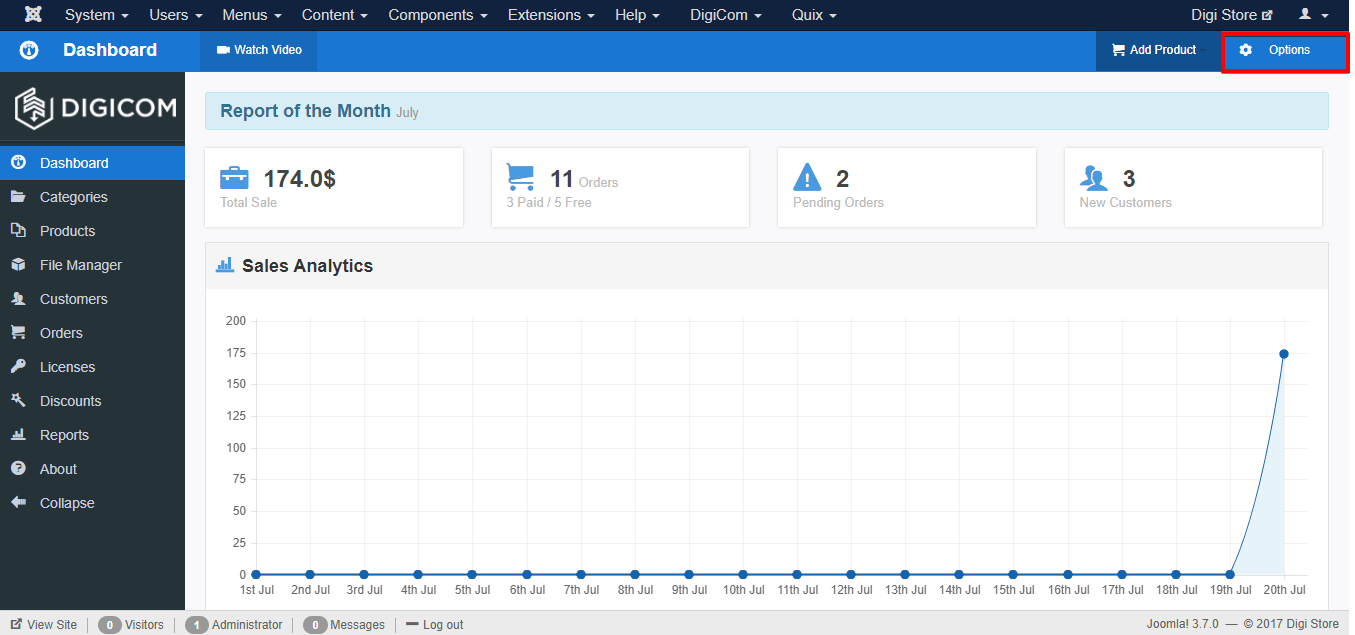
- Click on ACL
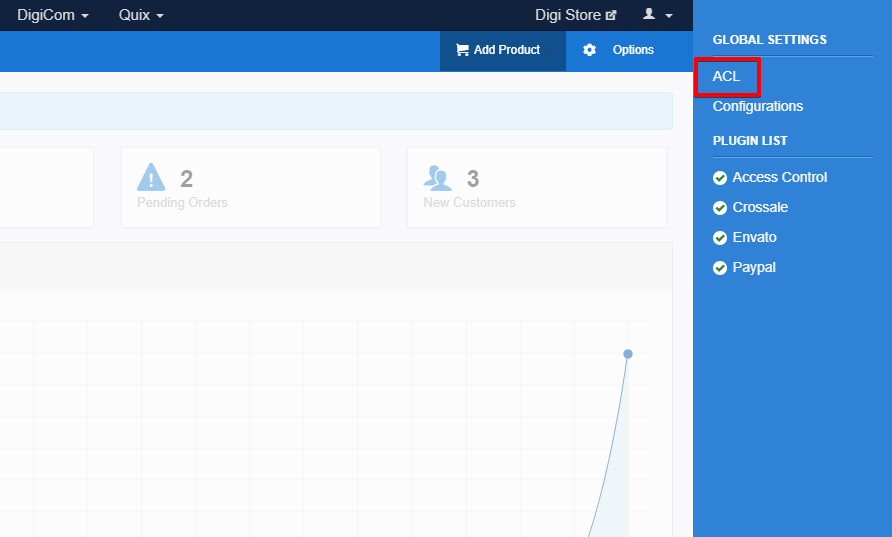
- Choose your custom User Group from the left bar and modify the access from the right section area.

Grow rapidly with our Joomla SEO service done by the veterans
With over 12 years of business and a vast array of Joomla templates and extensions, we know Joomla SEO better than anyone you could possiblly hire.
Improve my ranking